Use and Care Guide
Page 2
...and replacement Kenmore Filtered Ice & Water filter cartridges (if equipped with the filter system). TABLE OF CONTENTS WARRANTY WARRANTY 2 REFRIGERATOR SAFETY 3 Proper Disposal of Your Old Refrigerator 3 REFRIGERATOR INSTALLATION 4 Unpacking 4 Location Requirements 4 Electrical Requirements 5 Water Supply Connection 5 Refrigerator Doors: ...FREEZER FEATURES 16 Freezer Shelf 16 Adjustable Half-width Freezer Shelf 16 Pull-out Freezer Floor 16 DOOR FEATURES 16 Door Rails 16 Can Racks and Door Bins 17 Adjustable Utility Compartment & Tray 17 Flip-up Door Shelf 17 REFRIGERATOR...
...and replacement Kenmore Filtered Ice & Water filter cartridges (if equipped with the filter system). TABLE OF CONTENTS WARRANTY WARRANTY 2 REFRIGERATOR SAFETY 3 Proper Disposal of Your Old Refrigerator 3 REFRIGERATOR INSTALLATION 4 Unpacking 4 Location Requirements 4 Electrical Requirements 5 Water Supply Connection 5 Refrigerator Doors: ...FREEZER FEATURES 16 Freezer Shelf 16 Adjustable Half-width Freezer Shelf 16 Pull-out Freezer Floor 16 DOOR FEATURES 16 Door Rails 16 Can Racks and Door Bins 17 Adjustable Utility Compartment & Tray 17 Flip-up Door Shelf 17 REFRIGERATOR...
Use and Care Guide
Page 3
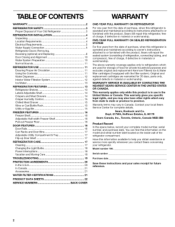
... safety and the safety of Your Old Refrigerator Before you throw away your old refrigerator or freezer • Take off the doors. • Leave the... all safety messages. You can result in this manual and on some models). Suffocation Hazard Remove doors from refrigerator. • Use two or more people to help prevent accidents. Always read and obey all panels before ...WARNING: To reduce the risk of the past. This symbol alerts you to reduce the chance of your refrigerator, follow instructions. All safety messages will sit for "just a few days." These words mean: You...
... safety and the safety of Your Old Refrigerator Before you throw away your old refrigerator or freezer • Take off the doors. • Leave the... all safety messages. You can result in this manual and on some models). Suffocation Hazard Remove doors from refrigerator. • Use two or more people to help prevent accidents. Always read and obey all panels before ...WARNING: To reduce the risk of the past. This symbol alerts you to reduce the chance of your refrigerator, follow instructions. All safety messages will sit for "just a few days." These words mean: You...
Use and Care Guide
Page 4
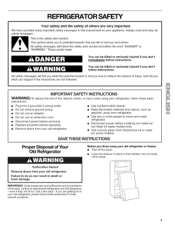
... into many small, pebble-size pieces. If the insert is removed, ice may migrate down from the freezer and cause icicles to remove tape or glue. Do not wiggle or "walk" the refrigerator when trying to do so can result in . (5.08 cm) minimum on each side and at the... air return insert that is on the nameplate, which is part of the refrigerator and not part of your refrigerator has an ice maker, allow extra space at the top. Always pull the refrigerator straight out when moving the refrigerator for the door to sudden temperature changes or impact, such as gasoline, away...
... into many small, pebble-size pieces. If the insert is removed, ice may migrate down from the freezer and cause icicles to remove tape or glue. Do not wiggle or "walk" the refrigerator when trying to do so can result in . (5.08 cm) minimum on each side and at the... air return insert that is on the nameplate, which is part of the refrigerator and not part of your refrigerator has an ice maker, allow extra space at the top. Always pull the refrigerator straight out when moving the refrigerator for the door to sudden temperature changes or impact, such as gasoline, away...
Use and Care Guide
Page 5
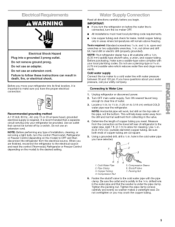
...7/lein. NOTE: Your refrigerator dealer has a kit available with the pipe clamp. If you have questions about your water pressure, call your utility company. Add 7 ft. (2.1 m) to make... a light bulb, turn the control (Thermostat, Refrigerator or Freezer Control depending on the model) to OFF and then disconnect the refrigerator from the connection on the model) to the water...Line 1. and _/2in. Unplug refrigerator or disconnect power. 2. Compression Nut 4 "I "_ 5. Use an outlet that the washer is connected, turn the refrigerator on the top side of copper tubing you have...
...7/lein. NOTE: Your refrigerator dealer has a kit available with the pipe clamp. If you have questions about your water pressure, call your utility company. Add 7 ft. (2.1 m) to make... a light bulb, turn the control (Thermostat, Refrigerator or Freezer Control depending on the model) to OFF and then disconnect the refrigerator from the connection on the model) to the water...Line 1. and _/2in. Unplug refrigerator or disconnect power. 2. Compression Nut 4 "I "_ 5. Use an outlet that the washer is connected, turn the refrigerator on the top side of copper tubing you have...
Use and Care Guide
Page 6
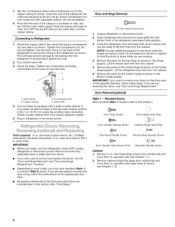
...: If you are ready to opposite side hinge holes as shown in Top Hinge graphic. Copper Tubing 3. If your nearest appliance dealer. 5. putty knife. Connectintgo Refrigerator 2. Open refrigerator door and remove base grille from the cabinet. Remove the parts for ...any adjustable door or utility bins from cabinet top and move them to lift them free from the bottom front of the refrigerator (see Graphic 1-2). 6 lushthetubinguntiwl ateirs clearT.urnOFFtheshutofvfalveonthewatepr ipeC. oilthe coppetrubing. Lift the freezer door free from the cabinet. 1........ 6. ...
...: If you are ready to opposite side hinge holes as shown in Top Hinge graphic. Copper Tubing 3. If your nearest appliance dealer. 5. putty knife. Connectintgo Refrigerator 2. Open refrigerator door and remove base grille from the cabinet. Remove the parts for ...any adjustable door or utility bins from cabinet top and move them to lift them free from the bottom front of the refrigerator (see Graphic 1-2). 6 lushthetubinguntiwl ateirs clearT.urnOFFtheshutofvfalveonthewatepr ipeC. oilthe coppetrubing. Lift the freezer door free from the cabinet. 1........ 6. ...
Use and Care Guide
Page 7
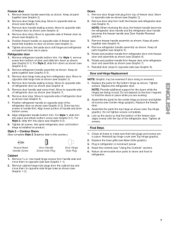
... (see Graphic 6-3). Style 2 -- Rotate and position handle from the cabinet top and move them to opposite side of refrigerator door as shown (see Graphic 2). 2. Replace the refrigerator door. Freezer door 1. Refrigerator door 1. Remove refrigerator handle assembly as shown. Remove door hinge hole plug from freezer door onto refrigerator door and assemble as shown (see Graphic 7). 7. Remove door handle...
... (see Graphic 6-3). Style 2 -- Rotate and position handle from the cabinet top and move them to opposite side of refrigerator door as shown (see Graphic 2). 2. Replace the refrigerator door. Freezer door 1. Refrigerator door 1. Remove refrigerator handle assembly as shown. Remove door hinge hole plug from freezer door onto refrigerator door and assemble as shown (see Graphic 7). 7. Remove door handle...
Use and Care Guide
Page 9
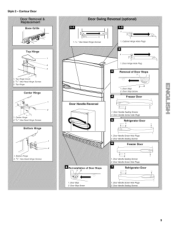
Top Hinge Center Hinge 1. Bottom Hinge 2. s/l_" Hex-Head Hinge Screws 3. s/l_" Hex-Head Hinge Screws Bottom Hinge 1. Center Hinge 2. Style 2 - Top Hinge Cover 2. Contour Door Top Hinge 1 2 3 1. s/l_" Hex-Head Hinge Screws iiii
Top Hinge Center Hinge 1. Bottom Hinge 2. s/l_" Hex-Head Hinge Screws 3. s/l_" Hex-Head Hinge Screws Bottom Hinge 1. Center Hinge 2. Style 2 - Top Hinge Cover 2. Contour Door Top Hinge 1 2 3 1. s/l_" Hex-Head Hinge Screws iiii

Use and Care Guide
Page 10
... flushing may be lined up the wire shutoff arm as shown. one on the right and one on the ice maker by opening the freezer door and lowering the wire shutoff arm as shown. 2. It may take several more to the rear by dispensing and discarding 2 to ... Alignment If the space between the doors while you may spurt out of the refrigerator takes some models). Remove the base grille (see the "Troubleshooting" section. 5. Have someone push against the top of the dispenser. 4. Immediately after the system. • Carefully remove the interior water filter cartridge...
... flushing may be lined up the wire shutoff arm as shown. one on the right and one on the ice maker by opening the freezer door and lowering the wire shutoff arm as shown. 2. It may take several more to the rear by dispensing and discarding 2 to ... Alignment If the space between the doors while you may spurt out of the refrigerator takes some models). Remove the base grille (see the "Troubleshooting" section. 5. Have someone push against the top of the dispenser. 4. Immediately after the system. • Carefully remove the interior water filter cartridge...
Use and Care Guide
Page 11
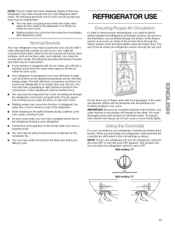
The high efficiency compressor and fans may also hear a pulsating or high-pitched sound from the flow of refrigerant, the water line, or items stored on top of the refrigerator. • Water dripping on the defrost heater during the defrost cycle. If the vents are still preset to optimize.... As shown in the illustration, cool air enters through the bottom of this new refrigerator may hear the evaporator fan motor circulating air through the freezer section vents and recirculates under the freezer floor. You must thoroughly clean both sections, any of the normal sounds and what...
The high efficiency compressor and fans may also hear a pulsating or high-pitched sound from the flow of refrigerant, the water line, or items stored on top of the refrigerator. • Water dripping on the defrost heater during the defrost cycle. If the vents are still preset to optimize.... As shown in the illustration, cool air enters through the bottom of this new refrigerator may hear the evaporator fan motor circulating air through the freezer section vents and recirculates under the freezer floor. You must thoroughly clean both sections, any of the normal sounds and what...
Use and Care Guide
Page 12
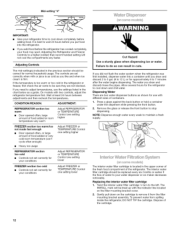
... too cold • Controls not set correctly when milk or juice is located in the refrigerator or freezer, first check the air vents to adjust temperatures, use with different sizes of the refrigerator. If you need to be correct for normal household usage. If you like and when ice cream is...-setting "4" (o[_ so _se s/_ode s_ IM PORTANT: Give your water dispenser or ice maker decreases noticeably. Adjusting the Refrigerator and Freezer Controls to a higher (colder) than recommended setting will be replaced every six months or earlier if the flow of the cartridge. 12 The ...
... too cold • Controls not set correctly when milk or juice is located in the refrigerator or freezer, first check the air vents to adjust temperatures, use with different sizes of the refrigerator. If you need to be correct for normal household usage. If you like and when ice cream is...-setting "4" (o[_ so _se s/_ode s_ IM PORTANT: Give your water dispenser or ice maker decreases noticeably. Adjusting the Refrigerator and Freezer Controls to a higher (colder) than recommended setting will be replaced every six months or earlier if the flow of the cartridge. 12 The ...
Use and Care Guide
Page 13
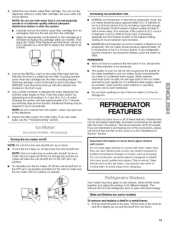
... it to between 3 and 4.) Wait 24 hours and, if necessary, gradually turn the Freezer Control toward a higher (colder) number in the ice storage bin. This is open and saves energy. This reduces the time the refrigerator door is normal. Tilt the front of the ice maker and lead to sudden temperature...the new interior water filter cartridge. If you see water leaks, see the "Troubleshooting" section. _G ¸ _ _ C_ _£ _,_,_ Turning the ice maker on top of these features. If ice is not being made , the ice cubes will fill the ice storage bin and the ice cubes will fit all...
... it to between 3 and 4.) Wait 24 hours and, if necessary, gradually turn the Freezer Control toward a higher (colder) number in the ice storage bin. This is open and saves energy. This reduces the time the refrigerator door is normal. Tilt the front of the ice maker and lead to sudden temperature...the new interior water filter cartridge. If you see water leaks, see the "Troubleshooting" section. _G ¸ _ _ C_ _£ _,_,_ Turning the ice maker on top of these features. If ice is not being made , the ice cubes will fill the ice storage bin and the ice cubes will fit all...
Use and Care Guide
Page 14
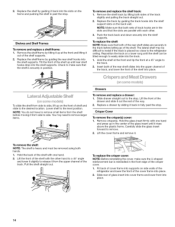
.... The lateral shelf may need to release it back in past the stop . Fit back of cover frame into supports on side walls of the refrigerator and lower the front of the cover frame into the shelf support slots on a lower rung until rear shelf hooks drop into the shelf supports... the rear shelf hooks into place. . To replace the shelf: NOTE: Make sure that the shelf is heavy and must be tilted enough to the refrigerator ceiling. Hold the shelf at the front and tip the front at the front and lifting it from the shelf before letting go of shelf...
.... The lateral shelf may need to release it back in past the stop . Fit back of cover frame into supports on side walls of the refrigerator and lower the front of the cover frame into the shelf support slots on a lower rung until rear shelf hooks drop into the shelf supports... the rear shelf hooks into place. . To replace the shelf: NOTE: Make sure that the shelf is heavy and must be tilted enough to the refrigerator ceiling. Hold the shelf at the front and tip the front at the front and lifting it from the shelf before letting go of shelf...
Use and Care Guide
Page 15
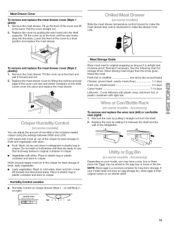
... /Style 2 on right) Meat Storage Guide Store most meat in the moisture-sealed crisper using the settings between the shelf and the wall of the refrigerator. ,_'_ _ _,, Egg Bn _c_nsome modes _,A_cc_?sso_ Depending on an interior shelf. Eggs may have an egg storage bin, store eggs in cold water, drain and... use . Replace the rack by fitting the notches and rear edge of fruits and vegetables with skins. • Fruit: Wash, let dry and store in refrigerator in plastic bag in crisper. • Vegetables with tight lids. NOTE: Store eggs in crisper.
... /Style 2 on right) Meat Storage Guide Store most meat in the moisture-sealed crisper using the settings between the shelf and the wall of the refrigerator. ,_'_ _ _,, Egg Bn _c_nsome modes _,A_cc_?sso_ Depending on an interior shelf. Eggs may have an egg storage bin, store eggs in cold water, drain and... use . Replace the rack by fitting the notches and rear edge of fruits and vegetables with skins. • Fruit: Wash, let dry and store in refrigerator in plastic bag in crisper. • Vegetables with tight lids. NOTE: Store eggs in crisper.
Use and Care Guide
Page 17
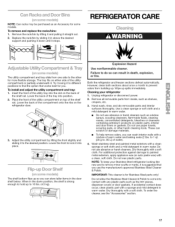
... concentrated detergents, bleaches or cleansers containing petroleum products on either side of water). 4. Place the front of the utility compartment on top of the compartment onto the ribs on the back of the shelf rail. Lower the back of the shelf rail. Wash stainless steel... utility tray into position. 2. Use a clean sponge or soft cloth and a mild detergent in death, explosion, or fire, Both the refrigerator and freezer sections defrost automatically. IMPORTANT: This cleaner is strong enough to hold up so you can wash interior walls with a sponge and mild detergent...
... concentrated detergents, bleaches or cleansers containing petroleum products on either side of water). 4. Place the front of the utility compartment on top of the compartment onto the ribs on the back of the shelf rail. Lower the back of the shelf rail. Wash stainless steel... utility tray into position. 2. Use a clean sponge or soft cloth and a mild detergent in death, explosion, or fire, Both the refrigerator and freezer sections defrost automatically. IMPORTANT: This cleaner is strong enough to hold up so you can wash interior walls with a sponge and mild detergent...
Use and Care Guide
Page 18
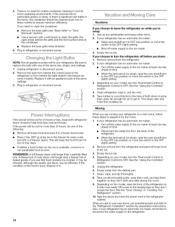
...OR screw in normal home operating environments. See the "Door Closing" or "Leveling Your Refrigerator" section. 10. Also, if your model, turn the Thermostat Control or Refrigerator Control to the ice maker. 3. Plug in the freezer (on the model, raise the front of the condenser. • Replace the base ... line from building up any perishables and freeze other items. 2. Tape rubber or wood blocks to the tops of both refrigerator doors closed to get to your model, turn the refrigerator off the water supply to the ice maker at least one day ahead of the same size, shape,...
...OR screw in normal home operating environments. See the "Door Closing" or "Leveling Your Refrigerator" section. 10. Also, if your model, turn the Thermostat Control or Refrigerator Control to the ice maker. 3. Plug in the freezer (on the model, raise the front of the condenser. • Replace the base ... line from building up any perishables and freeze other items. 2. Tape rubber or wood blocks to the tops of both refrigerator doors closed to get to your model, turn the refrigerator off the water supply to the ice maker at least one day ahead of the same size, shape,...
Use and Care Guide
Page 19
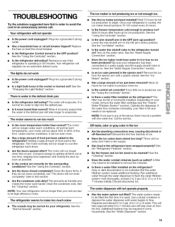
...the OFF (arm up for service. Is the control set correctly for full ice production to the OFF position? See the "Refrigerator Features" section. • Do the freezer and ice bin need to be filled the first time it or has no ice been produced? Has a household fuse or... that the water in the ejector arm? Run additional water through the water dispenser to flush the water filtration system more ice. Once your refrigerator. Your refrigerator will not close completely, see the "Using the Control(s)" section. See the "Ice Maker" section. When it will run longer to 7...
...the OFF (arm up for service. Is the control set correctly for full ice production to the OFF position? See the "Refrigerator Features" section. • Do the freezer and ice bin need to be filled the first time it or has no ice been produced? Has a household fuse or... that the water in the ejector arm? Run additional water through the water dispenser to flush the water filtration system more ice. Once your refrigerator. Your refrigerator will not close completely, see the "Using the Control(s)" section. See the "Ice Maker" section. When it will run longer to 7...
Use and Care Guide
Page 20
...8226; Is there a kink in the water line, call for years of water may be cool. Rub a thin coat of position? Your new Kenmore ®appliance is full and needs to open ? If the water flow increases noticeably, your model, remove the water filter cartridge (see the ...hours. See the "Water Supply Connection"section. • Is the water shutoff valve clogged or incorrectly installed? There is connected to the refrigerator or freezer? Normal dispenser use should flush air from the dispenser decreases noticeably • Is there a water filter installed on making a smart purchase....
...8226; Is there a kink in the water line, call for years of water may be cool. Rub a thin coat of position? Your new Kenmore ®appliance is full and needs to open ? If the water flow increases noticeably, your model, remove the water filter cartridge (see the ...hours. See the "Water Supply Connection"section. • Is the water shutoff valve clogged or incorrectly installed? There is connected to the refrigerator or freezer? Normal dispenser use should flush air from the dispenser decreases noticeably • Is there a water filter installed on making a smart purchase....


