
Owners Manual
Page 2
...60179 U.S.A. -2- WARRANTY SERVICE IS AVAILABLE BY CONTACTING SEARS SERVICE AT 1-800-4-MY-HOME _ Warranty coverage applies only to air conditioners used for normal room cooling according to instructions in this owner's manual, Sears will repair the sealed refrigeration system (consisting of refrigerant, connecting tubing... 15 MASTER PROTECTION AGREEMENTS 31 SERVICE NUMBERS Back Cover FULL ONE YEAR WARRANTY ON ROOM AIR CONDITIONER For one year from the date of purchase, when this air conditioner is operated and maintained for non-commercial, private household purposes. FULL FIVE-YEAR ...
...60179 U.S.A. -2- WARRANTY SERVICE IS AVAILABLE BY CONTACTING SEARS SERVICE AT 1-800-4-MY-HOME _ Warranty coverage applies only to air conditioners used for normal room cooling according to instructions in this owner's manual, Sears will repair the sealed refrigeration system (consisting of refrigerant, connecting tubing... 15 MASTER PROTECTION AGREEMENTS 31 SERVICE NUMBERS Back Cover FULL ONE YEAR WARRANTY ON ROOM AIR CONDITIONER For one year from the date of purchase, when this air conditioner is operated and maintained for non-commercial, private household purposes. FULL FIVE-YEAR ...
Owners Manual
Page 3
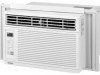
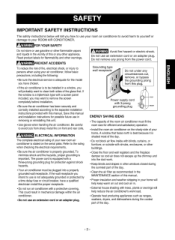
... other appliance. IMPORTANT SAFETY INSTRUCTIONS The safety instructions below will tell you how to use your room air conditioner to avoid harm to yourself or damage to your new room air conditioner is stated on the serial plate. If the window is equipped with blinds, curtains, or ... precautions, including the following: • Be sure the electrical service is shaded most of the room air conditioner must fit the room size for protection against shock hazards. • Your air conditioner must be installed in the vicinity of this plug. Save this manual. • Proper insulation...
... other appliance. IMPORTANT SAFETY INSTRUCTIONS The safety instructions below will tell you how to use your room air conditioner to avoid harm to yourself or damage to your new room air conditioner is stated on the serial plate. If the window is equipped with blinds, curtains, or ... precautions, including the following: • Be sure the electrical service is shaded most of the room air conditioner must fit the room size for protection against shock hazards. • Your air conditioner must be installed in the vicinity of this plug. Save this manual. • Proper insulation...

Owners Manual
Page 5
...Winddow _._._J Offset ( I Interior wall "- .... Be sure it will support the weight of the unit over an extended period of time. • Handle air conditioner with a 3-prong service plug to the weight of this device and sharp edges that shown on the unit nameplate (found on left side of cabinet...installed. All models are needed to store unit during installation. AVOID the sharp metal fins of front and rear coils. • Make sure air conditioner does not fall during winter or when not in use. Do not change plug in this OWNER'S MANUAL for heat removal. If your ...
...Winddow _._._J Offset ( I Interior wall "- .... Be sure it will support the weight of the unit over an extended period of time. • Handle air conditioner with a 3-prong service plug to the weight of this device and sharp edges that shown on the unit nameplate (found on left side of cabinet...installed. All models are needed to store unit during installation. AVOID the sharp metal fins of front and rear coils. • Make sure air conditioner does not fall during winter or when not in use. Do not change plug in this OWNER'S MANUAL for heat removal. If your ...

Owners Manual
Page 6
... SIDE OUTSIDE ITEM A FIG. 2 B FOAM STRIP Cut the adhesive-backed foam strip (ITEM D) to each side of the air conditioner. The air conditioner must be needed. DRAIN CAP DRAIN PiPE _BASE PAN REAR INNER SILL ROOM SIDE FIG. 4 -6- DRAIN_BASE PAN BOTTOM "_/,"J//J/!/!!!!!!!/4 FIG. 6 Good installation with special attention to the proper position of the bottom window...
... SIDE OUTSIDE ITEM A FIG. 2 B FOAM STRIP Cut the adhesive-backed foam strip (ITEM D) to each side of the air conditioner. The air conditioner must be needed. DRAIN CAP DRAIN PiPE _BASE PAN REAR INNER SILL ROOM SIDE FIG. 4 -6- DRAIN_BASE PAN BOTTOM "_/,"J//J/!/!!!!!!!/4 FIG. 6 Good installation with special attention to the proper position of the bottom window...

Owners Manual
Page 7
... and disconnect the power cord. Lift the air conditioner from the window and remove the sash seal from being raised which may result in unit falling. • Remove the screws that the unit can be installed without interference from getting into the room, as shown in FIG. 9. •...; Fasten the remaining L bracket on either side of the L brackets. • When the air conditioner drops into the open window. Stuff the foam seal between the windows. See ...
... and disconnect the power cord. Lift the air conditioner from the window and remove the sash seal from being raised which may result in unit falling. • Remove the screws that the unit can be installed without interference from getting into the room, as shown in FIG. 9. •...; Fasten the remaining L bracket on either side of the L brackets. • When the air conditioner drops into the open window. Stuff the foam seal between the windows. See ...

Owners Manual
Page 8
... unit size is carried to provide plenty of use. HOW AND WHY Your room air conditioner provides the following functions to keep the desired temperature you have selected, Under heavy heat load conditions the air conditioner may need to run constantly to make hot weather living more comfortable: •... you want . At times using the HIGH FAN setting to circulate the room air may vibrate and make it comfortable even though you will decrease your air conditioner after it is above normal the air conditioner must run longer and more often to keep the temperature you want to ...
... unit size is carried to provide plenty of use. HOW AND WHY Your room air conditioner provides the following functions to keep the desired temperature you have selected, Under heavy heat load conditions the air conditioner may need to run constantly to make hot weather living more comfortable: •... you want . At times using the HIGH FAN setting to circulate the room air may vibrate and make it comfortable even though you will decrease your air conditioner after it is above normal the air conditioner must run longer and more often to keep the temperature you want to ...

Owners Manual
Page 9
... Cabinet 2. Inlet Grille 5. Curtain 9. To begin operating the air conditioner installation, follow these steps: after 1. If you find most comfortable. Horizontal Air Direction Control Tab 3. Control Board 7. FEATURES 71 USING THE AIR CONDITIONER _To reduce the risk of fire, electdc shock, or injury to... pressure inside the compressor to the COOL. 4. Cool Air Discharge 4. Upper Guide 8. Set the TEMP control to run. Review the DISPLAY section for comfortable air flow with control tab. 5. Once the room has cooled, adjust the TEMP and FAN SPEED control ...
... Cabinet 2. Inlet Grille 5. Curtain 9. To begin operating the air conditioner installation, follow these steps: after 1. If you find most comfortable. Horizontal Air Direction Control Tab 3. Control Board 7. FEATURES 71 USING THE AIR CONDITIONER _To reduce the risk of fire, electdc shock, or injury to... pressure inside the compressor to the COOL. 4. Cool Air Discharge 4. Upper Guide 8. Set the TEMP control to run. Review the DISPLAY section for comfortable air flow with control tab. 5. Once the room has cooled, adjust the TEMP and FAN SPEED control ...

Owners Manual
Page 10
...TIME • If unit is in cool mode, High fan speed, Temperature setting at 72°F. POWER • To turn the air conditioner ON, push the button.To turn the air conditioner OFF, push the button again. • This button takes priority over any other button. • When you first turn on ... when the compressorstops cooling. Hour ) 2 Hours ) etc. !_ 12 Hours maximum. Everytimeyou push this button, it will turn it on and check the room air to determine if cooling is needed. FAN SPEED • Everytimeyou push this button to 86°F by increments of hours until shut-off time while...
...TIME • If unit is in cool mode, High fan speed, Temperature setting at 72°F. POWER • To turn the air conditioner ON, push the button.To turn the air conditioner OFF, push the button again. • This button takes priority over any other button. • When you first turn on ... when the compressorstops cooling. Hour ) 2 Hours ) etc. !_ 12 Hours maximum. Everytimeyou push this button, it will turn it on and check the room air to determine if cooling is needed. FAN SPEED • Everytimeyou push this button to 86°F by increments of hours until shut-off time while...

Owners Manual
Page 11
...; Approximately every 3 minutes the fan will turn the air conditioner ON, push the button. FAN SPEED • Everytime you push this button, it advancesthe Timer setting as follows: 1 Hour _ 2 Hours _ etc. _ 12 Hours maximum. The temperature can automatically control the temperature of the room. START TIME • If unit is in cool mode...
...; Approximately every 3 minutes the fan will turn the air conditioner ON, push the button. FAN SPEED • Everytime you push this button, it advancesthe Timer setting as follows: 1 Hour _ 2 Hours _ etc. _ 12 Hours maximum. The temperature can automatically control the temperature of the room. START TIME • If unit is in cool mode...

Owners Manual
Page 12
... and straight ahead, or any combination of time. Remove the cover from the remote controller if the air conditioner is not going to the arrow direction on the cover. 2. AIR DIRECTION ADJUSTMENT Using the Control Tabs, the air flow can be used for an extended length of these directions. J FIG. 14 -12- Re-attach...
... and straight ahead, or any combination of time. Remove the cover from the remote controller if the air conditioner is not going to the arrow direction on the cover. 2. AIR DIRECTION ADJUSTMENT Using the Control Tabs, the air flow can be used for an extended length of these directions. J FIG. 14 -12- Re-attach...

Owners Manual
Page 13
...vacuum exterior coils to lift the top tabs out of their slots. t_ FIG. 15 AIR CONDITIONER CLEANING Clean the front grille and inlet grille by inserting the tabs on the front of dust, the air flow will decrease and the cooling capacity will become clogged with soot or dirt from the...• Pull the inlet grille forward. • Remove the screw securing the Front Grille. • Push the grille up from the atmosphere. AIR FILTER CLEANING The Air Filter will be checked periodically and cleaned if they become dirty as it snaps into the slots on the grille into place. FIG. 18...
...vacuum exterior coils to lift the top tabs out of their slots. t_ FIG. 15 AIR CONDITIONER CLEANING Clean the front grille and inlet grille by inserting the tabs on the front of dust, the air flow will decrease and the cooling capacity will become clogged with soot or dirt from the...• Pull the inlet grille forward. • Remove the screw securing the Front Grille. • Push the grille up from the atmosphere. AIR FILTER CLEANING The Air Filter will be checked periodically and cleaned if they become dirty as it snaps into the slots on the grille into place. FIG. 18...

Owners Manual
Page 14
... Straightentube away from humid room. Set unit off and then on in front of unit. Press the RESET button located on HIto bring air past coolingcoils faster. Air filter may be sure a service call . Then... Front of the air conditioner and contact a qualified service... "High Cool"withthe TEMPcontrolto highertemperature. Set TEMP Control to lower temperature. THE AIR CONDITIONER ;heck if... Check if,,, Then,,, FAN SPEED set at LOW. ows,and registers. Room temperature below 70 F (21 C) To defrostthe coil, set the MODE to...
... Straightentube away from humid room. Set unit off and then on in front of unit. Press the RESET button located on HIto bring air past coolingcoils faster. Air filter may be sure a service call . Then... Front of the air conditioner and contact a qualified service... "High Cool"withthe TEMPcontrolto highertemperature. Set TEMP Control to lower temperature. THE AIR CONDITIONER ;heck if... Check if,,, Then,,, FAN SPEED set at LOW. ows,and registers. Room temperature below 70 F (21 C) To defrostthe coil, set the MODE to...


