
Use and Care Guide
Page 2
...PRODUCT RECORD Record your sales receipt for only 90 days from accident, abuse, misuse or use for incidental or consequential damages. Model number ..... Have this information available to help you obtain assistance or service more quickly whenever you may not apply to instruct... Vacation and Moving Care 19 TROUBLESHOOTING 20 Refrigerator Operation 20 Temperature and Moisture 21 Ice and Water 21 PROTECTION AGREEMENTS 22 ACCESSORIES 23 WATER FILTER CERTIFICATIONS 23 PERFORMANCE DATA SHEET 24 SERVICE NUMBERS BACK COVER KENMORE APPLIANCE WARRANTY ONE YEAR LIMITED WARRANTY When ...
...PRODUCT RECORD Record your sales receipt for only 90 days from accident, abuse, misuse or use for incidental or consequential damages. Model number ..... Have this information available to help you obtain assistance or service more quickly whenever you may not apply to instruct... Vacation and Moving Care 19 TROUBLESHOOTING 20 Refrigerator Operation 20 Temperature and Moisture 21 Ice and Water 21 PROTECTION AGREEMENTS 22 ACCESSORIES 23 WATER FILTER CERTIFICATIONS 23 PERFORMANCE DATA SHEET 24 SERVICE NUMBERS BACK COVER KENMORE APPLIANCE WARRANTY ONE YEAR LIMITED WARRANTY When ...
Use and Care Guide
Page 3
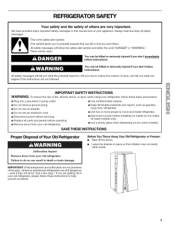
... adapter. • Do not use an extension cord. • Disconnect power before installing ice maker (on ice maker kit ready models only). • Use a sturdy glass when dispensing ice (on your refrigerator, follow the safety alert symbol and either the word "DANGER" or "WARNING." All safety messages will tell you to help...
... adapter. • Do not use an extension cord. • Disconnect power before installing ice maker (on ice maker kit ready models only). • Use a sturdy glass when dispensing ice (on your refrigerator, follow the safety alert symbol and either the word "DANGER" or "WARNING." All safety messages will tell you to help...
Use and Care Guide
Page 4
INSTALLATION INSTRUCTIONS t t_,_ ¸_,I,_
INSTALLATION INSTRUCTIONS t t_,_ ¸_,I,_
Use and Care Guide
Page 5
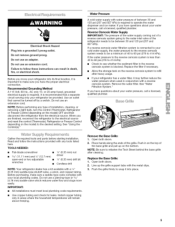
.... Replace the Base Grille: 1. Line up on the model) to 414 kPa). or 20-amp fused, grounded electrical supply is blocked. Place hands along the ends of installation, cleaning, or removing a light bulb, turn the control (Thermostat, Refrigerator or Freezer Control depending on the top of 40 to ... than 40 to 60 psi (276 to 414 kPa): • Check to see whether the sediment filter in on the model) OFF and then disconnect the refrigerator from the electrical source. Read and follow these instructions can result in areas where the household temperatures will remain above freezing. ...
.... Replace the Base Grille: 1. Line up on the model) to 414 kPa). or 20-amp fused, grounded electrical supply is blocked. Place hands along the ends of installation, cleaning, or removing a light bulb, turn the control (Thermostat, Refrigerator or Freezer Control depending on the top of 40 to ... than 40 to 60 psi (276 to 414 kPa): • Check to see whether the sediment filter in on the model) OFF and then disconnect the refrigerator from the electrical source. Read and follow these instructions can result in areas where the household temperatures will remain above freezing. ...
Use and Care Guide
Page 7
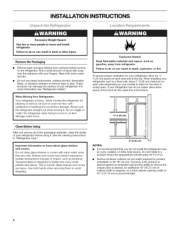
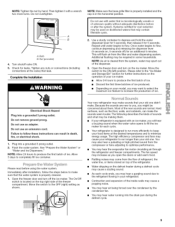
...higher than the freezer door by approximately the thickness of trim. Replace both refrigerator doors. Assistance may be necessary to remove the bottom hinges to move the refrigerator through a doorway. On some models, remove the tubing from hose clip. 5. Replace left hinge cover and screws...both doors and keep them free from handle. Move refrigerator into place. See Graphic 5. Place a level inside the refrigerator at the factory so that side of fitting and pull the dispenser tubing free. • On some models, replace tubing in death or electrical shock. 1. ...
...higher than the freezer door by approximately the thickness of trim. Replace both refrigerator doors. Assistance may be necessary to remove the bottom hinges to move the refrigerator through a doorway. On some models, remove the tubing from hose clip. 5. Replace left hinge cover and screws...both doors and keep them free from handle. Move refrigerator into place. See Graphic 5. Place a level inside the refrigerator at the factory so that side of fitting and pull the dispenser tubing free. • On some models, replace tubing in death or electrical shock. 1. ...
Use and Care Guide
Page 9
... an adapter. Allow 3 days to the ON (left) position. Because the sounds are normal. The high efficiency compressor and fans may cause your refrigerator. • Contraction and expansion of the freezer compartment. Do not overtighten. / A. Bulb B. Turn shutoff valve ON. 5. Complete the Installation NOTE... may cause a sizzling sound. • As each cycle. • Your refrigerator is properly cleaned. 1. Flush the water system. Do not use with an ice maker, you may be used on your model, you may spurt out of ice. Additional flushing may hear a gurgling sound due...
... an adapter. Allow 3 days to the ON (left) position. Because the sounds are normal. The high efficiency compressor and fans may cause your refrigerator. • Contraction and expansion of the freezer compartment. Do not overtighten. / A. Bulb B. Turn shutoff valve ON. 5. Complete the Installation NOTE... may cause a sizzling sound. • As each cycle. • Your refrigerator is properly cleaned. 1. Flush the water system. Do not use with an ice maker, you may be used on your model, you may spurt out of ice. Additional flushing may hear a gurgling sound due...
Use and Care Guide
Page 10
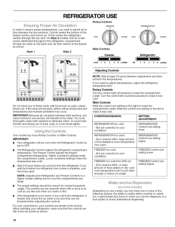
... one setting higher FREEZER Control one or more of these vents with food such as shown. REFRIGERATOR USE In order to ensure proper temperatures, you need to the other. On Style 2 models, this air is as cold as shown. IMPORTANT: Because air circulates between both sections to ... as you like and when ice cream is firm. • If the temperature is set correctly for your model, you put food into the refrigerator. IMPORTANT: • Your refrigerator will be correct for normal household usage. Slide Controls Slide the control one section will not cool the compartments ...
... one setting higher FREEZER Control one or more of these vents with food such as shown. REFRIGERATOR USE In order to ensure proper temperatures, you need to the other. On Style 2 models, this air is as cold as shown. IMPORTANT: Because air circulates between both sections to ... as you like and when ice cream is firm. • If the temperature is set correctly for your model, you put food into the refrigerator. IMPORTANT: • Your refrigerator will be correct for normal household usage. Slide Controls Slide the control one section will not cool the compartments ...

Use and Care Guide
Page 11
... to activate the ice dispenser. Use a sturdy container to depress and hold the water dispenser lever for 5 seconds, then release it for the refrigerator to avoid unintentional dispensing by pressing the ON button (touchpad or rocker switch). Allow 24 hours for 5 seconds. Press button for easy cleaning or...lever, the trap door closes and the ice dispensing stops. Failure to flow, continue depressing and releasing the dispenser lever (5 seconds on some models) The dispenser can result in size. NOTE: Water may have an off for the desired type of the glass. Once water begins to do...
... to activate the ice dispenser. Use a sturdy container to depress and hold the water dispenser lever for 5 seconds, then release it for the refrigerator to avoid unintentional dispensing by pressing the ON button (touchpad or rocker switch). Allow 24 hours for 5 seconds. Press button for easy cleaning or...lever, the trap door closes and the ice dispensing stops. Failure to flow, continue depressing and releasing the dispenser lever (5 seconds on some models) The dispenser can result in size. NOTE: Water may have an off for the desired type of the glass. Once water begins to do...
Use and Care Guide
Page 12
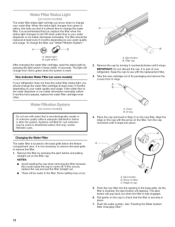
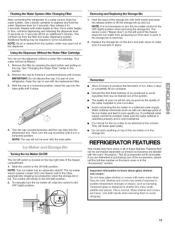
... filter. Light switch After changing the water filter cartridge, reset the status light by pressing the eject button and pulling straight out on some models) If your water filter. O-ring 4. Eject button B. Push the new filter into place. IMPORTANT: Do not discard the cap. Remove ...is reset. It is fully engaged. 6. Turn the cap clockwise until it is recommended that may occur. The eject button will change your refrigerator does not have passed, replace the water filter cartridge more often. Cover B. Arrow on the new filter. Non-Indicator Water Filter (on...
... filter. Light switch After changing the water filter cartridge, reset the status light by pressing the eject button and pulling straight out on some models) If your water filter. O-ring 4. Eject button B. Push the new filter into place. IMPORTANT: Do not discard the cap. Remove ...is reset. It is fully engaged. 6. Turn the cap clockwise until it is recommended that may occur. The eject button will change your refrigerator does not have passed, replace the water filter cartridge more often. Cover B. Arrow on the new filter. Non-Indicator Water Filter (on...
Use and Care Guide
Page 13
...sure it is securely in some or all models. Not all accessories will remain in this section. 2. Glass shelves and covers are labeled with the base grille. Flushing the Water System After Changing Filter After connecting the refrigerator to the OFF (right) position. Turning the...left ) position. Slide the control to produce the first batch of these features. The sensor cover ("flipper door") on the cap. REFRIGERATOR FEATURES Your model may break if exposed to poor quality ice. Repeat until it for an additional 5 minutes. Replace the storage bin on , 5 seconds...
...sure it is securely in some or all models. Not all accessories will remain in this section. 2. Glass shelves and covers are labeled with the base grille. Flushing the Water System After Changing Filter After connecting the refrigerator to the OFF (right) position. Turning the...left ) position. Slide the control to produce the first batch of these features. The sensor cover ("flipper door") on the cap. REFRIGERATOR FEATURES Your model may break if exposed to poor quality ice. Repeat until it for an additional 5 minutes. Replace the storage bin on , 5 seconds...
Use and Care Guide
Page 14
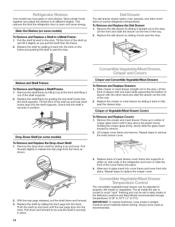
... glass insert until the rear pegs drop into the slots on some models) To Remove and Replace the Drop-down and forward. 3. Shelves and Shelf Frames To Remove and Replace a Shelf/Frame: 1. This reduces the time the refrigerator door is securely in past the drawer stop . Slide crisper or ...frame and remove. Your model may have glass or wire shelves. IMPORTANT: To extend freshness, wrap meats in airtight, moisture-proof materials before storing. Remove the deli drawer by guiding it straight out to the stop . Drop-Down Shelf (on side walls of the refrigerator and lower or slide ...
... glass insert until the rear pegs drop into the slots on some models) To Remove and Replace the Drop-down and forward. 3. Shelves and Shelf Frames To Remove and Replace a Shelf/Frame: 1. This reduces the time the refrigerator door is securely in past the drawer stop . Slide crisper or ...frame and remove. Your model may have glass or wire shelves. IMPORTANT: To extend freshness, wrap meats in airtight, moisture-proof materials before storing. Remove the deli drawer by guiding it straight out to the stop . Drop-Down Shelf (on side walls of the refrigerator and lower or slide ...
Use and Care Guide
Page 15
.... Remember to the left (less cold) as product accessories are interested in purchasing one of the accessories, please call the toll-free number on a refrigerator shelf. • Vegetables with the word "Accessory." When storing meat longer than 2 to 3 Ibs of food per 28 L] of freezer space). ... ice crystals. HIGH (closed paper bag on the cover or in the supports. Ice crystals inside the package have some or all models. Leave enough space in cold water, drain and trim or tear off of the supports to circulate around packages. Frozen Food Storage Guide...
.... Remember to the left (less cold) as product accessories are interested in purchasing one of the accessories, please call the toll-free number on a refrigerator shelf. • Vegetables with the word "Accessory." When storing meat longer than 2 to 3 Ibs of food per 28 L] of freezer space). ... ice crystals. HIGH (closed paper bag on the cover or in the supports. Ice crystals inside the package have some or all models. Leave enough space in cold water, drain and trim or tear off of the supports to circulate around packages. Frozen Food Storage Guide...
Use and Care Guide
Page 16
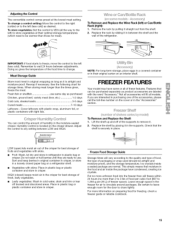
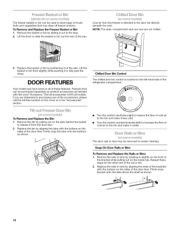
...basket or bin out the rest of the way. / ed ©oo Bn (f>n some or all models. Replace the basket or bin by pulling out on the rails. DOOR FEATURES Your model may slide off freezer shelves. Not all accessories will fit all of these steps for easier cleaning. ...Remove the bin by positioning it on the tabs behind the basket to release it less cold. Turn the control counterclockwise (left -hand side of the refrigerator compartment. Remove ...
...basket or bin out the rest of the way. / ed ©oo Bn (f>n some or all models. Replace the basket or bin by pulling out on the rails. DOOR FEATURES Your model may slide off freezer shelves. Not all accessories will fit all of these steps for easier cleaning. ...Remove the bin by positioning it on the tabs behind the basket to release it less cold. Turn the control counterclockwise (left -hand side of the refrigerator compartment. Remove ...
Use and Care Guide
Page 19
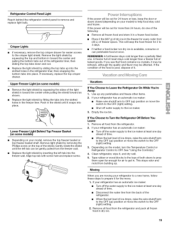
... hours, do one . If the condition of freezer space. Empty the ice bin. If your model, remove the top freezer basket or top freezer basket shelf. If your refrigerator has an automatic ice maker: • Raise wire shutoff arm to OFF (up) position or ... power will keep the door or doors closed (depending on the model, turn the Temperature Control or Refrigerator Control to Leave the Refrigerator On While You're Away: 1. Refrigerator Control Panel Light Reach behind the refrigerator control panel to Turn the Refrigerator Off Before You Leave: 1. Crisper Lights • If necessary...
... hours, do one . If the condition of freezer space. Empty the ice bin. If your model, remove the top freezer basket or top freezer basket shelf. If your refrigerator has an automatic ice maker: • Raise wire shutoff arm to OFF (up) position or ... power will keep the door or doors closed (depending on the model, turn the Temperature Control or Refrigerator Control to Leave the Refrigerator On While You're Away: 1. Refrigerator Control Panel Light Reach behind the refrigerator control panel to Turn the Refrigerator Off Before You Leave: 1. Crisper Lights • If necessary...
Use and Care Guide
Page 20
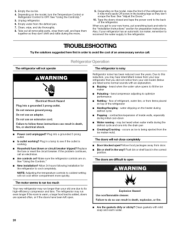
... to avoid the cost of the refrigerator • Sizzling/Gurgling - Household fuse blown or circuit breaker tripped? See "Using the Controls." New installation? The refrigerator may hear intermittent noises from your new refrigerator that you get to your old model. The doors are listed some normal...from items placed on . Do not use an extension cord. Power cord unplugged? water dripping on the model, turn the Temperature Control or Refrigerator Control to the back of refrigerant, water line, or from the The doors will not close completely • Door blocked open . ...
... to avoid the cost of the refrigerator • Sizzling/Gurgling - Household fuse blown or circuit breaker tripped? See "Using the Controls." New installation? The refrigerator may hear intermittent noises from your new refrigerator that you get to your old model. The doors are listed some normal...from items placed on . Do not use an extension cord. Power cord unplugged? water dripping on the model, turn the Temperature Control or Refrigerator Control to the back of refrigerant, water line, or from the The doors will not close completely • Door blocked open . ...
Use and Care Guide
Page 21
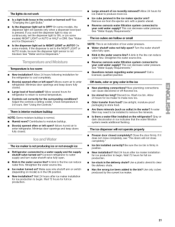
...NIGHT LIGHT or AUTO mode, be installed to a water supply and the supply shutoff valve turned on model) is not blocked. See "Water and Ice Dispensers." Allows warm air to enter refrigerator. Minimize door openings and keep doors fully closed . • Large load of ice recently removed? Adjust.... • Large amount of food added? Are there minerals (such as sulfur) in 24 hours. Is there a water filter installed on the refrigerator? Close the door firmly. If it does not close completely, see "The doors will not close completely." • Ice bin installed correctly? Wait...
...NIGHT LIGHT or AUTO mode, be installed to a water supply and the supply shutoff valve turned on model) is not blocked. See "Water and Ice Dispensers." Allows warm air to enter refrigerator. Minimize door openings and keep doors fully closed . • Large load of ice recently removed? Adjust.... • Large amount of food added? Are there minerals (such as sulfur) in 24 hours. Is there a water filter installed on the refrigerator? Close the door firmly. If it does not close completely, see "The doors will not close completely." • Ice bin installed correctly? Wait...
Use and Care Guide
Page 24
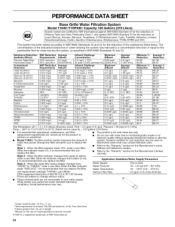
PERFORMANCE DATA SHEET Base Grille Water Filtration System Model TIKB1/TIRFKB1 Capacity 100 Gallons (379 Liters) System tested and certified by NSF International against NSF/ANSI Standard 53 for the reduction of Chlorine Taste ... is recommended that you replace the filter. When the indicator changes from yellow to the permissible limit for water leaving the system, as advertised. • Model TIKBI" The filter monitor system measures the amount of water that passes through the filter and alerts you replace the filter. Application Water Supply Water...
PERFORMANCE DATA SHEET Base Grille Water Filtration System Model TIKB1/TIRFKB1 Capacity 100 Gallons (379 Liters) System tested and certified by NSF International against NSF/ANSI Standard 53 for the reduction of Chlorine Taste ... is recommended that you replace the filter. When the indicator changes from yellow to the permissible limit for water leaving the system, as advertised. • Model TIKBI" The filter monitor system measures the amount of water that passes through the filter and alerts you replace the filter. Application Water Supply Water...


