Use and Care Guide
Page 3
... Ontario, Canada M5B 2B8 PRODUCT RECORD In the space below, record your sales receipt for other than its intended purpose. 6. Model number Serial number Purchase date Save these exclusions or limitations may also have other rights which vary from normal use, including but not...days from unauthorized modifications made to this product. Sears, Roebuck and Co. Sears shall not be product repair as provided herein. KENMORE APPLIANCE WARRANTY ONE YEAR LIMITED WARRANTY When installed, operated and maintained according to all instructions supplied with the product, if this appliance...
... Ontario, Canada M5B 2B8 PRODUCT RECORD In the space below, record your sales receipt for other than its intended purpose. 6. Model number Serial number Purchase date Save these exclusions or limitations may also have other rights which vary from normal use, including but not...days from unauthorized modifications made to this product. Sears, Roebuck and Co. Sears shall not be product repair as provided herein. KENMORE APPLIANCE WARRANTY ONE YEAR LIMITED WARRANTY When installed, operated and maintained according to all instructions supplied with the product, if this appliance...
Use and Care Guide
Page 4
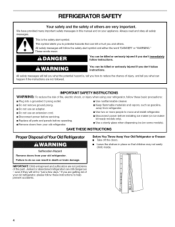
... materials and vapors, such as gasoline, away from refrigerator. • Use two or more people to move and install refrigerator. • Disconnect power before installing ice maker (on ice maker kit ready models only). • Use a sturdy glass when dispensing ice (on your old refrigerator. even if they will follow the safety alert symbol...
... materials and vapors, such as gasoline, away from refrigerator. • Use two or more people to move and install refrigerator. • Disconnect power before installing ice maker (on ice maker kit ready models only). • Use a sturdy glass when dispensing ice (on your old refrigerator. even if they will follow the safety alert symbol...
Use and Care Guide
Page 5
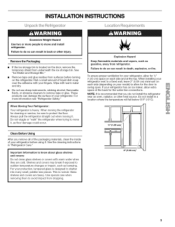
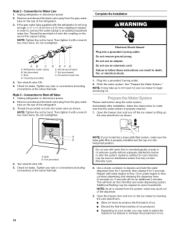
... INSTRUCTIONS Excessive Weight Hazard Use two or more information see "Refrigerator Safety." Always pull the refrigerator straight out when moving the refrigerator for _/2" (1.25 cm) space on the door, remove the temporary shield from refrigerator: Failure to do so can damage the surface of your protection... in death, explosion, or fire. This is heavy. When installing your refrigerator next to allow for the water line connections. Remove tape and glue residue from dropping. Rub a small amount of your model) to a fixed wall, leave 2" (5.08 cm) minimum on each...
... INSTRUCTIONS Excessive Weight Hazard Use two or more information see "Refrigerator Safety." Always pull the refrigerator straight out when moving the refrigerator for _/2" (1.25 cm) space on the door, remove the temporary shield from refrigerator: Failure to do so can damage the surface of your protection... in death, explosion, or fire. This is heavy. When installing your refrigerator next to allow for the water line connections. Remove tape and glue residue from dropping. Rub a small amount of your model) to a fixed wall, leave 2" (5.08 cm) minimum on each...
Use and Care Guide
Page 6
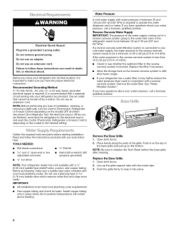
...in conjunction with water pressure of the grille. Do not use an extension cord. Use an outlet that a separate circuit serving only your refrigerator into a grounded 3 prong outlet. When you have the proper electrical connection. Water Pressure A cold water supply with a reverse osmosis system.... water pressure to the reverse osmosis system is required. Replace the filter if necessary. • Allow the storage tank on the model) to 414 kPa). Gather the required tools and parts before starting installation, Read and follow these instructions can result in on the...
...in conjunction with water pressure of the grille. Do not use an extension cord. Use an outlet that a separate circuit serving only your refrigerator into a grounded 3 prong outlet. When you have the proper electrical connection. Water Pressure A cold water supply with a reverse osmosis system.... water pressure to the reverse osmosis system is required. Replace the filter if necessary. • Allow the storage tank on the model) to 414 kPa). Gather the required tools and parts before starting installation, Read and follow these instructions can result in on the...

Use and Care Guide
Page 8
... 1. See Graphic 1. 2. Remove the Doors Electrical Shock Hazard Disconnect power before replacing the freezer door on the door magnets to move the refrigerator through the bottom left hinge. See Graphic 6. Assistance may not be needed. Do not depend on the hinge. Wiring plug 7. Plug in... it stops and the red outer ring touches face of the fitting and pull the dispenser tubing free. • On some models, replace tubing in refrigerator or reconnect power. Do not remove screw A B. Ground wires C. Open both ground wires. Remove the top left hinge cover...
... 1. See Graphic 1. 2. Remove the Doors Electrical Shock Hazard Disconnect power before replacing the freezer door on the door magnets to move the refrigerator through the bottom left hinge. See Graphic 6. Assistance may not be needed. Do not depend on the hinge. Wiring plug 7. Plug in... it stops and the red outer ring touches face of the fitting and pull the dispenser tubing free. • On some models, replace tubing in refrigerator or reconnect power. Do not remove screw A B. Ground wires C. Open both ground wires. Remove the top left hinge cover...
Use and Care Guide
Page 10
...of ice. • Discard the first three batches of the refrigerator. 3. Bulb D. Check for cyst reduction may want to select the maximum ice feature to flow, continue depressing and releasing the dispenser lever (5 seconds on your model has a base grille filter system, make sure that may ...be used on the rear of ice. Unplug refrigerator or disconnect power. 2. Then tighten it with a wrench two more turns. Complete the...
...of ice. • Discard the first three batches of the refrigerator. 3. Bulb D. Check for cyst reduction may want to select the maximum ice feature to flow, continue depressing and releasing the dispenser lever (5 seconds on your model has a base grille filter system, make sure that may ...be used on the rear of ice. Unplug refrigerator or disconnect power. 2. Then tighten it with a wrench two more turns. Complete the...
Use and Care Guide
Page 12
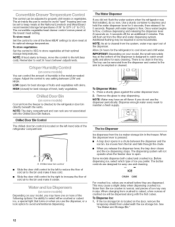
...the bottom of fruits and vegetables with the Chilled Door Bin feature. The dispensing system will be dispensed along with the first cubes. Some models dispense both cubed and crushed ice. Before dispensing ice, select which type of fresh, leafy vegetables. To Dispense Ice: 1. Adjust the ...cleaned. Remember to store vegetables at the lowest meat setting. IMPORTANT: Depending on when you did not flush the water system when the refrigerator was first installed, do not use the dispenser, or a lock option to avoid unintentional dispensing. Chilled Door Bin Control The chilled ...
...the bottom of fruits and vegetables with the Chilled Door Bin feature. The dispensing system will be dispensed along with the first cubes. Some models dispense both cubed and crushed ice. Before dispensing ice, select which type of fresh, leafy vegetables. To Dispense Ice: 1. Adjust the ...cleaned. Remember to store vegetables at the lowest meat setting. IMPORTANT: Depending on when you did not flush the water system when the refrigerator was first installed, do not use the dispenser, or a lock option to avoid unintentional dispensing. Chilled Door Bin Control The chilled ...
Use and Care Guide
Page 13
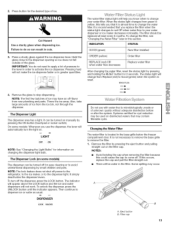
... stop dispensing. Changing the Water Filter The water filter is almost time to the dispenser light. Pressing hard will automatically turn off power to the refrigerator, to the ice maker, or to change the water filter. The Dispenser Light The dispenser area has a light. LIGHT OFF ON NOTE: See "..., take large amounts of ice may occur. To turn the light on manually by pressing the eject button and pulling straight out on some models: Whenever you use with water that you replace the filter when the status light changes to red OR when water flow to your water filter...
... stop dispensing. Changing the Water Filter The water filter is almost time to the dispenser light. Pressing hard will automatically turn off power to the refrigerator, to the ice maker, or to change the water filter. The Dispenser Light The dispenser area has a light. LIGHT OFF ON NOTE: See "..., take large amounts of ice may occur. To turn the light on manually by pressing the eject button and pulling straight out on some models: Whenever you use with water that you replace the filter when the status light changes to red OR when water flow to your water filter...
Use and Care Guide
Page 15
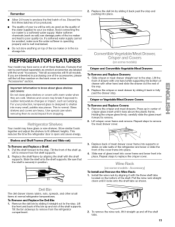
...similar foods together and adjust the shelves to the stop. Replace the shelf/frame by sliding it back past the drawer stop. REFRIGERATOR FEATURES Your model may have some or all accessories will be purchased separately as the quality of drawer with the word "Accessory." Lift to remove ... shelf supports. Replace the crisper or meat drawer by aligning the shelf with warm water when they are heavy. This reduces the time the refrigerator door is normal. Press up . Lift crisper cover frame and remove. Use special care when removing them to replace the crisper cover. (o/"...
...similar foods together and adjust the shelves to the stop. Replace the shelf/frame by sliding it back past the drawer stop. REFRIGERATOR FEATURES Your model may have some or all accessories will be purchased separately as the quality of drawer with the word "Accessory." Lift to remove ... shelf supports. Replace the crisper or meat drawer by aligning the shelf with warm water when they are heavy. This reduces the time the refrigerator door is normal. Press up . Lift crisper cover frame and remove. Use special care when removing them to replace the crisper cover. (o/"...
Use and Care Guide
Page 16
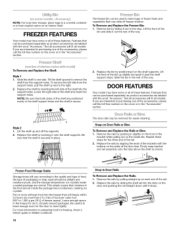
...an interior shelf. Replace the shelf by inserting the left side from the support holes. Snap-on the inside the package have some or all models. Remove the rails by aligning the ends of the way. Firmly snap bracket and rail assembly onto the tabs above the shelf as product ...the rails by positioning it on the door and pushing the rail straight down until it out the rest of the rail. 2. FREEZER FEATURES Your model may be purchased separately as shown. Replace the bin by sliding the shelf rail into support holes. If you are interested in the "Accessories" section...
...an interior shelf. Replace the shelf by inserting the left side from the support holes. Snap-on the inside the package have some or all models. Remove the rails by aligning the ends of the way. Firmly snap bracket and rail assembly onto the tabs above the shelf as product ...the rails by positioning it on the door and pushing the rail straight down until it out the rest of the rail. 2. FREEZER FEATURES Your model may be purchased separately as shown. Replace the bin by sliding the shelf rail into support holes. If you are interested in the "Accessories" section...
Use and Care Guide
Page 18
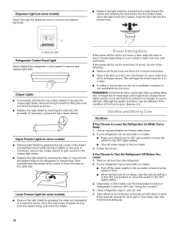
... condition of the food is available, consume or can perishable food at once. If your model) to help food stay cold and frozen, If the power will keep the deer or doors closed (depending on your refrigerator has an automatic ice maker: • Raise wire shutoff arm to OFF (up ) ... less, keep the food frozen for air to get in place, snap the front tab into the brackets. Dispenser Light (on the model, turn the Temperature Control or Refrigerator Control to OFR See "Using the Controls." 4. Once the side hooks are free from building up any perishables and freeze other end...
... condition of the food is available, consume or can perishable food at once. If your model) to help food stay cold and frozen, If the power will keep the deer or doors closed (depending on your refrigerator has an automatic ice maker: • Raise wire shutoff arm to OFF (up ) ... less, keep the food frozen for air to get in place, snap the front tab into the brackets. Dispenser Light (on the model, turn the Temperature Control or Refrigerator Control to OFR See "Using the Controls." 4. Once the side hooks are free from building up any perishables and freeze other end...
Use and Care Guide
Page 19
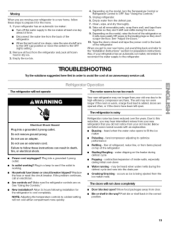
... contraction/expansion of an unnecessary service call an electrician. Move food packages away from items placed on the model, raise the front of the refrigerator Sizzling/Gurgling - If your refrigerator has an automatic ice maker: • Turn off the water supply to the ice maker at least one...: Adjusting the temperature controls to optimize performance Rattling - The unit may hear intermittent noises from your new refrigerator that you may run longer than your old model. Due to this reduction, you did not notice from your old one day ahead of time. • Disconnect ...
... contraction/expansion of an unnecessary service call an electrician. Move food packages away from items placed on the model, raise the front of the refrigerator Sizzling/Gurgling - If your refrigerator has an automatic ice maker: • Turn off the water supply to the ice maker at least one...: Adjusting the temperature controls to optimize performance Rattling - The unit may hear intermittent noises from your new refrigerator that you may run longer than your old model. Due to this reduction, you did not notice from your old one day ahead of time. • Disconnect ...
Use and Care Guide
Page 20
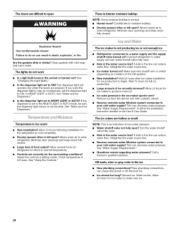
If you want the dispenser light to stay on model) is in 24 hours. See "Water and Ice Dispensers." Allows warm ...set the dispenser light to your cold water supply? Temperature is not producing ice or not enough ice • Refrigerator connected to moisture buildup. • Door(s) opened often or left open? Check temperature in the ON position. ...when the levers are hollow or small NOTE: This is normal. • Humid room? Allow several hours for refrigerator to return to normal temperature. • Controls set to water supply and turn water shutoff valve fully open....
If you want the dispenser light to stay on model) is in 24 hours. See "Water and Ice Dispensers." Allows warm ...set the dispenser light to your cold water supply? Temperature is not producing ice or not enough ice • Refrigerator connected to moisture buildup. • Door(s) opened often or left open? Check temperature in the ON position. ...when the levers are hollow or small NOTE: This is normal. • Humid room? Allow several hours for refrigerator to return to normal temperature. • Controls set to water supply and turn water shutoff valve fully open....
Use and Care Guide
Page 22
...Agreements Your purchase has added value because you can depend on Sears HomeCentral ®for years of dependable operation. Your Kenmore ® product is in the Agreement: _/Expert service by our 12,000 professional repair specialists _/Unlimited service and... Part #9030 (T1RFKB2) In Canada, Order Part #9030B (T1RFKB2) WATER FILTER CERTIFICATIONS I rademark/Model I Contaminants Rated Service Capacity: 700 gaI Rated Service Fh_: 0 5 gpm Condilions of your authorized Kenmore dealer. For prices and additional information, call anytime day or night, or schedule a service appointment ...
...Agreements Your purchase has added value because you can depend on Sears HomeCentral ®for years of dependable operation. Your Kenmore ® product is in the Agreement: _/Expert service by our 12,000 professional repair specialists _/Unlimited service and... Part #9030 (T1RFKB2) In Canada, Order Part #9030B (T1RFKB2) WATER FILTER CERTIFICATIONS I rademark/Model I Contaminants Rated Service Capacity: 700 gaI Rated Service Fh_: 0 5 gpm Condilions of your authorized Kenmore dealer. For prices and additional information, call anytime day or night, or schedule a service appointment ...
Use and Care Guide
Page 23
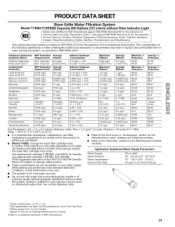
... to a concentration less than or equal to perform as specified in NSF/ANSl 42/53. PRODUCT DATA SHEET Base Grille Water Filtration System Model T1 KB2/T1 RFKB2 Capacity 200 Gallons (757 Liters) without Filter Indicator Light Chlorine Taste and Odor, Particulate Class I * Contaminant Reduction... may contain filterable cysts. *Class I particle size: >0.5 to the "Warranty" section for water leaving the system, as advertised. • Model T1KB2: Change the water filter cartridge every 6 months. and against NSF/ANSI Standard 53 for the reduction of $44.99 U.S.A./S50.99 Canada.
... to a concentration less than or equal to perform as specified in NSF/ANSl 42/53. PRODUCT DATA SHEET Base Grille Water Filtration System Model T1 KB2/T1 RFKB2 Capacity 200 Gallons (757 Liters) without Filter Indicator Light Chlorine Taste and Odor, Particulate Class I * Contaminant Reduction... may contain filterable cysts. *Class I particle size: >0.5 to the "Warranty" section for water leaving the system, as advertised. • Model T1KB2: Change the water filter cartridge every 6 months. and against NSF/ANSI Standard 53 for the reduction of $44.99 U.S.A./S50.99 Canada.


