Product Guide
Page 12
... in non-ECC mode) • 2.5 V memory ✏ NOTE Desktop Board D845GERG2/D845GEBV2 has been designed to support DIMMs based on 512 Mbit technology up . Supported memory configuration are: - You can access these Intel desktop boards. The BIOS will see Chapter 2 starting on the screen at : http://support.intel.com/support/motherboards/desktop/ All memory components and DIMMs used with the...
... in non-ECC mode) • 2.5 V memory ✏ NOTE Desktop Board D845GERG2/D845GEBV2 has been designed to support DIMMs based on 512 Mbit technology up . Supported memory configuration are: - You can access these Intel desktop boards. The BIOS will see Chapter 2 starting on the screen at : http://support.intel.com/support/motherboards/desktop/ All memory components and DIMMs used with the...
Product Guide
Page 20
...the clock current when the computer is turned off . A battery on the desktop board keeps the values in CMOS RAM and the clock current when the computer is asserted, the computer wakes from USB. See Chapter 2 starting on page 21 for correct operation Wake from USB USB bus activity wakes ...the computer from an ACPI S1 or S3 state. ✏ NOTE Wake from USB requires the use of a USB peripheral that supports Wake from an ACPI S1, S3, or S5 state. Intel Desktop Board D845GERG2/D845GEBV2 Product Guide ...
...the clock current when the computer is turned off . A battery on the desktop board keeps the values in CMOS RAM and the clock current when the computer is asserted, the computer wakes from USB. See Chapter 2 starting on page 21 for correct operation Wake from USB USB bus activity wakes ...the computer from an ACPI S1 or S3 state. ✏ NOTE Wake from USB requires the use of a USB peripheral that supports Wake from an ACPI S1, S3, or S5 state. Intel Desktop Board D845GERG2/D845GEBV2 Product Guide ...
Product Guide
Page 35
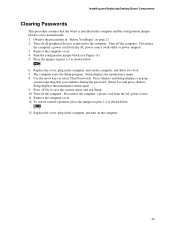
...all peripheral devices connected to save the current values and exit Setup. 10. Press and Setup displays a pop-up screen requesting that the board is installed in the computer, turn on the computer. 35 Remove the computer cover. 12. Observe the precautions in the computer, and ... starts the Setup program. Use the arrow keys to normal mode. 1. Replace the cover, plug in "Before You Begin" on pins 2-3 as shown below . 31 6. Setup displays the maintenance menu again. 9. Disconnect the computer's power cord from the AC power source. 11. Installing and Replacing Desktop Board ...
...all peripheral devices connected to save the current values and exit Setup. 10. Press and Setup displays a pop-up screen requesting that the board is installed in the computer, turn on the computer. 35 Remove the computer cover. 12. Observe the precautions in the computer, and ... starts the Setup program. Use the arrow keys to normal mode. 1. Replace the cover, plug in "Before You Begin" on pins 2-3 as shown below . 31 6. Setup displays the maintenance menu again. 9. Disconnect the computer's power cord from the AC power source. 11. Installing and Replacing Desktop Board ...
