

User Guide
Page 3
Reference information 3-1 Monitor specifications 3-1 Troubleshooting 3-2 Manual image setup 3-4 Manually installing the monitor driver 3-4 Installing the monitor driver in Windows XP 3-4 Installing the monitor driver in Windows 2000 3-5 Getting further help 3-6 Service information 3-7 Product numbers 3-7 ... your monitor 1-4 Connecting and turning on your monitor 1-4 Registering your monitor 2-8 Detaching the monitor stand 2-8 Chapter 3. Notices B-1 Trademarks B-2 © Copyright Lenovo 2005. © Portions Copyright IBM Corp. 2005 iii
Reference information 3-1 Monitor specifications 3-1 Troubleshooting 3-2 Manual image setup 3-4 Manually installing the monitor driver 3-4 Installing the monitor driver in Windows XP 3-4 Installing the monitor driver in Windows 2000 3-5 Getting further help 3-6 Service information 3-7 Product numbers 3-7 ... your monitor 1-4 Connecting and turning on your monitor 1-4 Registering your monitor 2-8 Detaching the monitor stand 2-8 Chapter 3. Notices B-1 Trademarks B-2 © Copyright Lenovo 2005. © Portions Copyright IBM Corp. 2005 iii

User Guide
Page 10
... you information and updates on your Product and provide us in developing better ways to receive further information. 1-6 ThinkVision L201p Flat Panel Monitor User's Guide See "Manual image setup" on the Web site questionnaire that you prefer, perform manual image setup. Registering your monitor image, press the Automatic Image Setup key. Automatic image setup requires that...
... you information and updates on your Product and provide us in developing better ways to receive further information. 1-6 ThinkVision L201p Flat Panel Monitor User's Guide See "Manual image setup" on the Web site questionnaire that you prefer, perform manual image setup. Registering your monitor image, press the Automatic Image Setup key. Automatic image setup requires that...

User Guide
Page 14
See "Manual image setup" on expand the image to get the suitable colo. • Default • Reddish • Bluish • Red: Increases or decreases the saturation of ...OSD Icon on Main Menu Submenu Description Adjusts overall brightness Controls and Adjustments (Analog) Controls and Adjustments (Digital) Same as Analog 2-4 ThinkVision L201p Flat Panel Monitor User's Guide Image Setup Image Properties Automatic Manual Color Preset mode Custom Scaling Automatically optimizes the image. Controls Locked not required for digital input Vertical Position Moves the image...
See "Manual image setup" on expand the image to get the suitable colo. • Default • Reddish • Bluish • Red: Increases or decreases the saturation of ...OSD Icon on Main Menu Submenu Description Adjusts overall brightness Controls and Adjustments (Analog) Controls and Adjustments (Digital) Same as Analog 2-4 ThinkVision L201p Flat Panel Monitor User's Guide Image Setup Image Properties Automatic Manual Color Preset mode Custom Scaling Automatically optimizes the image. Controls Locked not required for digital input Vertical Position Moves the image...

User Guide
Page 19
...monitor specifications, instructions to manually install the monitor driver, troubleshooting information, and service information. Video input (Analog) Standby/Suspend Off Input signal < 3W (Anolog), Monitor specifications for type-model 9320-Hxx and 9220-Hxx Dimensions Height 410.5 mm (16.2 in.) 520.5 mm (20.5 in.) Depth 248.0... Range: 110.0mm Yes (clockwise 90 degree) 100 mm (3.94 in.) Image Viewable image size Radial arm sold separately. 510.54 mm (20.1 in.)3 Maximum height 306.0 mm (12.05 in.) Maximum width 408.0 mm (16.06 in.) Power input Pixel pitch Supply voltage 0....
...monitor specifications, instructions to manually install the monitor driver, troubleshooting information, and service information. Video input (Analog) Standby/Suspend Off Input signal < 3W (Anolog), Monitor specifications for type-model 9320-Hxx and 9220-Hxx Dimensions Height 410.5 mm (16.2 in.) 520.5 mm (20.5 in.) Depth 248.0... Range: 110.0mm Yes (clockwise 90 degree) 100 mm (3.94 in.) Image Viewable image size Radial arm sold separately. 510.54 mm (20.1 in.)3 Maximum height 306.0 mm (12.05 in.) Maximum width 408.0 mm (16.06 in.) Power input Pixel pitch Supply voltage 0....
User Guide
Page 22
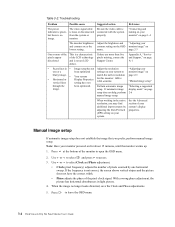
...there are at the bottom of the pixel clock signal. Note: Have your monitor powered on page setup does not help, perform 2-6 manual image setup. Adjust the brightness and contrast setting on blurry image. • Your system match the native resolution page 2-3 • Horizontal.... Use or to select and press to leave the OSD menu. 3-4 ThinkVision L201p Flat Panel Monitor User's Guide "Manual image setup" through the been optimized. See the Advanced section of the LCD technology and is not an LCD defect. Use or to select Clock and Phase adjustment. • Clock ...
...there are at the bottom of the pixel clock signal. Note: Have your monitor powered on page setup does not help, perform 2-6 manual image setup. Adjust the brightness and contrast setting on blurry image. • Your system match the native resolution page 2-3 • Horizontal.... Use or to select and press to leave the OSD menu. 3-4 ThinkVision L201p Flat Panel Monitor User's Guide "Manual image setup" through the been optimized. See the Advanced section of the LCD technology and is not an LCD defect. Use or to select Clock and Phase adjustment. • Clock ...

User Guide
Page 23
...boot into the CD drive, then click the Have Disk button. 13. Open the Hardware Update Wizard window by clicking Start J Settings J Control Panel, and then double-clicking the Display icon. 5. Turn off the computer and all attached devices. 2. Turn on Update Driver, and then click ... LCD monitors, unlike CRTs, a faster refresh rate does not improve display quality. Click the Monitor tab. 8. Choose ThinkVision L201p Monitor and click OK. Lenovo recommends using either 1600 x 1200 at a refresh rate of 60 Hz, or 640 x 480 at a refresh rate of the Reference and Driver CD for manually ...
...boot into the CD drive, then click the Have Disk button. 13. Open the Hardware Update Wizard window by clicking Start J Settings J Control Panel, and then double-clicking the Display icon. 5. Turn off the computer and all attached devices. 2. Turn on Update Driver, and then click ... LCD monitors, unlike CRTs, a faster refresh rate does not improve display quality. Click the Monitor tab. 8. Choose ThinkVision L201p Monitor and click OK. Lenovo recommends using either 1600 x 1200 at a refresh rate of 60 Hz, or 640 x 480 at a refresh rate of the Reference and Driver CD for manually ...

User Guide
Page 27
..., at http://www.lenovo.com/think /support and click Support phone list. © Copyright Lenovo 2005. © Portions Copyright IBM Corp. 2005 A-1 Telephone technical support Installation and configuration support through the Customer Support Center will be at your product through the problem... as possible: •Option name •Option number •Proof of purchase •Computer manufacturer, model, serial number, and manual •Exact wording of the error message (if any) •Description of the following information describes the technical support that is available...
..., at http://www.lenovo.com/think /support and click Support phone list. © Copyright Lenovo 2005. © Portions Copyright IBM Corp. 2005 A-1 Telephone technical support Installation and configuration support through the Customer Support Center will be at your product through the problem... as possible: •Option name •Option number •Proof of purchase •Computer manufacturer, model, serial number, and manual •Exact wording of the error message (if any) •Description of the following information describes the technical support that is available...
