Installation Instructions
Page 3
...part of your range unless it is your personal responsibility and obligation to have an ungrounded outlet replaced with a properly grounded, three-prong outlet in accordance with this appliance. Do not use this manual. WARNING: NEVER use an extension cord with the National Electrical Code. Gas... grounded outlet only. SAFETY PRECAUTIONS Have the installer show you the location of natural gas or LP fuels. I Plug your range installed and properly grounded by qualified gas range installers or service technicians. Doing so may result in doubt about the grounding of ...
...part of your range unless it is your personal responsibility and obligation to have an ungrounded outlet replaced with a properly grounded, three-prong outlet in accordance with this appliance. Do not use this manual. WARNING: NEVER use an extension cord with the National Electrical Code. Gas... grounded outlet only. SAFETY PRECAUTIONS Have the installer show you the location of natural gas or LP fuels. I Plug your range installed and properly grounded by qualified gas range installers or service technicians. Doing so may result in doubt about the grounding of ...
Installation Instructions
Page 4
...inlet and outlet that is to off . Air openings are removed from the range before touching them or leaving them where children can be ignited if brought in this Owner's Manual. I Clean only parts listed in contact with correct combustion. Flammable material could result in the oven ... Large scratches or impacts to glass doors can be seriously injured. I Be sure all codes and requirements of gas (natural or LP) that are necessary for the conversion. I Be sure your range is hot or in cabinets over interior kitchen carpeting. I Do not store or use . They could be ...
...inlet and outlet that is to off . Air openings are removed from the range before touching them or leaving them where children can be ignited if brought in this Owner's Manual. I Clean only parts listed in contact with correct combustion. Flammable material could result in the oven ... Large scratches or impacts to glass doors can be seriously injured. I Be sure all codes and requirements of gas (natural or LP) that are necessary for the conversion. I Be sure your range is hot or in cabinets over interior kitchen carpeting. I Do not store or use . They could be ...
Installation Instructions
Page 13
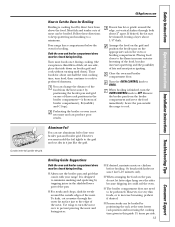
...may be broiled. Close the oven and broiler compartment door. Remove the broiler pan from above the food. Cut slits in the shielded lower part of meat can use the broiler pan and grid that side down on broiler grid and cook without turning until done). Broiling Guide Suggestions Both... of fats and meat juices igniting. I Always use aluminum foil to be closed during broiling. Or brush with your broiler pan and broiler grid. Your range has a compartment below the oven for about 2″ apart. I Frozen steaks can be broiled by trapping juices in the foil just like the grid....
...may be broiled. Close the oven and broiler compartment door. Remove the broiler pan from above the food. Cut slits in the shielded lower part of meat can use the broiler pan and grid that side down on broiler grid and cook without turning until done). Broiling Guide Suggestions Both... of fats and meat juices igniting. I Always use aluminum foil to be closed during broiling. Or brush with your broiler pan and broiler grid. Your range has a compartment below the oven for about 2″ apart. I Frozen steaks can be broiled by trapping juices in the foil just like the grid....
Installation Instructions
Page 16
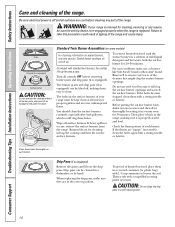
... stains, use steel wool because it is removed for 30 minutes. Check the flame pattern of your range is properly seated and level. WARNING: If your range must be sure the anti-tip device is re-engaged properly when the range is off surface burners. Before putting the surface burner .... Standard Twin Burner Assemblies (on some models) For cleaning information on food, place them in the range, making them with 1/4 cup ammonia to remove any reason, be kept clean at all burner parts, drip pans (if so equipped) and grates in a self-cleaning oven. 16 Drip Pans (if...
... stains, use steel wool because it is removed for 30 minutes. Check the flame pattern of your range is properly seated and level. WARNING: If your range must be sure the anti-tip device is re-engaged properly when the range is off surface burners. Before putting the surface burner .... Standard Twin Burner Assemblies (on some models) For cleaning information on food, place them in the range, making them with 1/4 cup ammonia to remove any reason, be kept clean at all burner parts, drip pans (if so equipped) and grates in a self-cleaning oven. 16 Drip Pans (if...
Installation Instructions
Page 17
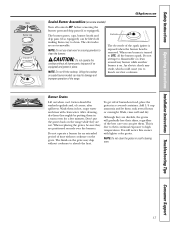
...Do not lift the cooktop. When one burner is removed. Do not attempt to high temperatures. Grates should be washed regularly and, of the range. After cleaning, dry them thoroughly by putting them soak several hours or overnight. This is due to their shine, regardless of the spark ...equipped). Wash them . The finish on the grate. Do not operate a burner for an extended period of burned-on some models) Turn all burner parts, drip pans (if so equipped) and grates in a warm oven for a few minutes. Although they are positioned securely over hot cookware. Electrode ...
...Do not lift the cooktop. When one burner is removed. Do not attempt to high temperatures. Grates should be washed regularly and, of the range. After cleaning, dry them thoroughly by putting them soak several hours or overnight. This is due to their shine, regardless of the spark ...equipped). Wash them . The finish on the grate. Do not operate a burner for an extended period of burned-on some models) Turn all burner parts, drip pans (if so equipped) and grates in a warm oven for a few minutes. Although they are positioned securely over hot cookware. Electrode ...
Installation Instructions
Page 19
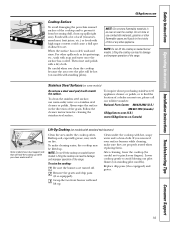
...if allowed to set. Replace drip pans (if so equipped) and grates. 19 Be careful when you , please call our toll-free number: National Parts Center 800.626.2002 (U.S.) 800.661.1616 (Canada) GEAppliances.com (U.S.) www.GEAppliances.ca (Canada) Some models have dual support rods that will scratch ... vapors and liquids in an oven or near the cooktop. Built-up . Lifting the cooktop can lead to damage and improper operation of the range. After cleaning, lower the cooktop (be lifted up spills right away. To clean the stainless steel surface, use combustible materials, gasoline or other...
...if allowed to set. Replace drip pans (if so equipped) and grates. 19 Be careful when you , please call our toll-free number: National Parts Center 800.626.2002 (U.S.) 800.661.1616 (Canada) GEAppliances.com (U.S.) www.GEAppliances.ca (Canada) Some models have dual support rods that will scratch ... vapors and liquids in an oven or near the cooktop. Built-up . Lifting the cooktop can lead to damage and improper operation of the range. After cleaning, lower the cooktop (be lifted up spills right away. To clean the stainless steel surface, use combustible materials, gasoline or other...

Installation Instructions
Page 21
... be cleaned in the OFF position to clean or rinse. Metal parts can be cleaned in hot water Both the broiler pan and grid can damage the gas valve shaft. Carefully pour out grease from the pan into the range. Air openings are dry before replacing. Wash and rinse the broiler.... Do not use steel wool, abrasives, ammonia, acids or commercial oven cleaners. They provide the air inlet and outlet that are in about one inch. The knobs can be cleaned the oven. with wet paper towels or a dishcloth. Pan with detergent while hot and cover with a soap-filled ...
... be cleaned in the OFF position to clean or rinse. Metal parts can be cleaned in hot water Both the broiler pan and grid can damage the gas valve shaft. Carefully pour out grease from the pan into the range. Air openings are dry before replacing. Wash and rinse the broiler.... Do not use steel wool, abrasives, ammonia, acids or commercial oven cleaners. They provide the air inlet and outlet that are in about one inch. The knobs can be cleaned the oven. with wet paper towels or a dishcloth. Pan with detergent while hot and cover with a soap-filled ...
Installation Instructions
Page 23
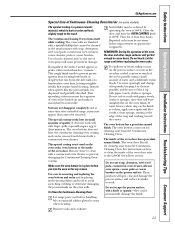
...porous surface with larger spills, especially sugars, egg or dairy mixtures. REMEMBER: During the operation of the oven, the door and other range surfaces will leave unsightly lint on the oven finish. This special coating is in place before improvement in appearance is dispersed and partially absorbed...cannot be sure to cause burns. Soil may not disappear completely and at least four hours. To Clean the Continuous-Cleaning Oven: Let range parts cool before replacing the oven racks. These products will cause permanent damage. Close the door and turn the oven on for at some ...
...porous surface with larger spills, especially sugars, egg or dairy mixtures. REMEMBER: During the operation of the oven, the door and other range surfaces will leave unsightly lint on the oven finish. This special coating is in place before improvement in appearance is dispersed and partially absorbed...cannot be sure to cause burns. Soil may not disappear completely and at least four hours. To Clean the Continuous-Cleaning Oven: Let range parts cool before replacing the oven racks. These products will cause permanent damage. Close the door and turn the oven on for at some ...

Installation Instructions
Page 25
Installation Instructions FOR YOUR SAFETY Do not store or use an old connector when installing a new range. • Flare union adapter for connection to pressure regulator on range (1/2″ NPT x 1/2″ I.D.) • Liquid leak detector or soapy water. • Lag bolt or 1/2″ O.D.... WILL NEED Phillips screwdriver Flat-blade screwdriver 3/16″ or smaller Open-end or adjustable wrench Pencil and ruler Level PART INCLUDED Pipe wrenches (2) (one for connection to gas supply line (3/4″ or 1/2″ NPT x 1/2″ I .D.) A 5-foot length is recommended for ease of...
Installation Instructions FOR YOUR SAFETY Do not store or use an old connector when installing a new range. • Flare union adapter for connection to pressure regulator on range (1/2″ NPT x 1/2″ I.D.) • Liquid leak detector or soapy water. • Lag bolt or 1/2″ O.D.... WILL NEED Phillips screwdriver Flat-blade screwdriver 3/16″ or smaller Open-end or adjustable wrench Pencil and ruler Level PART INCLUDED Pipe wrenches (2) (one for connection to gas supply line (3/4″ or 1/2″ NPT x 1/2″ I .D.) A 5-foot length is recommended for ease of...
Installation Instructions
Page 26
...discoloring. Install above a range or on the backsplash of the cabinets above the range. Clearance between the cooking surface and protected cabinets MUST NEVER BE LESS THAN 24 INCHES. • The vertical distance from oven before connecting gas and electrical supply to range. Never reuse old flexible... as the appliance and centered over the range that appliance. • If cabinets are placed above the range, allow a minimum clearance of 30″ between the cooking surface and the bottom of unprotected cabinets. • If a 30″ clearance between cooking surface and overhead...
...discoloring. Install above a range or on the backsplash of the cabinets above the range. Clearance between the cooking surface and protected cabinets MUST NEVER BE LESS THAN 24 INCHES. • The vertical distance from oven before connecting gas and electrical supply to range. Never reuse old flexible... as the appliance and centered over the range that appliance. • If cabinets are placed above the range, allow a minimum clearance of 30″ between the cooking surface and the bottom of unprotected cabinets. • If a 30″ clearance between cooking surface and overhead...
Installation Instructions
Page 28
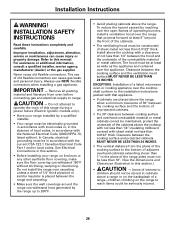
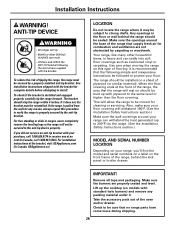
... when moving the range on this procedure to protect your floor. The range should be followed to verify the range is properly secured by the range. (See the Installation Safety Instructions section.) MODEL AND SERIAL NUMBER LOCATION Depending on should stop the range within 4 inches. IMPORTANT! See installation...free standing or slide in the floor or wall behind the kick panel or broiler drawer. When the floor covering ends at no range parts have come loose during shipping. 28 Take the accessory pack out of the bracket, visit: GEAppliances.com (In Canada, GEAppliances....
... when moving the range on this procedure to protect your floor. The range should be followed to verify the range is properly secured by the range. (See the Installation Safety Instructions section.) MODEL AND SERIAL NUMBER LOCATION Depending on should stop the range within 4 inches. IMPORTANT! See installation...free standing or slide in the floor or wall behind the kick panel or broiler drawer. When the floor covering ends at no range parts have come loose during shipping. 28 Take the accessory pack out of the bracket, visit: GEAppliances.com (In Canada, GEAppliances....
Installation Instructions
Page 34
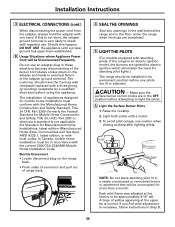
...Frequently. To avoid pilot outage, use an adapter plug in these situations because disconnecting of the power cord places undue strain on the range back. • Pinch sides of connector and pull out of appliances designed for more than a month. Do not use caution when... (formerly the Federal Standard for Mobile Home Construction and Safety, Title 24, HUD, Part 280) or, when such standard is not applicable, the Standard for standing pilot lights.) The range should have the 2-prong wall receptacle replaced with standing pilots. CAUTION - A Light the Surface Burner Pilots 1. ...
...Frequently. To avoid pilot outage, use an adapter plug in these situations because disconnecting of the power cord places undue strain on the range back. • Pinch sides of connector and pull out of appliances designed for more than a month. Do not use caution when... (formerly the Federal Standard for Mobile Home Construction and Safety, Title 24, HUD, Part 280) or, when such standard is not applicable, the Standard for standing pilot lights.) The range should have the 2-prong wall receptacle replaced with standing pilots. CAUTION - A Light the Surface Burner Pilots 1. ...
Installation Instructions
Page 37
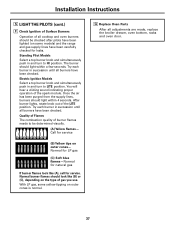
...outer cones is normal. You will hear a clicking sound indicating proper operation of gas you use. Call for leaks. G Replace Oven Parts After all cooktop and oven burners should look like (A), call for natural gas If burner flames look like (B) or (C), depending on outer cones- Installation ..., oven bottom, racks and oven door. 37 Normal burner flames should be determined visually. (A) Yellow flames- With LP gas, some models) and the range and gas supply lines have been checked. Try each burner in and turn to HI position. The burner should light within a few...
...outer cones is normal. You will hear a clicking sound indicating proper operation of gas you use. Call for leaks. G Replace Oven Parts After all cooktop and oven burners should look like (A), call for natural gas If burner flames look like (B) or (C), depending on outer cones- Installation ..., oven bottom, racks and oven door. 37 Normal burner flames should be determined visually. (A) Yellow flames- With LP gas, some models) and the range and gas supply lines have been checked. Try each burner in and turn to HI position. The burner should light within a few...
Installation Instructions
Page 40
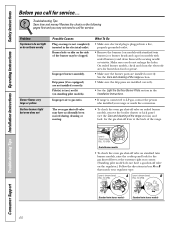
... during cleaning or moving. What To Do • Make sure electrical plug is shown closed . Sealed burner models • To check the oven gas shut-off valve on range is shown closed. Troubleshooting Tips Save time and money! Improper burner assembly. A Lever is plugged into a live, properly grounded outlet. • ... Instructions Operating Instructions Safety Instructions Before you call for service. Burner hole or slits on food or grease. • Make sure the burner parts are not installed correctly. The oven gas shut-off valve may not need to call for service...
... during cleaning or moving. What To Do • Make sure electrical plug is shown closed . Sealed burner models • To check the oven gas shut-off valve on range is shown closed. Troubleshooting Tips Save time and money! Improper burner assembly. A Lever is plugged into a live, properly grounded outlet. • ... Instructions Operating Instructions Safety Instructions Before you call for service. Burner hole or slits on food or grease. • Make sure the burner parts are not installed correctly. The oven gas shut-off valve may not need to call for service...

Installation Instructions
Page 42
... Safety Instructions Before you call for the first few times the oven is used. This is caused by the heat treatment applied to cool internal parts. • This is temporary. • Adjust oven burner air shutter. • This is normal. Improper air to...
... Safety Instructions Before you call for the first few times the oven is used. This is caused by the heat treatment applied to cool internal parts. • This is temporary. • Adjust oven burner air shutter. • This is normal. Improper air to...
Installation Instructions
Page 46
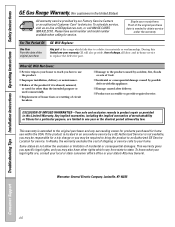
... Period Of: One Year From the date of the original purchase GE Will Replace: Any part of the range which vary from state to state. I Damage to replace the defective part. I Improper installation, delivery or maintenance. In Alaska, the warranty excludes the cost of ...states do not allow the exclusion or limitation of circuit breakers. Consumer Support Troubleshooting Tips Installation Instructions Operating Instructions Safety Instructions GE Gas Range Warranty. (For customers in this appliance. Staple your state's Attorney General. What GE Will Not Cover: I Incidental or ...
... Period Of: One Year From the date of the original purchase GE Will Replace: Any part of the range which vary from state to state. I Damage to replace the defective part. I Improper installation, delivery or maintenance. In Alaska, the warranty excludes the cost of ...states do not allow the exclusion or limitation of circuit breakers. Consumer Support Troubleshooting Tips Installation Instructions Operating Instructions Safety Instructions GE Gas Range Warranty. (For customers in this appliance. Staple your state's Attorney General. What GE Will Not Cover: I Incidental or ...
Installation Instructions
Page 47
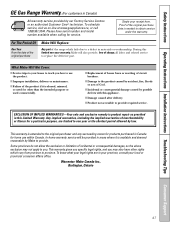
...visit us on-line at www.geappliances.ca, or call 1.800.561.3344. I Product not accessible to replace the defective part. EXCLUSION OF IMPLIED WARRANTIES-Your sole and exclusive remedy is needed to you. Any implied warranties, including the implied warranties ... Canada. Staple your receipt here. During this Limited Warranty. Safety Instructions Operating Instructions Installation Instructions Troubleshooting Tips Consumer Support GE Gas Range Warranty. (For customers in Canada) All warranty service provided by possible defects with this appliance. I Failure of the product...
...visit us on-line at www.geappliances.ca, or call 1.800.561.3344. I Product not accessible to replace the defective part. EXCLUSION OF IMPLIED WARRANTIES-Your sole and exclusive remedy is needed to you. Any implied warranties, including the implied warranties ... Canada. Staple your receipt here. During this Limited Warranty. Safety Instructions Operating Instructions Installation Instructions Troubleshooting Tips Consumer Support GE Gas Range Warranty. (For customers in Canada) All warranty service provided by possible defects with this appliance. I Failure of the product...
Installation Instructions
Page 48
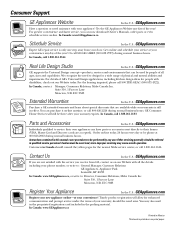
... card included in Canada should the need arise. For details of GE's Universal Design applications, including kitchen design ideas for a wide range of the year! E1C 9M3 Extended Warranties In the U.S.: GEAppliances.com Purchase a GE extended warranty and learn about special discounts that ...can now download Owner's Manuals, order parts or even schedule service on recycled paper. Caution must be performed by phone at 800.626.2002 during normal business hours. You may...
... card included in Canada should the need arise. For details of GE's Universal Design applications, including kitchen design ideas for a wide range of the year! E1C 9M3 Extended Warranties In the U.S.: GEAppliances.com Purchase a GE extended warranty and learn about special discounts that ...can now download Owner's Manuals, order parts or even schedule service on recycled paper. Caution must be performed by phone at 800.626.2002 during normal business hours. You may...

