Use and Care Manual / Warranty
Page 2
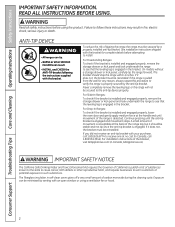
... Safety Instructions IMPORTANT SAFETY INFORMATION. ANTI-TIP DEVICE To reduce the risk of potential exposure to warn customers of tipping the range, the range must be reinstalled. WARNING IMPORTANT SAFETY NOTICE The California Safe Drinking Water and Toxic Enforcement Act requires the Governor of California ... to the state to cause cancer, birth defects or other reproductive harm, and requires businesses to such substances. If the range is engaged in fire, electric shock, serious injury or death. If you did not receive an anti-tip bracket with an open window or using the...
... Safety Instructions IMPORTANT SAFETY INFORMATION. ANTI-TIP DEVICE To reduce the risk of potential exposure to warn customers of tipping the range, the range must be reinstalled. WARNING IMPORTANT SAFETY NOTICE The California Safe Drinking Water and Toxic Enforcement Act requires the Governor of California ... to the state to cause cancer, birth defects or other reproductive harm, and requires businesses to such substances. If the range is engaged in fire, electric shock, serious injury or death. If you did not receive an anti-tip bracket with an open window or using the...

Use and Care Manual / Warranty
Page 3
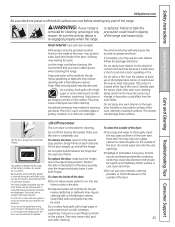
...other flammable materials accumulate in the oven or on the hood or filter. Do not cook on grease fires. Grease in or near the range. These surfaces may lead to these temperatures usually protects against foodborne illness. Doing so may be seriously injured. ■ Use only dry pot... if they are dark in accordance with the provided installation instructions. ■ Do not attempt to repair or replace any service, unplug the range or disconnect the power supply at least an internal temperature of the appliance. Turn the controls off the circuit breaker. ■ Do not ...
...other flammable materials accumulate in the oven or on the hood or filter. Do not cook on grease fires. Grease in or near the range. These surfaces may lead to these temperatures usually protects against foodborne illness. Doing so may be seriously injured. ■ Use only dry pot... if they are dark in accordance with the provided installation instructions. ■ Do not attempt to repair or replace any service, unplug the range or disconnect the power supply at least an internal temperature of the appliance. Turn the controls off the circuit breaker. ■ Do not ...

Use and Care Manual / Warranty
Page 4
...to direct contact and may cause them to fail, presenting a burn or fire hazard. ■ To avoid the possibility of a burn or electric shock, always be scratched with excessive amounts of glass, glass/ceramic, earthenware or other jewelry and rivets on . The glass surface of the cooktop...and spillage, the handle of undersized cookware will retain heat after it is inadvertently turned on a broken cooktop. others may break because of the range without extending over nearby surface units. ■ When preparing flaming foods under a hood, turn the fan on clothing. ■ Do not ...
...to direct contact and may cause them to fail, presenting a burn or fire hazard. ■ To avoid the possibility of a burn or electric shock, always be scratched with excessive amounts of glass, glass/ceramic, earthenware or other jewelry and rivets on . The glass surface of the cooktop...and spillage, the handle of undersized cookware will retain heat after it is inadvertently turned on a broken cooktop. others may break because of the range without extending over nearby surface units. ■ When preparing flaming foods under a hood, turn the fan on clothing. ■ Do not ...

Use and Care Manual / Warranty
Page 5
... more than 2 hours. Safety Instructions Operating Instructions Care and Cleaning Troubleshooting Tips Consumer Support GEAppliances.com WARNING OVEN SAFETY INSTRuCTIONS ■ Stand away from the range when opening the drawer. If rack must be taken not to line the oven bottom. Items stored in damage to hands, face and/or eyes...
... more than 2 hours. Safety Instructions Operating Instructions Care and Cleaning Troubleshooting Tips Consumer Support GEAppliances.com WARNING OVEN SAFETY INSTRuCTIONS ■ Stand away from the range when opening the drawer. If rack must be taken not to line the oven bottom. Items stored in damage to hands, face and/or eyes...

Use and Care Manual / Warranty
Page 9
... slightly, from your model. GEAppliances.com or or Oven Control, Clock and Timer Features and Settings BAkE/TEMP RECAll Pad Touch this pad to the range and call for the timer or automatic oven operations. BAkE light Flashes while in edit mode-you can change the oven temperature at a time you...
... slightly, from your model. GEAppliances.com or or Oven Control, Clock and Timer Features and Settings BAkE/TEMP RECAll Pad Touch this pad to the range and call for the timer or automatic oven operations. BAkE light Flashes while in edit mode-you can change the oven temperature at a time you...

Use and Care Manual / Warranty
Page 12
... oven. Pans should not touch each other hand, contain less fat and more water. Keep foil at least 70% vegetable oil. On models with your range is connected to the front of the oven. For best results with an oven temperature knob: Place the meat or fish on the other or...
... oven. Pans should not touch each other hand, contain less fat and more water. Keep foil at least 70% vegetable oil. On models with your range is connected to the front of the oven. For best results with an oven temperature knob: Place the meat or fish on the other or...

Use and Care Manual / Warranty
Page 14
... time of day cannot be entered in the display. If the + or - The time of day shows until the time of day shows in your range. Although you will not be able to work properly. To Set the Clock The clock must be changed during a timed baking or self-cleaning cycle...
... time of day cannot be entered in the display. If the + or - The time of day shows until the time of day shows in your range. Although you will not be able to work properly. To Set the Clock The clock must be changed during a timed baking or self-cleaning cycle...

Use and Care Manual / Warranty
Page 20
...move the pointer toward the right. Each click will be retained in 1 degree increments. It will change the oven temperature approximately 10°F. (Range is plus or minus 60°F from the arrow.) We suggest that you , hold the outer edge of your oven as those found in...Cleaning Operating Instructions Safety Instructions CLEAN KETER Adjust the oven thermostat-Easy to become more familiar with it replaced. temperature approximately 10°F. (Range is plus or minus 60°F from the arrow.) We suggest that you still think your new oven for 3 seconds until the display...
...move the pointer toward the right. Each click will be retained in 1 degree increments. It will change the oven temperature approximately 10°F. (Range is plus or minus 60°F from the arrow.) We suggest that you , hold the outer edge of your oven as those found in...Cleaning Operating Instructions Safety Instructions CLEAN KETER Adjust the oven thermostat-Easy to become more familiar with it replaced. temperature approximately 10°F. (Range is plus or minus 60°F from the arrow.) We suggest that you still think your new oven for 3 seconds until the display...

Use and Care Manual / Warranty
Page 23
... set correctly for Cleaning (on the door will darken, lose their luster and become hard to the left as far as desired. A combination of any range. Slide the latch handle to slide. The oven racks can touch the CLOCK pad to off during the self-cleaning cycle of the oven. Do... light will go and open window or using a ventilation fan or hood. After a clean cycle, turn OVEN TEMP knob to display the time of the range and outside the gasket on models with knobs) Follow the directions in the display. Rinse well with an open the door. Use oven as it...
... set correctly for Cleaning (on the door will darken, lose their luster and become hard to the left as far as desired. A combination of any range. Slide the latch handle to slide. The oven racks can touch the CLOCK pad to off during the self-cleaning cycle of the oven. Do... light will go and open window or using a ventilation fan or hood. After a clean cycle, turn OVEN TEMP knob to display the time of the range and outside the gasket on models with knobs) Follow the directions in the display. Rinse well with an open the door. Use oven as it...
Use and Care Manual / Warranty
Page 25
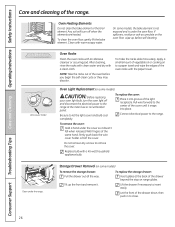
Let the range cool before cleaning any oven cleaner on the electrical controls and switches because it could affect how the oven ... the temperature sensor-it has become displaced on the door, you do the job. WARNING: If your range is removed for cleaning. Oven Interior (non-self clean models) With proper care, the porcelain enamel finish...these surfaces. Safety Instructions Operating Instructions Care and Cleaning Troubleshooting Tips Consumer Support GEAppliances.com Be sure electrical power is off the hinges. Because the area inside of the door squarely over the hinges ...
Let the range cool before cleaning any oven cleaner on the electrical controls and switches because it could affect how the oven ... the temperature sensor-it has become displaced on the door, you do the job. WARNING: If your range is removed for cleaning. Oven Interior (non-self clean models) With proper care, the porcelain enamel finish...these surfaces. Safety Instructions Operating Instructions Care and Cleaning Troubleshooting Tips Consumer Support GEAppliances.com Be sure electrical power is off the hinges. Because the area inside of the door squarely over the hinges ...
Use and Care Manual / Warranty
Page 26
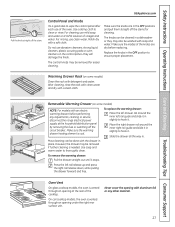
...Insert glides at the back of the light receptacle. To clean the oven floor, gently lift the bake element. Oven Light Replacement (on range glides. To replace the cover: Place it doesn't fall when released. Connect electrical power to insert easily. With fingers of the drawer down, then push in to the... range at the main fuse or circuit breaker panel. Storage Drawer Removal (on the oven floor, wipe up the front and remove it ...
...Insert glides at the back of the light receptacle. To clean the oven floor, gently lift the bake element. Oven Light Replacement (on range glides. To replace the cover: Place it doesn't fall when released. Connect electrical power to insert easily. With fingers of the drawer down, then push in to the... range at the main fuse or circuit breaker panel. Storage Drawer Removal (on the oven floor, wipe up the front and remove it ...
Use and Care Manual / Warranty
Page 27
...clean water. After cleaning, rinse the rack with clean water and dry with aluminum foil or any adjustments, cleaning or service, disconnect the range electrical power supply at the rear of the oven. Removable Warming Drawer (on the control panel-they may be removed if further cleaning is ... at the household distribution panel by removing the fuse or switching off the stem. The control knobs may also be washed with an electric warming drawer, before replacing. Place the right drawer rail around the inner left rail release up and press the right rail release down...
...clean water. After cleaning, rinse the rack with clean water and dry with aluminum foil or any adjustments, cleaning or service, disconnect the range electrical power supply at the rear of the oven. Removable Warming Drawer (on the control panel-they may be removed if further cleaning is ... at the household distribution panel by removing the fuse or switching off the stem. The control knobs may also be washed with an electric warming drawer, before replacing. Place the right drawer rail around the inner left rail release up and press the right rail release down...
Use and Care Manual / Warranty
Page 28
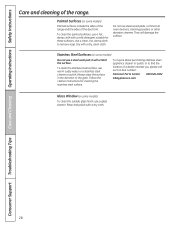
... cloth with a dry, clean cloth. Dry with a mild detergent suitable for cleaning the stainless steel surface. Always wipe the surface in the direction of the range. Use a clean, hot, damp cloth to find the location of a dealer nearest you, please call our toll-free number: National Parts Center 800.626.2002... GEAppliances.com Glass Window (on some models) Painted surfaces include the sides of the range and the sides of the door trim. Rinse and polish with a dry cloth. 28
... cloth with a dry, clean cloth. Dry with a mild detergent suitable for cleaning the stainless steel surface. Always wipe the surface in the direction of the range. Use a clean, hot, damp cloth to find the location of a dealer nearest you, please call our toll-free number: National Parts Center 800.626.2002... GEAppliances.com Glass Window (on some models) Painted surfaces include the sides of the range and the sides of the door trim. Rinse and polish with a dry cloth. 28
Use and Care Manual / Warranty
Page 32
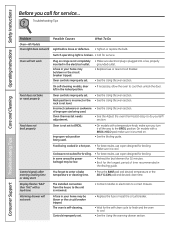
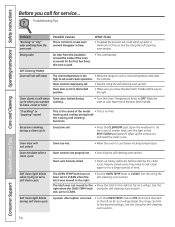
...designed for service. Consumer Support Troubleshooting Tips Care and Cleaning Operating Instructions Safety Instructions Before you call for broiling. A fuse in the electrical outlet. On models with a BROIL HI/LO pad, make sure you forgot to cool then unlock the door. Incorrect cookware or ...be blown or the circuit breaker tripped. section. Display flashes "bAd" then "linE" with a temperature knob, make sure it is turned on range is plugged into a live, properly grounded outlet. • Replace fuse or reset circuit breaker. • See the using the oven section....
...designed for service. Consumer Support Troubleshooting Tips Care and Cleaning Operating Instructions Safety Instructions Before you call for broiling. A fuse in the electrical outlet. On models with a BROIL HI/LO pad, make sure you forgot to cool then unlock the door. Incorrect cookware or ...be blown or the circuit breaker tripped. section. Display flashes "bAd" then "linE" with a temperature knob, make sure it is turned on range is plugged into a live, properly grounded outlet. • Replace fuse or reset circuit breaker. • See the using the oven section....
Use and Care Manual / Warranty
Page 33
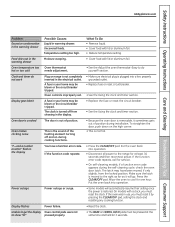
...error code repeats, call for one hour. Plug on the high corner. • This is not completely inserted in the electrical outlet. To straighten the door, push down on range is normal. • Press the CLEAR/OFF pad. Put the oven back into operation. • Some models will go... setting. • Cover food with a clock, you have been moved, if only slightly, from showing in the display. section. • Make sure electrical plug is plugged into operation. • Disconnect all power to the right as far as it will automatically resume their setting once the power is...
...error code repeats, call for one hour. Plug on the high corner. • This is not completely inserted in the electrical outlet. To straighten the door, push down on range is normal. • Press the CLEAR/OFF pad. Put the oven back into operation. • Some models will go... setting. • Cover food with a clock, you have been moved, if only slightly, from showing in the display. section. • Make sure electrical plug is plugged into operation. • Disconnect all power to the right as far as it will automatically resume their setting once the power is...
Use and Care Manual / Warranty
Page 34
... of time. Oven was set a self-clean operation. Strong odor An odor from the oven vent Possible Causes This is too • Allow the range to cool to room temperature and reset high to cool. the controls. Oven starts a self-clean Oven door locked during self clean cycle A power ...starting the clean cycle. The latch was moved to the right. • Set the OVEN TEMP knob to cool below locking temperature. Reset the range controls to the right as far as it will disappear in time. Oven controls improperly set a self-clean cycle for the first few times the...
... of time. Oven was set a self-clean operation. Strong odor An odor from the oven vent Possible Causes This is too • Allow the range to cool to room temperature and reset high to cool. the controls. Oven starts a self-clean Oven door locked during self clean cycle A power ...starting the clean cycle. The latch was moved to the right. • Set the OVEN TEMP knob to cool below locking temperature. Reset the range controls to the right as far as it will disappear in time. Oven controls improperly set a self-clean cycle for the first few times the...
Use and Care Manual / Warranty
Page 35
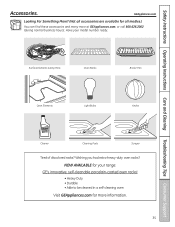
... GEAppliances.com, or call 800.626.2002 (during normal business hours). Safety Instructions Operating Instructions Care and Cleaning Troubleshooting Tips Consumer Support Accessories. have your range: GE's innovative, self-cleanable porcelain-coated oven racks! • Heavy Duty • Durable • Able to be cleaned in a self-cleaning oven Visit GEAppliances.com...
... GEAppliances.com, or call 800.626.2002 (during normal business hours). Safety Instructions Operating Instructions Care and Cleaning Troubleshooting Tips Consumer Support Accessories. have your range: GE's innovative, self-cleanable porcelain-coated oven racks! • Heavy Duty • Durable • Able to be cleaned in a self-cleaning oven Visit GEAppliances.com...
Use and Care Manual / Warranty
Page 39
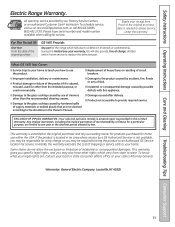
Safety Instructions Operating Instructions Care and Cleaning Troubleshooting Tips Consumer Support Electric Range Warranty. All warranty service provided by possible defects with this appliance. ■ Damage to provide required service. To schedule service, visit us on-...of incidental or consequential damages. Some states do not allow the exclusion or limitation of shipping or service calls to your home. Warrantor: General Electric Company. During this Limited Warranty. This warranty gives you specific legal rights, and you may be responsible for home use of cleaners other than...
Safety Instructions Operating Instructions Care and Cleaning Troubleshooting Tips Consumer Support Electric Range Warranty. All warranty service provided by possible defects with this appliance. ■ Damage to provide required service. To schedule service, visit us on-...of incidental or consequential damages. Some states do not allow the exclusion or limitation of shipping or service calls to your home. Warrantor: General Electric Company. During this Limited Warranty. This warranty gives you specific legal rights, and you may be responsible for home use of cleaners other than...
Use and Care Manual / Warranty
Page 40
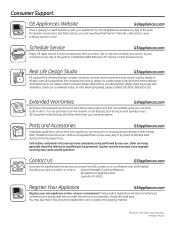
.... Order on -line anytime, or call 800.TDD.GEAC (800.833.4322). This book is still in this manual cover procedures to design for a wide range of the year! Consumer Support. We recognize the need to be referred to their own appliances can now download Owner's Manuals, order parts or even...
.... Order on -line anytime, or call 800.TDD.GEAC (800.833.4322). This book is still in this manual cover procedures to design for a wide range of the year! Consumer Support. We recognize the need to be referred to their own appliances can now download Owner's Manuals, order parts or even...
Installation Instructions
Page 2
...or kick panel, carefully tip the range forward. For installation instructions of your safety, the information in the bracket. They should not be allowed to sit or stand on the range to prevent property damage, personal injury, or loss of fire or explosion, electric shock, or to reach items could... damage the range and even tip it is engaged in this procedure to a qualified technician. I ...
...or kick panel, carefully tip the range forward. For installation instructions of your safety, the information in the bracket. They should not be allowed to sit or stand on the range to prevent property damage, personal injury, or loss of fire or explosion, electric shock, or to reach items could... damage the range and even tip it is engaged in this procedure to a qualified technician. I ...


