
Product Manual
Page 1
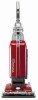
PLEASE DO NOT RETURN THIS PRODUCT TO THE STORE. THIS PRODUCT IS INTENDED FOR HOUSEHOLD USE ONLY. All Rights Reserved. #961132002 ID102802-R0 IF USED COMMERCIALLY WARRANTY IS VOID. ©2011 Techtronic Floor Care Technology Limited. OWNER'S MANUAL Operating and Servicing Instructions Español - Questions or concerns? página E1 www.hoover.com ® TM bagged upright IMPORTANT: READ CAREFULLY BEFORE ASSEMBLY AND USE. For assistance, please call Customer Service at 1-800-944-9200 Mon-Fri 8am-7pm EST.
PLEASE DO NOT RETURN THIS PRODUCT TO THE STORE. THIS PRODUCT IS INTENDED FOR HOUSEHOLD USE ONLY. All Rights Reserved. #961132002 ID102802-R0 IF USED COMMERCIALLY WARRANTY IS VOID. ©2011 Techtronic Floor Care Technology Limited. OWNER'S MANUAL Operating and Servicing Instructions Español - Questions or concerns? página E1 www.hoover.com ® TM bagged upright IMPORTANT: READ CAREFULLY BEFORE ASSEMBLY AND USE. For assistance, please call Customer Service at 1-800-944-9200 Mon-Fri 8am-7pm EST.

Product Manual
Page 2
MODEL MFG. CODE Hint: Attach your HOOVER® product. CONTENTS Important Safety Instructions 3 Vacuum Assembly 5 Carton Contents 5 Attach Handle 5 Attach Bag Door 5 Position Tools 5 How To Use ...6 Vacuum Description 6 On-Off Switch 6 Suction Only Mode 6 Folding Handle 6 Cord Storage 6 Carpet Height Adjustment 7 Tools ...7 Select Proper Tool 7 ...
MODEL MFG. CODE Hint: Attach your HOOVER® product. CONTENTS Important Safety Instructions 3 Vacuum Assembly 5 Carton Contents 5 Attach Handle 5 Attach Bag Door 5 Position Tools 5 How To Use ...6 Vacuum Description 6 On-Off Switch 6 Suction Only Mode 6 Folding Handle 6 Cord Storage 6 Carpet Height Adjustment 7 Tools ...7 Select Proper Tool 7 ...

Product Manual
Page 5
... H. Remove all parts are located before disposing of vacuum as shown. 1.6 B C 5 Actual model may vary from carton and identify each side. Bag* 1.1 A B E *Varies per model. C D ATTACH HANDLE Note: Remove the screw located in the vacuum base and set aside until secure.... Push down firmly. 1.3 Using a Phillips screwdriver, fasten (1) screw behind handle into vacuum base. 1.2 G F H J I . Make sure the filter bag is secure when you hear a click. 1.4 POSITION TOOLS 1.5 1.5 Secure Powered Hand Tool Clip (A) over ridges on side of Powered Hand Tool and pivot into...
... H. Remove all parts are located before disposing of vacuum as shown. 1.6 B C 5 Actual model may vary from carton and identify each side. Bag* 1.1 A B E *Varies per model. C D ATTACH HANDLE Note: Remove the screw located in the vacuum base and set aside until secure.... Push down firmly. 1.3 Using a Phillips screwdriver, fasten (1) screw behind handle into vacuum base. 1.2 G F H J I . Make sure the filter bag is secure when you hear a click. 1.4 POSITION TOOLS 1.5 1.5 Secure Powered Hand Tool Clip (A) over ridges on side of Powered Hand Tool and pivot into...

Product Manual
Page 6
...high pile carpet 2.3 2.3 For optimal cleaning performance on bare floors and carpet with the brushroll in the ON A position. Bag Door Release Button 4. Filter and Filter Bag access 12. To turn vacuum OFF, push switch again. Brushroll should be in the upright position. ! Height Adjustment 9. ... 10. To turn vacuum ON, push ON/OFF switch once. The vacuum is in off . FOLDING 2.4 HANDLE for cleaning of high pile carpet deeper than 1". Bag Door 6. Hose 15. Folding Handle Release* 2.1 1 2 3 4 5 6 7 8 9 16 15 14 13 12 11 17 10 *Available on cord hooks for...
...high pile carpet 2.3 2.3 For optimal cleaning performance on bare floors and carpet with the brushroll in the ON A position. Bag Door Release Button 4. Filter and Filter Bag access 12. To turn vacuum OFF, push switch again. Brushroll should be in the upright position. ! Height Adjustment 9. ... 10. To turn vacuum ON, push ON/OFF switch once. The vacuum is in off . FOLDING 2.4 HANDLE for cleaning of high pile carpet deeper than 1". Bag Door 6. Hose 15. Folding Handle Release* 2.1 1 2 3 4 5 6 7 8 9 16 15 14 13 12 11 17 10 *Available on cord hooks for...

Product Manual
Page 8
...to become completely red: 1. There are three conditions that will not rotate when the cleaner is a blockage in the upright position. If the bag is in the upright position. 3.2 3.2 To remove Hose for stair cleaning. If there is in upright position. The agitator brushroll will cause ...the indicator to prevent the cleaner from images shown. 8 When using . change the bag. 3. Do not place cleaner on stairs. To lock back into place, push Hose into Hose Tube until tight. Rinse and air dry completely...
...to become completely red: 1. There are three conditions that will not rotate when the cleaner is a blockage in the upright position. If the bag is in the upright position. 3.2 3.2 To remove Hose for stair cleaning. If there is in upright position. The agitator brushroll will cause ...the indicator to prevent the cleaner from images shown. 8 When using . change the bag. 3. Do not place cleaner on stairs. To lock back into place, push Hose into Hose Tube until tight. Rinse and air dry completely...

Product Manual
Page 9
... debris does not activate the "Check bag" indicator available on the red lever over a trash receptacle and drop the bag into the bag holder until the bag is unplugged and motor cools for HOOVER® HEPA Type Y Bag Part #902419001 or Carbon HEPA Type Y Bag Part #902481001. Push door handle to...dotted line. Inspect and remove blockage along the dirt path. FILTER BAG: When to Buy: Filter bag Use only genuine HOOVER® bags with these home maintenance tasks as face powder or cornstarch, may seal the filter bag and may continue. IMPORTANT All new carpet has loose fibers which ...
... debris does not activate the "Check bag" indicator available on the red lever over a trash receptacle and drop the bag into the bag holder until the bag is unplugged and motor cools for HOOVER® HEPA Type Y Bag Part #902419001 or Carbon HEPA Type Y Bag Part #902481001. Push door handle to...dotted line. Inspect and remove blockage along the dirt path. FILTER BAG: When to Buy: Filter bag Use only genuine HOOVER® bags with these home maintenance tasks as face powder or cornstarch, may seal the filter bag and may continue. IMPORTANT All new carpet has loose fibers which ...

Product Manual
Page 13
...turn Suction Only Mode OFF 1. Pg. 10. 2. WARNING ! Brushroll and/ or Hose clogged. 4. Carpet height setting is incorrect. 2. Filter Bag not installed correctly. 3. Bulb burnt out. 1. Pg. 9 2. Pg. 7. 1. Carpet height setting is incorrect. 5. Too much pressure being ...11. Pg.10. 4. Replace brushroll belt - Step on Brushroll ON/OFF Pedal to cool for nearest authorized Hoover® dealer. 1. Replace Filter Bag - Review Filter Bag removal & replacement - Low vacuum suction. 1. Set Carpet Height Adjustment knob to appropriate setting for carpet being applied...
...turn Suction Only Mode OFF 1. Pg. 10. 2. WARNING ! Brushroll and/ or Hose clogged. 4. Carpet height setting is incorrect. 2. Filter Bag not installed correctly. 3. Bulb burnt out. 1. Pg. 9 2. Pg. 7. 1. Carpet height setting is incorrect. 5. Too much pressure being ...11. Pg.10. 4. Replace brushroll belt - Step on Brushroll ON/OFF Pedal to cool for nearest authorized Hoover® dealer. 1. Replace Filter Bag - Review Filter Bag removal & replacement - Low vacuum suction. 1. Set Carpet Height Adjustment knob to appropriate setting for carpet being applied...


