Hoover SH40040DI Support and Manuals
Get Help and Manuals for this Hoover item
View All Support Options Below
Free Hoover SH40040DI manuals!
Problems with Hoover SH40040DI?
Ask a Question
Free Hoover SH40040DI manuals!
Problems with Hoover SH40040DI?
Ask a Question
Popular Hoover SH40040DI Manual Pages
Manual - Page 1
... TO THE STORE. All rights reserved. #961134001 ID101234-R3 For assistance, please call Customer Service at 1-800-944-9200 Mon-Fri 8am-7pm EST.
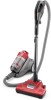
THIS PRODUCT IS INTENDED FOR HOUSEHOLD USE ONLY. IF USED COMMERCIALLY WARRANTY IS VOID.
©2010 Techtronic Floor Care Technology Limited.
Owner's Manual
Operating and Servicing Instructions
Español -
Manual - Page 2
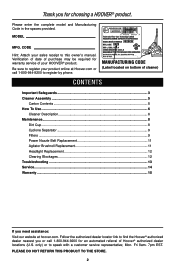
... required for choosing a HOOVER® product. Please enter the complete model and Manufacturing Code in the spaces provided. Thank you for warranty service of cleaner)
Contents
Important Safeguards 3 Cleaner Assembly...5
Carton Contents...5 How To Use...6
Cleaner Description 6 Maintenance...8
Dirt Cup...8 Cyclone Separator 9 Filters...9 Power Nozzle Belt Replacement 11 Agitator Brushroll...
Manual - Page 3
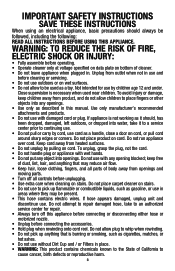
... hair, loose clothing, fingers, and all parts of cleaner. • Do not leave appliance when plugged in use and
before unplugging. • Use extra care when cleaning on cord. Do not attempt to repair damaged hose, take it should always be
followed, including the following: READ ALL INSTRUCTIONS BEFORE USING THIS APPLIANCE. Use only...
Manual - Page 4
.... Do not change the plug in the outlet, reverse the plug. Do not expose machine to freezing temperatures. • Do not use sharp objects to install the proper outlet. If the plug does not fit fully in any way.
4 This plug will fit in a dry place.
Manual - Page 5
... on wand to disconnect from nozzle.
5 Actual model may vary from
cleaner, press release buttons (C) on front of Wand firmly
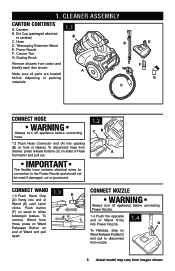
into...parts are located
before connecting hose.
1.2
CB
1.2 Push Hose Connector end (A) into opening
(B) on sides of packing
materials.
Connect Nozzle
WARNING
Always turn off appliance before connecting Power Nozzle.
1.4 1.4 Push the opposite
end of cleaner...
Manual - Page 6

...
2.3 Use the carry handle located on the power cord indicates the recommended cord length. HOW TO USE
Cleaner Description
1. Dirt Cup Release Button
7. Post-Motor Filter Cover
10. Cyclone Separator
2.1 1
(Located inside of the vacuum cleaner. Max Fill Line
7 4
10 8 9
CANISTER BASE
6 5
2 3
Max
11 13 DIRT Cup
ON-OFF switch
2.2 Insert the plug...
Manual - Page 7
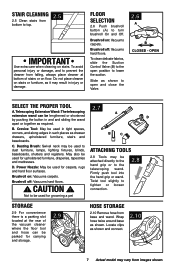
... Tool: May be used to dust furniture, lamps, lighting fixtures, blinds, baseboards, shutters and registers.
CAUTION ! Do not place cleaner on stairs. Brushroll on : Vacuums carpets. OPEN
Select the Proper Tool
2.7
A.
Brushroll on : Vacuums carpets. Twist tool slightly to tighten or loosen connection.
2.8
Not to open position to turn brushroll On and Off.
Power Nozzle...
Manual - Page 8

... to open and empty dirt cup. To reduce the risk of your cleaner needs servicing. Any other servicing should be done by an authorized service representative.
! Inspect and remove blockage along the dirt path.
Do not use and care of personal injury, unplug vacuum before the dirt reaches the fill line.
! How to Empty
3.1 Press...
Manual - Page 9
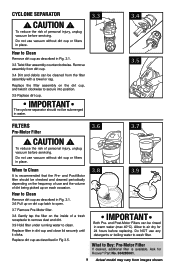
...Hoover® Part No. 304285001.
9 Actual model may vary from images shown. and Post-Motor Filters can be submerged in Fig 3.5.
What to secure into position.
3.5 Replace dirt cup. CAUTION ! Do not use vacuum...inside of personal injury, unplug vacuum before servicing. CAUTION !
Remove assembly from the filter assembly with a towel or rag. Replace filter in warm water (max ...
Manual - Page 10
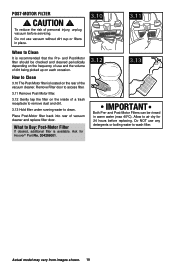
..., unplug vacuum before replacing. CAUTION !
To reduce the risk of vacuum cleaner and replace filter door. Remove Filter door to access filter.
3.11 Remove Post-Motor filter.
3.12 Gently tap the filter on the rear of a trash receptacle to remove dust and dirt.
3.13 Hold filter under running water to air dry for Hoover® Part No...
Manual - Page 11

... and may vary from moving
!
! Agitator brushroll replacement
When to Replace
When agitator brushroll brushes are similar in this cleaner and is important for HOOVER® part no .
562673001 when a belt replacement is in good condition. CAUTION To reduce the risk of agitator Brushroll. It has been designed specifically for use in shape and size, but is...
Manual - Page 12
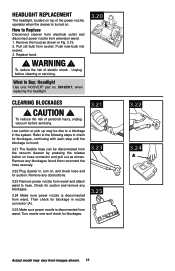
... and attach wand to Buy: Headlight
Use only HOOVER® part no. 59135317, when replacing the headlight
3.20
Clearing blockages
! Check for suction. Push new bulb into socket. 3. Remove the hood as shown in nozzle connector (A).
3.25 Make sure power nozzle is disconnected from the vacuum cleaner by pressing the release button on hose connector...
Manual - Page 13
....
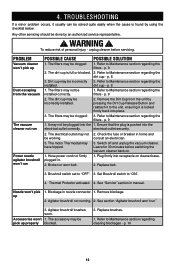
1. TROUBLESHOOTING
If a minor problem occurs, it to Maintenance section regarding the filters - PROBLEM
Vacuum cleaner won 't pick up properly blocked.
3. Refer to Maintenance section regarding the dirt cup - The filters may be plugged into receptacle on .
1. WARNING ! Refer to Maintenance section regarding the
installed. Brushroll switch set to Maintenance...
Manual - Page 14
... Pages under "Vacuum Cleaners" or "Household". • Visit our website at hoover.com (U.S. Customers) or hoover.ca (Canadian customers). This will only result in Glenwillow for service. Service
To obtain approved Hoover® service and genuine Hoover® parts, locate the nearest Authorized Hoover® Warranty Service Dealer (Depot) by the complete model number when requesting...
Manual - Page 15
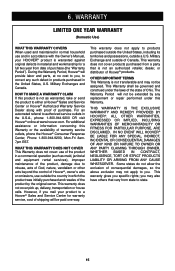
... Warranty Service Dealer along with the Owner's Manual, your product to a Hoover® Sales and Service Center for a full two year from state to products purchased outside the United States, including its territories and possessions, outside of purchase.
However, if you .
THIS WARRANTY IS THE EXCLUSIVE WARRANTY AND REMEDY PROVIDED BY HOOVER®. you specific rights...
Hoover SH40040DI Reviews
We have not received any reviews for Hoover yet.