
Manual
Page 2
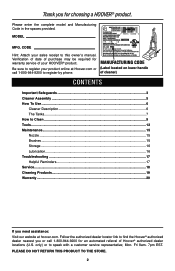
...of your HOOVER® product. Verification of date of purchase may be required for warranty service of cleaner) Contents Important Safeguards 3 Cleaner Assembly...5 How To Use...6 Cleaner Description 6 The Tanks...7 How to the store. 2 Please do not return this owner's manual. Be ...only) or to register by phone. Thank you for an automated referral of Hoover® authorized dealer locations (U.S. Model MFG. Fri 8am- 7pm EST. CODE Hint: Attach your product online at hoover.com. Mon- Please enter the complete model and Manufacturing Code in the spaces provided.
...of your HOOVER® product. Verification of date of purchase may be required for warranty service of cleaner) Contents Important Safeguards 3 Cleaner Assembly...5 How To Use...6 Cleaner Description 6 The Tanks...7 How to the store. 2 Please do not return this owner's manual. Be ...only) or to register by phone. Thank you for an automated referral of Hoover® authorized dealer locations (U.S. Model MFG. Fri 8am- 7pm EST. CODE Hint: Attach your product online at hoover.com. Mon- Please enter the complete model and Manufacturing Code in the spaces provided.
Manual
Page 7
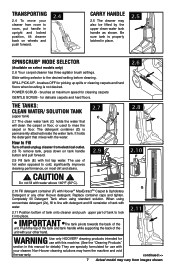
...cleaning. The use with this machine. (See the "Cleaning Products" section in this manual for details) They are specially formulated for use of tank to cold, significantly improves cleaning performance, on select models only) 2.6 Your carpet cleaner has three agitator brush settings. Do not fill with ... latched in upright and locked position, tilt cleaner back on tank handle button and pull forward. 2.9 2.9 Fill tank (E) with your other Hoover detergent. POWER SCRUB - Be sure tank is not desired. Transporting 2.4 To move your cleaner from room to Fill Turn off and unplug ...
...cleaning. The use with this machine. (See the "Cleaning Products" section in this manual for details) They are specially formulated for use of tank to cold, significantly improves cleaning performance, on select models only) 2.6 Your carpet cleaner has three agitator brush settings. Do not fill with ... latched in upright and locked position, tilt cleaner back on tank handle button and pull forward. 2.9 2.9 Fill tank (E) with your other Hoover detergent. POWER SCRUB - Be sure tank is not desired. Transporting 2.4 To move your cleaner from room to Fill Turn off and unplug ...


