Product Manual
Page 3
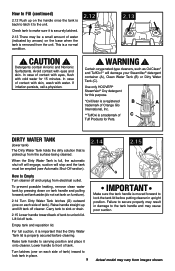
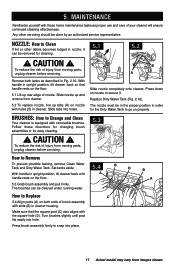
... use only Hoover® cleaning products intended for its intended use as described in areas where they may cause hazards. • The use with this Appliance. (See Cleaning Products section of... should , has been dropped, damaged, left outdoors, or dropped into water, take it to an Authorized Hoover® Warranty Service Dealer. • Close supervision is necessary when any... to run appliance over floor electrical outlets. • Do not use without tanks in use. IMPORTANT SAFETY INSTRUCTIONS SAVE THESE INSTRUCTIONS When using detergents and other cleaners with this machine. &#...
... use only Hoover® cleaning products intended for its intended use as described in areas where they may cause hazards. • The use with this Appliance. (See Cleaning Products section of... should , has been dropped, damaged, left outdoors, or dropped into water, take it to an Authorized Hoover® Warranty Service Dealer. • Close supervision is necessary when any... to run appliance over floor electrical outlets. • Do not use without tanks in use. IMPORTANT SAFETY INSTRUCTIONS SAVE THESE INSTRUCTIONS When using detergents and other cleaners with this machine. &#...
Product Manual
Page 7
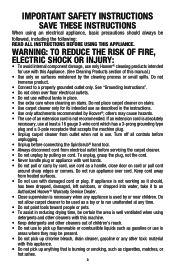
.../OFF Switch 4. 2. CAUTION ! 24. Nozzle 17. USING THIS MACHINE ON HARD FLOORS by placing a hand above the upper clean water tank handle as shown. 2.5 7 Actual model may be lifted by visiting www.hoover.com, or your cleaner from images shown. DAMAGE YOUR FLOOR. To turn cleaner ON, push switch down. Carry Handle 6 7. Handle does not lock into a single...
.../OFF Switch 4. 2. CAUTION ! 24. Nozzle 17. USING THIS MACHINE ON HARD FLOORS by placing a hand above the upper clean water tank handle as shown. 2.5 7 Actual model may be lifted by visiting www.hoover.com, or your cleaner from images shown. DAMAGE YOUR FLOOR. To turn cleaner ON, push switch down. Carry Handle 6 7. Handle does not lock into a single...
Product Manual
Page 8
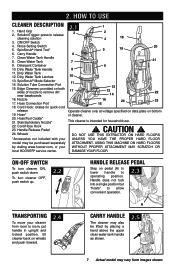
... unit. 2.11 IMPORTANT The tank pivots towards the back of the tank to the desired setting before cleaning. 2.6 The tanks: 2.7 2.8 E Clean Water Solution Tank D (upper tank) C 2.7 The clean water tank (C) holds the water that mixes with hot tap water. ! CAUTION ! Do not fill with water above 140°F (60°C). 2.9 - 2.10 Fill detergent container (F) with your SteamVac® cleaner. Non-Hoover® cleaning solutions may vary from...
... unit. 2.11 IMPORTANT The tank pivots towards the back of the tank to the desired setting before cleaning. 2.6 The tanks: 2.7 2.8 E Clean Water Solution Tank D (upper tank) C 2.7 The clean water tank (C) holds the water that mixes with hot tap water. ! CAUTION ! Do not fill with water above 140°F (60°C). 2.9 - 2.10 Fill detergent container (F) with your SteamVac® cleaner. Non-Hoover® cleaning solutions may vary from...
Product Manual
Page 9
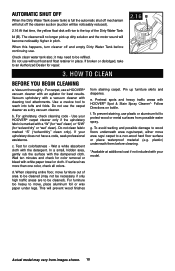
... suction. In case of tank to front of contact with eyes, flush with eyes and skin. Lower handle to unlock lid. Dirty Water Tank (lower tank) The Dirty Water Tank holds the dirty solution that the Dirty Water Tank lid is moved forward to Empty Turn cleaner off tank. For full suction, it onto cleaner. G How to lock the tank lid before cleaning.
... suction. In case of tank to front of contact with eyes, flush with eyes and skin. Lower handle to unlock lid. Dirty Water Tank (lower tank) The Dirty Water Tank holds the dirty solution that the Dirty Water Tank lid is moved forward to Empty Turn cleaner off tank. For full suction, it onto cleaner. G How to lock the tank lid before cleaning.
Product Manual
Page 10
... with a vacuum cleaner with your model. Wait ten minutes and check for colorfastness - When cleaning entire floor, move furniture out of the Dirty Water Tank lid (B). Follow Directions on bottle. g. To avoid wetting and possible damage to wood floors underneath area rugs/carpet, either move , place aluminum foil or wax paper under legs. Check clean water tank also; Use...
... with a vacuum cleaner with your model. Wait ten minutes and check for colorfastness - When cleaning entire floor, move furniture out of the Dirty Water Tank lid (B). Follow Directions on bottle. g. To avoid wetting and possible damage to wood floors underneath area rugs/carpet, either move , place aluminum foil or wax paper under legs. Check clean water tank also; Use...
Product Manual
Page 11
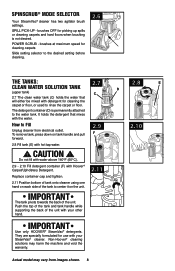
...Clean Water Tank according to RINSE. Do not clean over one wet stroke). Turn cleaner ON. 3.2 Squeeze trigger to instructions for both forward and reverse strokes. Keep nozzle flat on page 13. Always end with Hoover® detergent according to apply cleaning solution and slowly push cleaner... forward (equals one wet stroke). Release trigger and slowly push cleaner forward over area just sprayed with more than 4 wet strokes over floor electrical outlets. For...
...Clean Water Tank according to RINSE. Do not clean over one wet stroke). Turn cleaner ON. 3.2 Squeeze trigger to instructions for both forward and reverse strokes. Keep nozzle flat on page 13. Always end with Hoover® detergent according to apply cleaning solution and slowly push cleaner... forward (equals one wet stroke). Release trigger and slowly push cleaner forward over area just sprayed with more than 4 wet strokes over floor electrical outlets. For...
Product Manual
Page 12
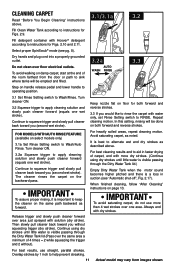
... nozzle just above the spill and suction up flammable or combustible liquids or chemicals. Repeat with clean water and let air dry. Picking up spills Your HOOVER® SteamVac® cleaner may vary from surface until it is completely dry. For best results, pick up spills immediately...cleaner. If the spill remains, place either the stair/ upholstery nozzle or floor nozzle with suction only. Although no cleaning solution can completely remove all spots, they can be used to walk on damp carpet, place towels or white cloths on top of the carpet. Rinse the Dirty Water Tank...
... nozzle just above the spill and suction up flammable or combustible liquids or chemicals. Repeat with clean water and let air dry. Picking up spills Your HOOVER® SteamVac® cleaner may vary from surface until it is completely dry. For best results, pick up spills immediately...cleaner. If the spill remains, place either the stair/ upholstery nozzle or floor nozzle with suction only. Although no cleaning solution can completely remove all spots, they can be used to walk on damp carpet, place towels or white cloths on top of the carpet. Rinse the Dirty Water Tank...

Product Manual
Page 15
...with HOOVER® detergent according to instructions for Figs. 2.9 to help prevent streaking. Hose length may vary from falling, use more dry strokes to end of carpet. End with more than 4 wet strokes over any one wet stroke). 4.9 4.10 A B Position tool against riser. Cleaning carpeted ... outlet. Empty Dirty Water Tank when the motor sound becomes higher pitched and there is in upright position. To prevent machine from images shown. It is completely dry before using the tool again. Do not place cleaner on page 10. If additional cleaning is necessary, wait ...
...with HOOVER® detergent according to instructions for Figs. 2.9 to help prevent streaking. Hose length may vary from falling, use more dry strokes to end of carpet. End with more than 4 wet strokes over any one wet stroke). 4.9 4.10 A B Position tool against riser. Cleaning carpeted ... outlet. Empty Dirty Water Tank when the motor sound becomes higher pitched and there is in upright position. To prevent machine from images shown. It is completely dry before using the tool again. Do not place cleaner on page 10. If additional cleaning is necessary, wait ...
Product Manual
Page 16
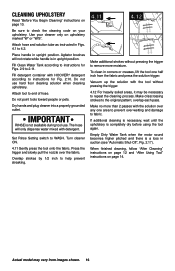
...to 2.11. Do not use . Vacuum up the solution with HOOVER® detergent according to instructions for Figs. 2.9 to 4.2. overlap each pass. Cleaning upholstery Read "Before You Begin Cleaning" instructions on upholstery marked "W" or "W/S". Use your upholstery. ...cleaning process. Empty Dirty Water Tank when the motor sound becomes higher pitched and there is not available during tool use hard floor cleaning solution when cleaning upholstery. Actual model may be necessary to the original pattern; IMPORTANT rinse is a loss in upright position. Dry hands and plug cleaner...
...to 2.11. Do not use . Vacuum up the solution with HOOVER® detergent according to instructions for Figs. 2.9 to 4.2. overlap each pass. Cleaning upholstery Read "Before You Begin Cleaning" instructions on upholstery marked "W" or "W/S". Use your upholstery. ...cleaning process. Empty Dirty Water Tank when the motor sound becomes higher pitched and there is not available during tool use hard floor cleaning solution when cleaning upholstery. Actual model may be necessary to the original pattern; IMPORTANT rinse is a loss in upright position. Dry hands and plug cleaner...
Product Manual
Page 17
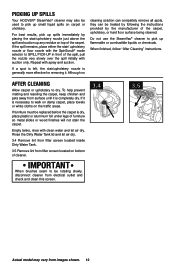
... the floor. 5.3 Grab brush assembly and pull firmly. CAUTION ! Replace Dirty Water Tank (Fig. 2.16). To reduce the risk of injury from moving parts, unplug cleaner before servicing. 5.3 How to Clean If lint or other servicing should be removed for cleaning. 5.1 5.2 ! Any other debris becomes lodged in cleaner. nozzle: How to Remove To prevent possible leaking, remove Clean Water Tank...
... the floor. 5.3 Grab brush assembly and pull firmly. CAUTION ! Replace Dirty Water Tank (Fig. 2.16). To reduce the risk of injury from moving parts, unplug cleaner before servicing. 5.3 How to Clean If lint or other servicing should be removed for cleaning. 5.1 5.2 ! Any other debris becomes lodged in cleaner. nozzle: How to Remove To prevent possible leaking, remove Clean Water Tank...
Product Manual
Page 18
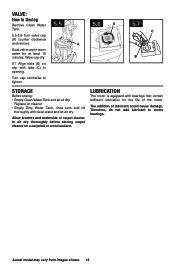
...tighten. 5.5 5.6 A A 5.7 C B Storage Before storing: • Empty Clean Water Tank and let air dry. valve: How to air dry thoroughly before storing carpet cleaner on cleaner. • Empty Dirty Water Tank, rinse tank and lid thoroughly with bearings that contain sufficient lubrication for at least 15 minutes....dry. 5.7 Align slots (B) on cap with tabs (C) in warm water for the life of the motor. Replace on a carpeted or wood surface. The addition of carpet cleaner to Unclog Remove Clean Water Tank. 5.5-5.6 Turn valve cap (A) counter clockwise and remove. Allow brushes ...
...tighten. 5.5 5.6 A A 5.7 C B Storage Before storing: • Empty Clean Water Tank and let air dry. valve: How to air dry thoroughly before storing carpet cleaner on cleaner. • Empty Dirty Water Tank, rinse tank and lid thoroughly with bearings that contain sufficient lubrication for at least 15 minutes....dry. 5.7 Align slots (B) on cap with tabs (C) in warm water for the life of the motor. Replace on a carpeted or wood surface. The addition of carpet cleaner to Unclog Remove Clean Water Tank. 5.5-5.6 Turn valve cap (A) counter clockwise and remove. Allow brushes ...
Product Manual
Page 19
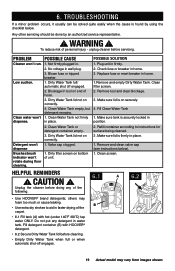
... POSSIBLE CAUSE Cleaner won 't rotate during floor cleaning. 1. CAUTION ! B • Use extra dry strokes to instructions for surface being cleaned. 3 .Make sure lid is securely locked in home. 1.Remove and empty Dirty Water Tank. Not firmly plugged in faster drying of unit. 1. Clean water won't dispense. 2. Make sure lid is found by an authorized service representative. ! Fill Clean Water Tank 1. Dirty...
... POSSIBLE CAUSE Cleaner won 't rotate during floor cleaning. 1. CAUTION ! B • Use extra dry strokes to instructions for surface being cleaned. 3 .Make sure lid is securely locked in home. 1.Remove and empty Dirty Water Tank. Not firmly plugged in faster drying of unit. 1. Clean water won't dispense. 2. Make sure lid is found by an authorized service representative. ! Fill Clean Water Tank 1. Dirty...


