Hoover F6212 Support and Manuals
Get Help and Manuals for this Hoover item

View All Support Options Below
Free Hoover F6212 manuals!
Problems with Hoover F6212?
Ask a Question
Free Hoover F6212 manuals!
Problems with Hoover F6212?
Ask a Question
Popular Hoover F6212 Manual Pages
Manual - Page 1
ENGLISH § pp. 1-14 ESPAÑOL § pág. 16-24 FRANÇAIS § p. 25-33
™ ™
Your HOOVER Deep Cleaner is fully assembled
and ready to begin cleaning!
www.hoover.com
®
Manual - Page 2
... or appliance with the deep cleaner. Keep cord away from electrical outlet before connecting the powered hand tool. • Always disconnect cord from heated surfaces. • Do not use . Save these instructions!
2
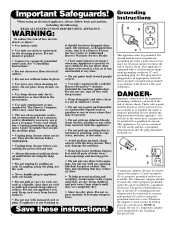
Grounding Instructions
A
B
C
This appliance must be used only until they may be installed by the Canadian Electrical Code. This appliance is not permitted...
Manual - Page 3
... carpet 10-11 Cleaning upholstery . . . . . 11-12 Basic steps for warranty service of your cleaner. Hoover Detergent
© 2004 The Hoover Company www.hoover.com
B
A
Continued §
3 our Consumer Response Center (8 AM to this manual.
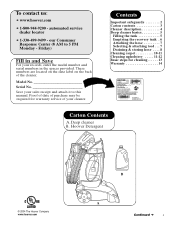
To contact us:
• www.hoover.com
• 1-800-944-9200 - Deep cleaner B. automated service dealer locator
• 1-330-499-9499 - Model...
Manual - Page 4
... data plate on
cleaner)
18
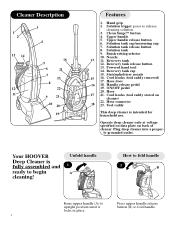
22. Your HOOVER Deep Cleaner is intended for household use.
Stair/upholstery nozzle
15 16. Cord hooks (tool caddy removed) 17. Tool caddy
This deep cleaner is fully assembled and ready to fold handle.
4 Press upper handle release button (B) to begin cleaning! Upper handle release button
6. Brush setting selector
10...
Manual - Page 5
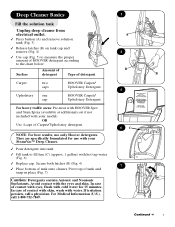
NOTE: For best results, use with hot tap water (Fig. 6)
Replace cap. They are specifically formulated for 15 minutes. Avoid contact with water.
Pivot top of tank onto cleaner. In case of contact with eyes, flush with cold water for use only Hoover detergents. A
Press button (A) and remove solution
tank (Fig. 3)
Release latches (B) on tank...
Manual - Page 6
... A 9
10 D
11
12
6
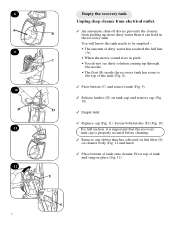
Empty the recovery tank Unplug deep cleaner from electrical outlet.
An automatic shut-off device prevents the cleaner
B
from picking up through the nozzle.
• The float (B) inside ...line (A).
• When the motor sound rises in place (Fig. 12). Pivot top of tank onto cleaner. Secure both latches (D) (Fig. 10). You will know the tank needs to the top of the ...
Manual - Page 7
...
13
14 A
15 D
A C
B
A
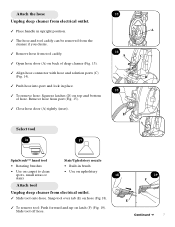
SpinScrub™ hand tool
• Rotating brushes
• Use on carpet to clean spots, small areas or stairs
Stair/Upholstery nozzle • Built-in place.
To remove hose: Squeeze...).
Push hose into port and lock in brush • Use on upholstery
Attach tool
Unplug deep cleaner from port (Fig. 15).
Close hose door (A) tightly (inset). Snap tool over tab (E) ...
Manual - Page 8
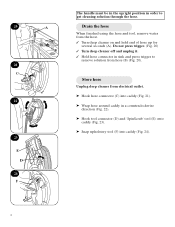
... and unplug it. Hold hose connector in sink and press trigger to get cleaning solution through the hose.
Store hose
Unplug deep cleaner from the hose. Turn deep cleaner on and hold end of hose up for
several seconds (A). Drain the hose
When finished using the hose and tool, remove water from...
Manual - Page 9

...; Wrap cord around cord hooks (I
28
J
Brush speed selector
29
Choose ON for normal cleaning of carpet (traffic areas, spots, etc.)
No cleaning solution removes all carpets.
Stain removal varies with the type of cleaner (Fig. 28). Hose caddy
You can either store the hose caddy on caddy (Fig. 26).
Clean Surge™...
Manual - Page 10
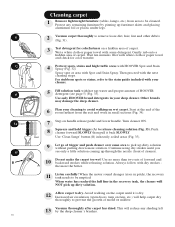
... tank needs to the stain guide included with HOOVER Spot and Stain Spray (Fig. 32). A
the more than two sets of carpet. Wait ten minutes. For stubborn spots or stains, refer to be cleaned. Start at the end of the room farthest from area to prevent the growth of cleaner).
10 Do not make the...
Manual - Page 11
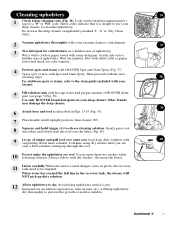
... rub onto a hidden area of HOOVER detergent (see only a little solution coming up dirty solution.
12 Allow upholstery to the stain guide included with your vacuum cleaner's attachments.
3 Test detergent for ...check for a 'W' or 'WS' code. For stubborn spots or stains, refer to dry. Cleaning upholstery
1 Check fabric cleaning code (Fig. 36). These codes indicate that it is alright to pick ...
Manual - Page 12
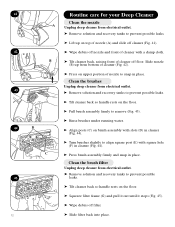
... and recovery tanks to prevent possible leaks.
® Lift up from electrical outlet. ® Remove solution and recovery tanks to prevent possible leaks.
® Tilt cleaner back so handle rests on the floor.
® Pull brush assembly firmly to remove (Fig. 43).
® Rinse brushes under running water.
® Align posts...
Manual - Page 13
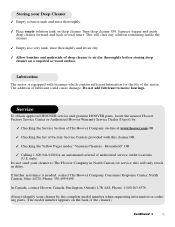
...forward and back several times.
Service
To obtain approved HOOVER service and genuine HOOVER parts, locate the nearest Hoover Factory Service Center or Authorized Hoover Warranty Service Dealer (Depot) by the complete model number when requesting information or ordering parts. (The model number appears on a carpeted or wood surface.
Turn deep cleaner ON. Lubrication
The motor is needed...
Manual - Page 14
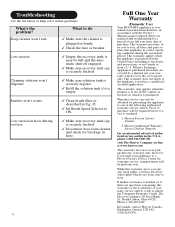
... gives you specific legal rights, you , all labor and parts to do
Make sure the cleaner is securely latched. however, if you mail your appliance to a Hoover Factory Service Center for ... appliance to help solve minor problems.
What's the problem?
Troubleshooting
Use the list below to one full year from a U.
This warranty provides, at www.hoover.com
This warranty does not...
Hoover F6212 Reviews
We have not received any reviews for Hoover yet.