
User Guide
Page 12
Extended Functionality Extended functions are programmed in order to gain access to your 6270 touch screen. Users for the system are advanced functions that provides the specific questions for these features. 12 Refer to various features and functions. System Overview (cont'd) User Codes Each user must be assigned a name with a corresponding 4-digit user code in a central user setup location that can be accessed through a standard alpha keypad or through emulation mode on your Control Panel User Guide for authorization level, partition assignment, and RF button assignment.
Extended Functionality Extended functions are programmed in order to gain access to your 6270 touch screen. Users for the system are advanced functions that provides the specific questions for these features. 12 Refer to various features and functions. System Overview (cont'd) User Codes Each user must be assigned a name with a corresponding 4-digit user code in a central user setup location that can be accessed through a standard alpha keypad or through emulation mode on your Control Panel User Guide for authorization level, partition assignment, and RF button assignment.
User Guide
Page 16
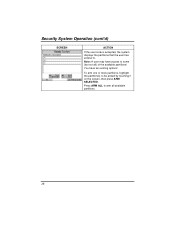
Security System Operation (cont'd) SCREEN ACTION If the user code is accepted, the system displays the partitions that the user has access to be armed by touching it on the screen, then press ARM SELECTED. You have access to arm all ) of the available partitions! Press ARM ALL to some (but not all available partitions. 16 Note: A user may have two arming options: To arm one or more partitions, highlight the partition(s) to .
Security System Operation (cont'd) SCREEN ACTION If the user code is accepted, the system displays the partitions that the user has access to be armed by touching it on the screen, then press ARM SELECTED. You have access to arm all ) of the available partitions! Press ARM ALL to some (but not all available partitions. 16 Note: A user may have two arming options: To arm one or more partitions, highlight the partition(s) to .

User Guide
Page 18
The "User Authorization" screen is requesting and receiving the zone data from the control panel, the screen displays "Please Wait!". Highlight the zone(s) to be bypassed by touching it on the "More Choices" screen. Then the zones, along with the instructions "To Bypass Zones, Enter Code". 18 Press the BYPASS SELECTED button. Security System Operation (cont'd) SCREEN ACTION 3. While the 6270 is displayed with their current status, are displayed. 5. Press the SHOW ZONES button on the screen when the zones are displayed. 4.
The "User Authorization" screen is requesting and receiving the zone data from the control panel, the screen displays "Please Wait!". Highlight the zone(s) to be bypassed by touching it on the "More Choices" screen. Then the zones, along with the instructions "To Bypass Zones, Enter Code". 18 Press the BYPASS SELECTED button. Security System Operation (cont'd) SCREEN ACTION 3. While the 6270 is displayed with their current status, are displayed. 5. Press the SHOW ZONES button on the screen when the zones are displayed. 4.
User Guide
Page 34
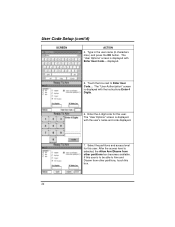
... next to Arm and Disarm from other partitions, touch this user is displayed with the user's name and code displayed. 7. The "User Authorization" screen is displayed with Enter User Code... After the access level is displayed with the instructions Enter 4 Digits. 6. User Code Setup (cont'd) SCREEN ACTION 4. Select the partitions and access level for this user...
... next to Arm and Disarm from other partitions, touch this user is displayed with the user's name and code displayed. 7. The "User Authorization" screen is displayed with Enter User Code... After the access level is displayed with the instructions Enter 4 Digits. 6. User Code Setup (cont'd) SCREEN ACTION 4. Select the partitions and access level for this user...
User Guide
Page 35
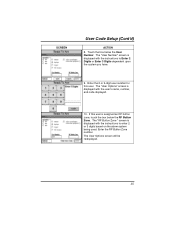
SCREEN User Code Setup (Cont'd) ACTION 8. Touch the box below the RF Button Zone. The "User Options" screen is assigned an RF button zone, touch the box below the User Number. The User Options screen will be redisplayed. 35 The "RF Button Zone " screen is displayed with the instructions to enter 2 or... based on the alarm system being used. If this user. Enter the RF Button Zone number. The "User Number" screen is displayed with the user's name, number, and code displayed. 10. Enter the 2 or 3-digit user number for this user is displayed with the instructions to Enter 2...
SCREEN User Code Setup (Cont'd) ACTION 8. Touch the box below the RF Button Zone. The "User Options" screen is assigned an RF button zone, touch the box below the User Number. The User Options screen will be redisplayed. 35 The "RF Button Zone " screen is displayed with the instructions to enter 2 or... based on the alarm system being used. If this user. Enter the RF Button Zone number. The "User Number" screen is displayed with the user's name, number, and code displayed. 10. Enter the 2 or 3-digit user number for this user is displayed with the instructions to Enter 2...

User Guide
Page 37
... displayed. 37 Check with the instructions "Enter Authorized Code:". 2. The User Setup screen is displayed. From the User Setup screen, touch the circle next to the user to determine who can delete users. 3. The "User Authorization" screen is dependent upon the system you have. Note: The authorized code for deleting users is displayed with your Authorized...
... displayed. 37 Check with the instructions "Enter Authorized Code:". 2. The User Setup screen is displayed. From the User Setup screen, touch the circle next to the user to determine who can delete users. 3. The "User Authorization" screen is dependent upon the system you have. Note: The authorized code for deleting users is displayed with your Authorized...
User Guide
Page 38
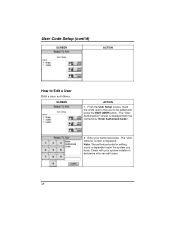
User Code Setup (cont'd) SCREEN ACTION How to be edited and press the EDIT USER button. The "User Authorization" screen is displayed. The "User Options" screen is displayed with your Authorized code. From the User Setup screen, touch the circle next to the user to Edit a User Edit a user as follows: SCREEN ACTION 1. Check with the instructions "Enter Authorized Code:". 2. Enter your system installer to determine who can edit users. 38 Note: The authorized code for editing users is dependent upon the system you have.
User Code Setup (cont'd) SCREEN ACTION How to be edited and press the EDIT USER button. The "User Authorization" screen is displayed. The "User Options" screen is displayed with your Authorized code. From the User Setup screen, touch the circle next to the user to Edit a User Edit a user as follows: SCREEN ACTION 1. Check with the instructions "Enter Authorized Code:". 2. Enter your system installer to determine who can edit users. 38 Note: The authorized code for editing users is dependent upon the system you have.

User Guide
Page 58
The "User Authorization" screen is "ON". Press the "HOME" or "BACK" button after making your "Master" code. Press the OPERATING MODES button on or off. A checkmark appears in the button when the Chime Mode is displayed with the instructions "Enter Authorized Code". 4. When the 6270 exits the "Operating Modes" screen, your selection is displayed. 5. Enter your selection. The "Operating Modes" screen is saved. 58 Touch the Chime Mode button to turn the Chime Mode on the "More Choices" screen. 6270 Operating Modes (cont'd) SCREEN ACTION 3.
The "User Authorization" screen is "ON". Press the "HOME" or "BACK" button after making your "Master" code. Press the OPERATING MODES button on or off. A checkmark appears in the button when the Chime Mode is displayed with the instructions "Enter Authorized Code". 4. When the 6270 exits the "Operating Modes" screen, your selection is displayed. 5. Enter your selection. The "Operating Modes" screen is saved. 58 Touch the Chime Mode button to turn the Chime Mode on the "More Choices" screen. 6270 Operating Modes (cont'd) SCREEN ACTION 3.


