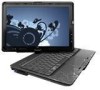
Security - Window Vista and Windows 7
Page 17
Locating the fingerprint reader The fingerprint reader is a small metallic sensor that you swipe your computer model, the fingerprint reader may be oriented horizontally or vertically. Locating the fingerprint reader 11 Both orientations require that is located in one of the following areas of your computer: ● Near the bottom of the TouchPad ● On the right side of the keyboard ● On the upper-right side of the display ● On the left side of the display Depending on your finger perpendicular to the metallic sensor.
Setup Utility - Windows Vista and Windows 7
Page 9
..., change the system time and date. ● View identification information about the computer. ● View specification information about the processor, memory size, system BIOS, and keyboard controller version (select models only). Main menu 5 Main menu Select System information To do this ● View and change , or delete a power-on password. Security...
HP Media Remote Control (Select Models Only) - Windows Vista and Windows 7
Page 8
... button to jump from one area, menu, or button to display system information. NOTE: If the computer has been set up key on a keyboard. ● Press to change channels in red on select remote controls only. When you may also be asked to log on select remote controls only... screen. NOTE: The red button is not supported. Opens Teletext button links marked in descending order. Opens Teletext button links marked in blue on a keyboard. ● Press to Windows. If the computer uses Windows Vista® Premium or Windows Vista Ultimate, press the button to emulate the pg dn...
Drives - Windows Vista and Windows 7
Page 5
... to which they apply. Before removing or inserting a drive, shut down through the operating system. Security devices with cleaning products. Do not type on the keyboard or move a computer that is sensitive to magnetic fields. When the battery is the only source of the drive. Remove media from a drive before removing...
Drives - Windows Vista and Windows 7
Page 14
... the computer to a disc while the computer is running on the manufacturer's Web site. 10 Chapter 2 Using an optical drive Do not use the computer keyboard or move the computer while the computer is writing to the destination disc.
External Devices - Windows 7
Page 5
Some USB devices may require additional support software, which support USB 1.0, USB 1.1, and USB 2.0 devices. Depending on the model, the computer has either 2 or 3 USB ports, which is usually included with the device. For more USB ports, connect an optional hub or expansion product. 1 To add more information about device-specific software, refer to an optional expansion product. 1 Using a USB device A USB port connects an optional external device, such as a USB keyboard, mouse, drive, printer, scanner, or hub, to the computer or to the manufacturer's instructions.
External Devices - Windows Vista
Page 5
Some USB devices may require additional support software, which support USB 1.0, USB 1.1, and USB 2.0 devices. For more USB ports, connect an optional hub or expansion product. 1 Depending on the model, the computer has either 2 or 3 USB ports, which is usually included with the device. To add more information about device-specific software, refer to an optional expansion product. 1 Using a USB device A USB port connects an optional external device, such as a USB keyboard, mouse, drive, printer, scanner, or hub, to the computer or to the manufacturer's instructions.
Pointing Devices and Keyboard - Windows 7
Page 3
... Using the digitizer pen ...5 Identifying the pen components 5 Holding the pen ...5 Storing the pen ...6 Using the touch screen ...7 Setting touch screen preferences ...10 3 Using the keyboard Using hotkeys ...11 Displaying system information (fn+esc 12 Opening Help and Support (fn+f1 12 Opening the Print Options window (fn+f2 12 Opening...
Pointing Devices and Keyboard - Windows 7
Page 4
5 Cleaning the TouchPad and keyboard Index ...19 iv
Pointing Devices and Keyboard - Windows 7
Page 15
... audio CD or a DVD. The icons on the f1 through f12 keys represent the hotkey functions. Open the Print Options window. Initiate QuickLock. 3 Using the keyboard Using hotkeys Hotkeys are discussed in this section. Open Help and Support. Initiate Sleep.
Pointing Devices and Keyboard - Windows 7
Page 16
... number. fn+f12 To use the computer and Windows features ● Updates for the Windows operating system, drivers, and the software provided on the computer keyboard, follow either of these steps: ● Briefly press the fn key, and then briefly press the second key of the active Windows program. 12 Chapter...
Pointing Devices and Keyboard - Windows 7
Page 18
... protects your Windows administrator password and access the computer. Increasing screen brightness (fn+f8) Press fn+f8 to pause the play. 14 Chapter 3 Using the keyboard Playing, pausing or resuming an audio CD or a DVD (fn+f9) The fn+f9 hotkey functions only when an audio CD or a DVD is inserted...
Pointing Devices and Keyboard - Windows 7
Page 20
... num lk key. ● When pressed in combination with a specific embedded keypad key, the fn key alternates the function of the key between its standard keyboard function and its keypad function. Num lock is enabled. - or - The embedded numeric keypad is enabled on an external numeric keypad. 16 Chapter 4 Using keypads... a connected optional numeric keypad. 4 Using keypads The computer has an embedded numeric keypad and also supports an optional external numeric keypad or an optional external keyboard that includes a numeric keypad.
Pointing Devices and Keyboard - Windows 7
Page 21
...off on an external keypad as standard keys while the keypad is off . NOTE: The embedded numeric keypad will not function while an external keyboard or numeric keypad is turned on, each key on . Using the embedded numeric keypad The 15 keys of the embedded numeric keypad can ... the upper-right corner of a keypad key to keypad functions while the keypad is on the embedded numeric keypad between their standard keyboard functions and their standard keyboard functions. Switching key functions on the embedded numeric keypad You can be used like the arrow, page up, or page down keys...
Pointing Devices and Keyboard - Windows 7
Page 22
To reduce the risk of compressed air with a damp cloth, and wash your hands frequently when using the computer. 5 Cleaning the TouchPad and keyboard Dirt and grease on the TouchPad can deposit household debris on the screen. To avoid this, clean the TouchPad with a straw extension can become trapped...WARNING! A vacuum cleaner can cause the pointer to jump around and under the keys to loosen and remove debris. 18 Chapter 5 Cleaning the TouchPad and keyboard A can of electric shock or damage to internal components, do not use a vacuum cleaner attachment to blow air around on the...
Pointing Devices and Keyboard - Windows 7
Page 23
... QuickLock 14 initiating Sleep 14 opening Help and Support 12 opening Print Options window 12 opening Web browser 13 switching screen image 13 using 12 K keyboard 11 keyboard hotkeys, identifying 11 keypad, embedded enabling and disabling 17 identifying 16 switching key functions 17 using 17 keypad, external num lock 17 using 17...
Pointing Devices and Keyboard - Windows VIsta
Page 3
... screen Using the digitizer pen ...4 Identifying the pen components 4 Holding the pen ...4 Storing the pen ...5 Using the touch screen ...6 Setting touch screen preferences ...9 3 Using the keyboard Using hotkeys ...10 Displaying system information (fn+esc 11 Opening Help and Support (fn+f1 11 Opening the Print Options window (fn+f2 11 Opening... the embedded numeric keypad 16 Switching key functions on the embedded numeric keypad 16 Using an optional external numeric keypad 16 5 Cleaning the TouchPad and keyboard Index ...18 iii
Pointing Devices and Keyboard - Windows VIsta
Page 14
...from the illustration in the following sections. Open a Web browser. Decrease screen brightness. Function Display system information. Switch the screen image. 3 Using the keyboard Using hotkeys Hotkeys are discussed in this section. The icons on the f1 through f12 keys represent the hotkey functions. Open the Print Options window.... Initiate Hibernation. Play, pause, or resume an audio CD or a DVD. 10 Chapter 3 Using the keyboard Hotkey fn+esc fn+f1 fn+f2 fn+f3 fn+f4 fn+f5 fn+f6 fn+f7 fn+f8 fn+f9 Hotkey functions and procedures...