Resolving Start Up and No Boot Problems Checklist
Page 1
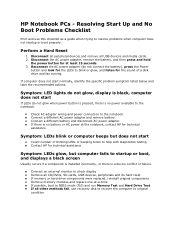
... drive and fan turning. Disconnect the AC power adapter, remove the battery, and then press and hold the power button for at the notebook, contact HP for technical assistance. Perform a Hard Reset 1. Disconnect all peripheral devices and remove all other methods fail, use this checklist as a guide...DVDs, SD cards, USB devices, peripherals and do not glow when power button is pressed, there is a device conflict or failure. HP Notebook PCs - Resolving Start Up and No Boot Problems Checklist Print and use recovery disk to recover the computer to resolve problems when computer does ...
... drive and fan turning. Disconnect the AC power adapter, remove the battery, and then press and hold the power button for at the notebook, contact HP for technical assistance. Perform a Hard Reset 1. Disconnect all peripheral devices and remove all other methods fail, use this checklist as a guide...DVDs, SD cards, USB devices, peripherals and do not glow when power button is pressed, there is a device conflict or failure. HP Notebook PCs - Resolving Start Up and No Boot Problems Checklist Print and use recovery disk to recover the computer to resolve problems when computer does ...

Notebook Essentials - Windows 7
Page 2
...are on your computer. As part of this product up now at http://www.hp.com. © Copyright 2010 Hewlett-Packard Development Company, L.P. Nothing herein should be liable for Business Notebook Keep this effort, we provide user guides and learning centers on your computer. Part... number: 582228-001 User Guides HP is subject to change without notice. Sign up to date with your computer...
...are on your computer. As part of this product up now at http://www.hp.com. © Copyright 2010 Hewlett-Packard Development Company, L.P. Nothing herein should be liable for Business Notebook Keep this effort, we provide user guides and learning centers on your computer. Part... number: 582228-001 User Guides HP is subject to change without notice. Sign up to date with your computer...

Notebook Essentials - Windows 7
Page 5
... a wired network 21 Chapter 4: Keeping the computer safe Protecting the computer from power surges 23 Turning off the computer 24 Using the computer safely 24 Notebook Essentials iii
... a wired network 21 Chapter 4: Keeping the computer safe Protecting the computer from power surges 23 Turning off the computer 24 Using the computer safely 24 Notebook Essentials iii

Notebook Essentials - Windows 7
Page 6
Contents Chapter 5: Using software Identifying installed software 25 Using HP TouchSmart software or HP MediaSmart software 26 Installing software from an optical disc 26 Creating or burning a CD or DVD 27 Updating the software installed on the computer 28 ... An external device is not working 37 The wireless network connection is not working 37 Appendix B: Specifications Operating environment 39 Input power 40 Index iv Notebook Essentials
Contents Chapter 5: Using software Identifying installed software 25 Using HP TouchSmart software or HP MediaSmart software 26 Installing software from an optical disc 26 Creating or burning a CD or DVD 27 Updating the software installed on the computer 28 ... An external device is not working 37 The wireless network connection is not working 37 Appendix B: Specifications Operating environment 39 Input power 40 Index iv Notebook Essentials

Notebook Essentials - Windows 7
Page 7
... Help and Support, and then click User Guides. Connecting to the Internet After creating the recovery discs, set up your wired and wireless networking features. Notebook Essentials 1 For more information, refer to Chapter 3, "Networking." First, read specific chapters for free updates. Antivirus software helps protect your antivirus software After you have...
... Help and Support, and then click User Guides. Connecting to the Internet After creating the recovery discs, set up your wired and wireless networking features. Notebook Essentials 1 For more information, refer to Chapter 3, "Networking." First, read specific chapters for free updates. Antivirus software helps protect your antivirus software After you have...

Notebook Essentials - Windows 7
Page 8
... Interface) device to the computer. For instructions on the webcam, refer to the user guide in Help and Support. 2 Notebook Essentials The following list highlights the entertainment features of the computer and set up optional external audio devices, refer to the user...in Help and Support. ■ Video-You can also use MediaSmart software. ■ Webcam-Adjustable, with preinstalled multimedia software, including HP MediaSmart, which turns the computer into a mobile entertainment center. For more information on the computer. For more information about using the integrated...
... Interface) device to the computer. For instructions on the webcam, refer to the user guide in Help and Support. 2 Notebook Essentials The following list highlights the entertainment features of the computer and set up optional external audio devices, refer to the user...in Help and Support. ■ Video-You can also use MediaSmart software. ■ Webcam-Adjustable, with preinstalled multimedia software, including HP MediaSmart, which turns the computer into a mobile entertainment center. For more information on the computer. For more information about using the integrated...

Notebook Essentials - Windows 7
Page 9
Chapter 1: Getting started Finding information Locating the electronic manuals For detailed information about the features and components of your computer may look slightly different from the illustration in Help and Support. ✎ The desktop of the computer, such as power management, drives, memory, security, and other features, click Start, click Help and Support, and then click User Guides. You do not need to connect to the Internet to access the user guides in this section. Help and Support User Guides Notebook Essentials 3
Chapter 1: Getting started Finding information Locating the electronic manuals For detailed information about the features and components of your computer may look slightly different from the illustration in Help and Support. ✎ The desktop of the computer, such as power management, drives, memory, security, and other features, click Start, click Help and Support, and then click User Guides. You do not need to connect to the Internet to access the user guides in this section. Help and Support User Guides Notebook Essentials 3

Notebook Essentials - Windows 7
Page 10
... more safety and regulatory information, and for computer users. For more information In addition to http://www.hp.com/support, select your country or region, and follow the on the Web at http://www.hp.com/ergo. The Safety & Comfort Guide also provides important electrical and mechanical safety information. The Safety & Comfort..., click Start, and then click Help and Support. For country- To access the notices, click Start, click Help and Support, and then click User Guides. 4 Notebook Essentials
... more safety and regulatory information, and for computer users. For more information In addition to http://www.hp.com/support, select your country or region, and follow the on the Web at http://www.hp.com/ergo. The Safety & Comfort Guide also provides important electrical and mechanical safety information. The Safety & Comfort..., click Start, and then click Help and Support. For country- To access the notices, click Start, click Help and Support, and then click User Guides. 4 Notebook Essentials

Notebook Essentials - Windows 7
Page 11
Open the display. 2. Rotate the display 180 degrees either clockwise or counterclockwise. Ä CAUTION: To reduce the risk of damage to your computer, do not force the display past 180 degrees. 3. Lower the display over the keyboard. Ä CAUTION: To reduce the risk of damage to your computer, do not transport the computer while it is in slate mode: 1. Notebook Essentials 5 Display rotating To rotate the display and use the computer in slate mode. Chapter 2: What's new?
Open the display. 2. Rotate the display 180 degrees either clockwise or counterclockwise. Ä CAUTION: To reduce the risk of damage to your computer, do not force the display past 180 degrees. 3. Lower the display over the keyboard. Ä CAUTION: To reduce the risk of damage to your computer, do not transport the computer while it is in slate mode: 1. Notebook Essentials 5 Display rotating To rotate the display and use the computer in slate mode. Chapter 2: What's new?

Notebook Essentials - Windows 7
Page 12
When you change the screen image to 4 different orientations. Using the rotate button When the computer is in slate mode, press the rotate button (on the right side of the computer) to change the screen orientation, the top of the screen rotates 90 degrees clockwise into the following orientations: landscape secondary 1, portrait primary 2, landscape primary 3, and portrait secondary 4. ✎ Computers with WWAN capabilities only support landscape primary 3 and portrait secondary 4 orientations. 6 Notebook Essentials Chapter 2: What's new?
When you change the screen image to 4 different orientations. Using the rotate button When the computer is in slate mode, press the rotate button (on the right side of the computer) to change the screen orientation, the top of the screen rotates 90 degrees clockwise into the following orientations: landscape secondary 1, portrait primary 2, landscape primary 3, and portrait secondary 4. ✎ Computers with WWAN capabilities only support landscape primary 3 and portrait secondary 4 orientations. 6 Notebook Essentials Chapter 2: What's new?

Notebook Essentials - Windows 7
Page 13
Moves the pointer and selects or activates items on and off, quickly double-tap the TouchPad off indicator. ✎ When the TouchPad zone is active, the light is off indicator 2 Left TouchPad button 3 Right TouchPad button 4 TouchPad zone Description To turn the TouchPad zone on the screen. Notebook Essentials 7 Component 1 TouchPad off . Functions like the right button on an external mouse. Functions like the left button on an external mouse. TouchPad Identifying TouchPad components Chapter 2: What's new?
Moves the pointer and selects or activates items on and off, quickly double-tap the TouchPad off indicator. ✎ When the TouchPad zone is active, the light is off indicator 2 Left TouchPad button 3 Right TouchPad button 4 TouchPad zone Description To turn the TouchPad zone on the screen. Notebook Essentials 7 Component 1 TouchPad off . Functions like the right button on an external mouse. Functions like the left button on an external mouse. TouchPad Identifying TouchPad components Chapter 2: What's new?

Notebook Essentials - Windows 7
Page 14
Navigating To move the pointer, touch and slide one finger across the TouchPad surface in the direction you want the pointer to go. 8 Notebook Essentials Turning the TouchPad on and off . When the TouchPad zone is active, the light is off The TouchPad is turned on and off, quickly double-tap the TouchPad off indicator. Chapter 2: What's new? To turn the TouchPad on at the factory.
Navigating To move the pointer, touch and slide one finger across the TouchPad surface in the direction you want the pointer to go. 8 Notebook Essentials Turning the TouchPad on and off . When the TouchPad zone is active, the light is off The TouchPad is turned on and off, quickly double-tap the TouchPad off indicator. Chapter 2: What's new? To turn the TouchPad on at the factory.

Notebook Essentials - Windows 7
Page 15
The rotate gesture must be done within the TouchPad zone. Notebook Essentials 9 Using TouchPad gestures The TouchPad supports a variety of gestures that make it easy and fun to work with images or pages of text. Scrolling ...
The rotate gesture must be done within the TouchPad zone. Notebook Essentials 9 Using TouchPad gestures The TouchPad supports a variety of gestures that make it easy and fun to work with images or pages of text. Scrolling ...

Notebook Essentials - Windows 7
Page 16
... o'clock to gradually decrease the object's size. Pinching/Zooming Pinching allows you to twelve o'clock. ✎ Rotating must be done within the TouchPad zone. 10 Notebook Essentials
... o'clock to gradually decrease the object's size. Pinching/Zooming Pinching allows you to twelve o'clock. ✎ Rotating must be done within the TouchPad zone. 10 Notebook Essentials

Notebook Essentials - Windows 7
Page 17
..., and then click User Guides. To access this section are disabled at the factory. To disable or reenable TouchPad gestures, or to the user guide. Notebook Essentials 11 You computer also supports additional TouchPad gestures that you would click or double-click with the right TouchPad button. ✎ You must tap...
..., and then click User Guides. To access this section are disabled at the factory. To disable or reenable TouchPad gestures, or to the user guide. Notebook Essentials 11 You computer also supports additional TouchPad gestures that you would click or double-click with the right TouchPad button. ✎ You must tap...

Notebook Essentials - Windows 7
Page 18
You can also use this motion to slowly scroll through documents. ✎ For the flick movement to work, a scrollbar must be present in a light, quick flicking motion up, down, left, or right to a new location. Chapter 2: What's new? Dragging Press your finger on an item on the screen, and then move your finger to drag the item to navigate through screens or quickly scroll through documents. 12 Notebook Essentials Flicking Touch the screen in the active window.
You can also use this motion to slowly scroll through documents. ✎ For the flick movement to work, a scrollbar must be present in a light, quick flicking motion up, down, left, or right to a new location. Chapter 2: What's new? Dragging Press your finger on an item on the screen, and then move your finger to drag the item to navigate through screens or quickly scroll through documents. 12 Notebook Essentials Flicking Touch the screen in the active window.

Notebook Essentials - Windows 7
Page 19
To rotate, anchor your thumb on the screen, and then move your forefinger in an up or down , left, or right motion. ✎ Scrolling speed is useful for moving up , down on the screen, and then drag them across the screen in a semicircular motion around your thumb. Notebook Essentials 13 To scroll, place two fingers on a page or image. Scrolling Scrolling is controlled by finger speed. Rotating Rotating allows you to rotate items such as photos and pages. Chapter 2: What's new?
To rotate, anchor your thumb on the screen, and then move your forefinger in an up or down , left, or right motion. ✎ Scrolling speed is useful for moving up , down on the screen, and then drag them across the screen in a semicircular motion around your thumb. Notebook Essentials 13 To scroll, place two fingers on a page or image. Scrolling Scrolling is controlled by finger speed. Rotating Rotating allows you to rotate items such as photos and pages. Chapter 2: What's new?

Notebook Essentials - Windows 7
Page 20
... and the computer. ■ To set preferences for left-handed or right-handed users, click Start, click Control Panel, click Hardware and Sound, click Tablet PC Settings, and then click the Other tab. Chapter 2: What's new? Click Start, click Control Panel, click Hardware and Sound, click Pen and Touch, and then.... ■ Zoom in by holding two fingers together on the screen, and then pull the fingers apart to zoom in the system. Click OK. 14 Notebook Essentials
... and the computer. ■ To set preferences for left-handed or right-handed users, click Start, click Control Panel, click Hardware and Sound, click Tablet PC Settings, and then click the Other tab. Chapter 2: What's new? Click Start, click Control Panel, click Hardware and Sound, click Pen and Touch, and then.... ■ Zoom in by holding two fingers together on the screen, and then pull the fingers apart to zoom in the system. Click OK. 14 Notebook Essentials

Notebook Essentials - Windows 7
Page 21
... write on the computer. Storing the pen To store the pen when you were writing with the pen in pen-specific programs such as Tablet PC Input Panel, in all Microsoft® Office programs, and in most Windows programs. Identifying the pen components The pen interacts with the computer whenever the... tip 1 of the pen is pressed against the screen. Notebook Essentials 15 Holding the pen Hold the pen as if you are not using it, insert the pen, tip first, into the pen holder on...
... write on the computer. Storing the pen To store the pen when you were writing with the pen in pen-specific programs such as Tablet PC Input Panel, in all Microsoft® Office programs, and in most Windows programs. Identifying the pen components The pen interacts with the computer whenever the... tip 1 of the pen is pressed against the screen. Notebook Essentials 15 Holding the pen Hold the pen as if you are not using it, insert the pen, tip first, into the pen holder on...

Notebook Essentials - Windows 7
Page 22
... 2: What's new? Sharing optical drives Although your computer, click Start, click Control Panel, click Network and Internet, and then click Network and Sharing Center. 16 Notebook Essentials From the computer with the optical drive you want to share, and then click Properties. 3. Click the Sharing tab, and then click Advanced Sharing...
... 2: What's new? Sharing optical drives Although your computer, click Start, click Control Panel, click Network and Internet, and then click Network and Sharing Center. 16 Notebook Essentials From the computer with the optical drive you want to share, and then click Properties. 3. Click the Sharing tab, and then click Advanced Sharing...


