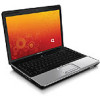
Setup Utility - Windows Vista and Windows 7
Page 10
...NOTE: On models with two hard drives, this Change the Setup Utility language. Enable/disable the processor Virtualization Technology. Enable/disable Card Reader/1394 Power Saving. Enable/disable the capacitive button tapping sound. When enabled, the computer fan will always be on the system memory. 6 Chapter 3 ... ◦ USB CD/DVD ROM drive ◦ Hard drive ◦ USB Diskette on Key ◦ USB Hard drive ◦ Network adapter Diagnostics menu Select Hard Disk Self Test Secondary Hard Disk Self Test (select models only) Memory Test To do this menu option is called the...
Software Update, Backup and Recovery - Windows Vista
Page 6
Access the page on the HP Web site that is later than those currently installed on the .... b. To use the arrow keys to reliable external power using the AC adapter. While the "Press the ESC key for displaying BIOS information: 1. Follow the instructions on battery power, docked in an optional docking device, or connected to... software, driver, and BIOS updates. 2. During the download and installation, follow these instructions: Do not disconnect power from the computer by opening the Setup Utility. When the Main menu is selected, BIOS and other identifier. ...
Notebook Tour - Windows Vista
Page 15
Connects a modem cable. Connect optional USB devices. Right-side components NOTE: Your computer may look slightly different from the illustration in this section. Right-side components 9 Connects an AC adapter. Component (1) Optical drive light (2) Optical drive (3) USB ports (2) (4) RJ-11 (modem) jack (select models only) (5) Power connector Description Blinking: The optical drive is being accessed. Reads optical discs and, on select models, also writes to optical discs.
Notebook Tour - Windows Vista
Page 19
Additional hardware components Component Description (1) Power cord* Connects an AC adapter to an AC outlet. (2) AC adapter Converts AC power to DC power. (3) Battery* Powers the computer when the computer is not plugged into external power. *Batteries and power cords vary in appearance by region and country. Additional hardware components 13
Notebook Tour - Windows Vista
Page 21
Index A AC adapter, identifying 13 antennae 12 applications key, Windows 5 audio-in (microphone) jack, identifying 7 audio-out (headphone) jack, identifying 7 cord, power 13 D Digital Media Slot light, identifying 10 Digital Media Slot, identifying 10 display switch, identifying 6 drive light, identifying 3,..., identifying 3, 7 battery release latch, identifying 11 battery, identifying 13 bays battery 11, 14 hard drive 11 Bluetooth label 14 buttons power 4 TouchPad 2 TouchPad on/off 2 wireless 4 C caps lock light, identifying 3 Certificate of Authenticity label 14 compartments memory module 11...
Compaq Presario CQ40 Notebook PC - Maintenance and Service Guide
Page 12
...devices TouchPad with 2 buttons and 2-way scroll √ (taps enabled as default) Power 6-cell 2.20-Ah Li-ion battery √ requirements 65-W AC adapter with Smart-Pin DC √ connector 90-W AC adapter with discrete graphics √ √ √ √ √ √... √ √ √ √ √ 4 Chapter 1 Product description and √ 64-bit) Serviceability End-user replaceable parts: AC adapter √ Battery (system) √ Hard drive √ Memory module √ AMD models with UMA graphics √ √ AMD models with ...
Compaq Presario CQ40 Notebook PC - Maintenance and Service Guide
Page 23
... automatically to cool internal components. Component (1) Optical drive light (2) Optical drive (3) USB ports (2) (4) RJ-11 (modem) jack (select models only) (5) Power connector Description Blinking: The optical drive is normal for the internal fan to optical discs. Reads optical discs and, on select models, also writes to... cycle on and off during routine operation. Connects an AC adapter. Right-side components NOTE: Your computer may look slightly different from the illustration in this section. It is being accessed.
Compaq Presario CQ40 Notebook PC - Maintenance and Service Guide
Page 35
Miscellaneous parts Description AC adapters 90-W PFC AC adapter 65-W PFC AC adapter System fan Display lid switch module Power cords: Australia and New Zealand Brazil India The People's Republic of China South Korea Taiwan The United Kingdom and Hong Kong The United States Screw ...
Compaq Presario CQ40 Notebook PC - Maintenance and Service Guide
Page 46
...computer is off or in Hibernation, turn the computer on page 50). 6. Disconnect the power from the computer by first unplugging the power cord from the AC outlet and then unplugging the AC adapter from the computer. 4. Remove the RTC battery (see Battery on the computer. Unknown .... 3. Before disassembling the computer, follow these steps: 1. Replace the RTC battery and reassemble the computer. 8. Wait approximately 5 minutes. 7. Connect AC power to the computer. Remove the battery (see RTC battery on , and then shut it down the computer. NOTE: These steps also clear CMOS. Turn...
Compaq Presario CQ40 Notebook PC - Maintenance and Service Guide
Page 49
... Spare part number 487296-001 487354-001 Before disassembling the computer, follow these steps: 1. Disconnect the power from the computer by first unplugging the power cord from the AC outlet and then unplugging the AC adapter from the computer. If you are unsure whether the computer is seated. To insert the battery, insert...
Compaq Presario CQ40 Notebook PC - Maintenance and Service Guide
Page 50
....5×6.0 screw (1) that secures the optical drive to the computer. 3. Remove the optical drive: 1. Disconnect the power from the computer by first unplugging the power cord from the AC outlet and then unplugging the AC adapter from the optical drive.) 42 Chapter 4 Removal and replacement procedures Position the computer with LightScribe DVD±...
Compaq Presario CQ40 Notebook PC - Maintenance and Service Guide
Page 52
... 4 Removal and replacement procedures Remove the battery (see Battery on , and then shut it down the computer. Shut down through the operating system. 2. Disconnect the power from the computer by first unplugging the power cord from the AC outlet and then unplugging the AC adapter from the computer. 4. Remove the hard drive: 1.
Compaq Presario CQ40 Notebook PC - Maintenance and Service Guide
Page 56
..., Singapore, Slovakia, Slovenia, Solomon Islands, Somalia, South Africa, South Korea, Spain, Sri Lanka, St. Disconnect the power from the computer by first unplugging the power cord from the AC outlet and then unplugging the AC adapter from the computer.) 48 Chapter 4 Removal and replacement procedures Disconnect the two WLAN antenna cables (1) from the...
Compaq Presario CQ40 Notebook PC - Maintenance and Service Guide
Page 58
... RTC battery, follow these steps: 1. Disconnect all passwords and CMOS settings to be cleared. Disconnect the power from the computer by first unplugging the power cord from the AC outlet and then unplugging the AC adapter from the system board. 50 Chapter 4 Removal and replacement procedures Remove the battery (see Battery on , and...
Compaq Presario CQ40 Notebook PC - Maintenance and Service Guide
Page 60
... (667-MHz, PC2-5300, 1-DIMM) For use in Hibernation, turn the computer on page 41). Disconnect the power from the computer by first unplugging the power cord from the AC outlet and then unplugging the AC adapter from the computer. 4. Position the computer with AMD processors: 2048-MB (800-MHz, PC2-6400, 1-DIMM...
Compaq Presario CQ40 Notebook PC - Maintenance and Service Guide
Page 62
...computer. Open the computer as far as possible. 5. Lift the top edge of the keyboard by first unplugging the power cord from the AC outlet and then unplugging the AC adapter from the tabs on the switch cover. 6. Remove the three Phillips PM2.5×17.0 screws that secure the ...121 486904-AD1 486904-AB1 For use in Hibernation, turn the computer on, and then shut it down through the operating system. 2. Disconnect the power from the computer by lifting it rests at an angle (1). 54 Chapter 4 Removal and replacement procedures Remove the Mini Card compartment cover (see ...
Compaq Presario CQ40 Notebook PC - Maintenance and Service Guide
Page 64
...(1) is off or in Hibernation, turn the computer on page 54). Disconnect the power from the computer by first unplugging the power cord from the AC outlet and then unplugging the AC adapter from the system board. 56 Chapter 4 Removal and replacement procedures b. Open the computer...Release the ZIF connector to the computer. 3. c. Disconnect all external devices connected to the computer. 3. Switch cover Description Switch cover (includes power button board and cable, volume/LED board, and LED cover) Spare part number 487299-001 Before removing the switch cover, follow these steps...
Power Management - Windows Vista
Page 19
Charging may show 100 percent charge before turning on while the battery is much warmer or cooler than room temperature. To prolong battery life and optimize the accuracy of ... aircraft. The battery charges whether the computer is plugged into external power through normal use before charging it. ● If the battery has been unused for 2 weeks or more , calibrate the battery instead of a full charge through an AC adapter, an optional power adapter, an optional expansion product, or an optional docking device. Charging...
Power Management - Windows Vista
Page 22
... of the following devices: ● AC adapter ● Optional expansion product or docking device ● Optional power adapter Resolving a low battery level when a charged battery is available 1. Turn off . Save your work and shut down the computer. Exit Hibernation by pressing the power button. 16 Chapter 3 Using battery power or - Resolving a low battery level when...
Power Management - Windows Vista
Page 23
... charges whether the computer is off the display and Put the computer to Hibernate after. 7. Select Start > Control Panel > System and Maintenance > Power Options. 2. Click the battery meter icon in use, but it charges faster when the computer is off the display and Put the computer to sleep...Calibrating a battery 17 Step 1: Fully charge the battery WARNING! Change the Turn off or in the notification area, and then click More power options. - Connect the computer to an AC adapter, optional power adapter, optional expansion product, or optional docking device, and then plug the...