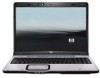
HP Pavilion dv9500, dv9600, and dv9700 Entertainment PCs - Maintenance and Service Guide
Page 51
...or liquids. To prevent damage to the computer, damage to products that must be mailed, place the drive in their proper locations during removal and insertion. While handling a drive, avoid touching the connector. Improper cable placement can damage the computer. In all cases, avoid bending...CAUTION: Drives are discharged of protective packaging and label the package "FRAGILE." If you are fragile components that have magnetic fields, such as monitors or speakers. Handle drives on , and then shut it down the computer. Cables and connectors CAUTION: When servicing the computer, be ...
HP Pavilion dv9500, dv9600, and dv9700 Entertainment PCs - Maintenance and Service Guide
Page 110
Front USB board (see Audio board on page 84) k. Disconnect the fan cable (1) from the system board. 3. Audio board (see Front USB board on page 97) j. System board (see Top cover trim on page 92) Remove the fan/heat assembly: 1. Loosen the three Phillips PM2.5×5.0 captive screws (2) that secure the fan/heat sink assembly to the system board. 100 Chapter 4 Removal and replacement procedures Top cover trim (see System board on page 87) l. i. Turn the system board upside down, with the expansion port 3 and external monitor port toward you. 2.
HP Pavilion dv9500, dv9600, and dv9700 Entertainment PCs - Maintenance and Service Guide
Page 173
...Kit, spare part number 31, 35 ExpressCard slot 15 ExpressCard slot bezel illustrated 28 removal 86 external media cards, product description 7 external monitor port location 15 pin assignments 151 F fan/heat sink assembly removal 96 spare part number 37, 38 spare part numbers 22, 38, 96 feet locations...38 fingerprint reader board cable, illustrated 29 fingerprint reader board, spare part number 21, 75 fn key 12 front components 14 front USB board removal 84 spare part number 21, 37, 84 front USB board cable, illustrated 29 function keys 12 G graphics, product description 2 grounding equipment ...
HP Pavilion dv9500, dv9600, and dv9700 Entertainment PCs - Maintenance and Service Guide
Page 174
...17 memory/WLAN module compartment cover illustrated 28 removal 55 microphone location 9 removal 73 spare part number 27, 33, 74 microphone jack location 14 pin assignments 150 model name 1 modem jack location 15 pin assignments 152 modem, product description 6 monitor port location 15 pin assignments 151 mouse, ...114, 115, 116 optical drive connector board removal 94 spare part number 22, 33, 94 P packing guidelines 43 password clearing 45 passwords 109 pin assignments audio-in 150 audio-out 150 external monitor 151 headphone 150 microphone 150 modem 152 monitor 151 network 152 RJ-11 152 RJ-...
HP Pavilion dv9500, dv9600, and dv9700 Entertainment PCs - Maintenance and Service Guide
Page 175
...33 play/pause button 11 pointing device components 13 product description 8 ports 1394 16 external monitor port 15 HDMI 16 monitor port 15 product description 7 Universal Serial Bus (USB) 15, 16 power button 10 power button board removal 67 spare part number 20, 33, 67 power connector 15 power connector bracket... removal 91 spare part number 22, 33, 91 power cord set requirements 154 power cord, ...
Multimedia - Windows Vista
Page 5
... jack 3 Using the audio-out (headphone) jack 3 Adjusting the volume ...4 Using the Quick Launch buttons ...5 Using the video features ...6 Using the external monitor port 6 Using the S-Video-out jack (select models only 7 Using the webcam (select models only 8 Adjusting webcam properties 10 Using an optical drive ......11 Identifying the installed optical drive 11 Inserting an optical disc (CD or DVD 11 Removing an optical disc when running on battery or external power 12 Removing an optical disc when no computer power is available 13 Using the media activity functions ...14 Using...
Multimedia - Windows Vista
Page 27
...17 copyright warning 20 D DVD changing region setting 20 inserting 11 playing 19 protecting 17 removing, with power 12 removing, without power 13 writing to 17 DVD button 5 DVD region settings 20 E earbuds 1 external monitor port 6 H headphones 1 I internal microphone, identifying 1 J jacks audio-in (...audio-in) jack 1 microphone, internal 1 microphones, supported 3 monitor, connecting 6 multimedia software described 17 using 18 mute button 4 mute button, identifying 1 O optical disc inserting 11 removing, with power 12 removing, without power 13 writing to 17 optical drive playing 19 ...