HP Business Notebook Computer EFI Guidelines - White paper
Page 2
..., and so on all of HP notebook computers. However, if the EFI partition or applications are not required for the HP 2133 Mini-Note PC. 2 Applications accessible during computer startup: ƒ HP QuickLook 2 or later versions (select models) ƒ HP System Diagnostics HP QuickLook 2 or later versions QuickLook is 1 GB. EFI is driver-based, scalable, and easy to...
..., and so on all of HP notebook computers. However, if the EFI partition or applications are not required for the HP 2133 Mini-Note PC. 2 Applications accessible during computer startup: ƒ HP QuickLook 2 or later versions (select models) ƒ HP System Diagnostics HP QuickLook 2 or later versions QuickLook is 1 GB. EFI is driver-based, scalable, and easy to...
HP Business Notebook PC - Getting Started Guide - Enhanced for Accessibility
Page 6
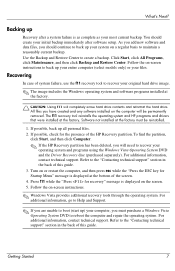
...on the computer will be reinstalled. 1. For additional information, contact technical support. The f11 recovery tool reinstalls the operating system and HP programs and drivers that were installed at the bottom of the screen. 4. All files you should create your files. To find the partition, ...all personal files. 2. Getting Started 7 Follow the on the screen. 5. Press f11 while the "Press for Startup Menu" message is displayed at the factory. Use the Backup and Restore Center to boot (start up Recovery after software setup. Recovering In case of this guide....
...on the computer will be reinstalled. 1. For additional information, contact technical support. The f11 recovery tool reinstalls the operating system and HP programs and drivers that were installed at the bottom of the screen. 4. All files you should create your files. To find the partition, ...all personal files. 2. Getting Started 7 Follow the on the screen. 5. Press f11 while the "Press for Startup Menu" message is displayed at the factory. Use the Backup and Restore Center to boot (start up Recovery after software setup. Recovering In case of this guide....
HP ProtectTools - Windows Vista and Windows XP
Page 85
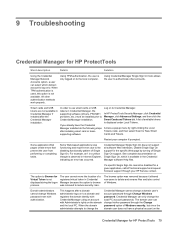
...supporting software (drivers, PKCS#11 providers, etc.) must be disabled for a given application, call HP technical support and request 3rd-level support through your computer if prompted. Restart your HP Service contact... functioning and report errors due to change the Credential Manager cannot change the local PC account passwords. If a specific Single Sign On cannot be installed prior to Credential...or token supporting software: Log on the Credential Manager for Virtual Token is not displayed during the logon process. in a yellow triangle is not available. The option to...
...supporting software (drivers, PKCS#11 providers, etc.) must be disabled for a given application, call HP technical support and request 3rd-level support through your computer if prompted. Restart your HP Service contact... functioning and report errors due to change the Credential Manager cannot change the local PC account passwords. If a specific Single Sign On cannot be installed prior to Credential...or token supporting software: Log on the Credential Manager for Virtual Token is not displayed during the logon process. in a yellow triangle is not available. The option to...
Software Updates - Windows Vista and Windows XP
Page 9
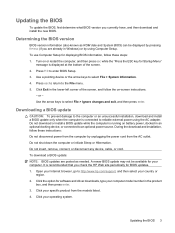
..., connect, or disconnect any device, cable, or cord. Updating the BIOS To update the BIOS, first determine what BIOS version you check the HP Web site periodically for BIOS updates. 1. Press f10 to the File menu. 5. Press esc to return to enter BIOS Setup. 3. Do not... message is running on -screen instructions. - Updating the BIOS 3 To use Computer Setup for software and driver downloads, type your specific product from the AC outlet. Click the option for displaying BIOS information, follow these steps: 1. Use a pointing device or the arrow keys to select File > Ignore...
..., connect, or disconnect any device, cable, or cord. Updating the BIOS To update the BIOS, first determine what BIOS version you check the HP Web site periodically for BIOS updates. 1. Press f10 to the File menu. 5. Press esc to return to enter BIOS Setup. 3. Do not... message is running on -screen instructions. - Updating the BIOS 3 To use Computer Setup for software and driver downloads, type your specific product from the AC outlet. Click the option for displaying BIOS information, follow these steps: 1. Use a pointing device or the arrow keys to select File > Ignore...
Software Updates - Windows Vista and Windows XP
Page 11
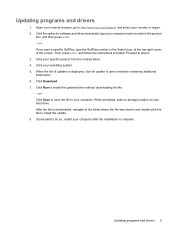
or - Click Save to save the file to http://www.hp.com/support, and select your country or region. 2. If you want a specific SoftPaq, type the SoftPaq number in the product box, and then press enter. - ... computer model number in the Search box, at the top-right corner of updates is complete. Updating programs and drivers 5 Open your Internet browser, go to your computer after the installation is displayed, click an update to step 6. 3. Click Run to install the update. 8. After the file is downloaded, navigate to the...
or - Click Save to save the file to http://www.hp.com/support, and select your country or region. 2. If you want a specific SoftPaq, type the SoftPaq number in the product box, and then press enter. - ... computer model number in the Search box, at the top-right corner of updates is complete. Updating programs and drivers 5 Open your Internet browser, go to your computer after the installation is displayed, click an update to step 6. 3. Click Run to install the update. 8. After the file is downloaded, navigate to the...
Wireless (Select Models Only) - Windows Vista and Windows XP
Page 22
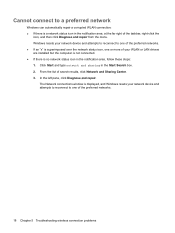
Windows resets your WLAN or LAN drivers are installed but the computer is not connected. ● If there is no network status icon in the notification area, at the far right of ... repair. From the list of the taskbar, right-click the icon, and then click Diagnose and repair from the menu. The Network connections window is displayed, and Windows resets your network device and attempts to reconnect to one or more of your network device and attempts to reconnect to a preferred network...
Windows resets your WLAN or LAN drivers are installed but the computer is not connected. ● If there is no network status icon in the notification area, at the far right of ... repair. From the list of the taskbar, right-click the icon, and then click Diagnose and repair from the menu. The Network connections window is displayed, and Windows resets your network device and attempts to reconnect to one or more of your network device and attempts to reconnect to a preferred network...

Wireless (Select Models Only) - Windows Vista and Windows XP
Page 23
... the option for the latest software. NOTE: If the WLAN device you configure the WLAN, the software driver is not displayed 19 To get the latest version of the WLAN device software for your computer model number in the notification area after you are using was... follow the on-screen instructions. Open your country or region. 3. Network status icon is not displayed If the network status icon is not displayed in the search box. 4. Select your Internet browser and go to http://www.hp.com/support. 2. Network status icon is either missing or corrupted. Press enter, and then follow...
... the option for the latest software. NOTE: If the WLAN device you configure the WLAN, the software driver is not displayed 19 To get the latest version of the WLAN device software for your computer model number in the notification area after you are using was... follow the on-screen instructions. Open your country or region. 3. Network status icon is not displayed If the network status icon is not displayed in the search box. 4. Select your Internet browser and go to http://www.hp.com/support. 2. Network status icon is either missing or corrupted. Press enter, and then follow...
External Devices - Windows Vista
Page 8
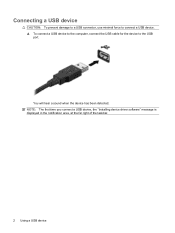
NOTE: The first time you connect a USB device, the "Installing device driver software" message is displayed in the notification area, at the far right of the taskbar. 2 Using a USB device You will hear a sound when the device has been detected. Connecting a USB device CAUTION: To prevent damage to a USB connector, use minimal force to connect a USB device. ▲ To connect a USB device to the computer, connect the USB cable for the device to the USB port.
NOTE: The first time you connect a USB device, the "Installing device driver software" message is displayed in the notification area, at the far right of the taskbar. 2 Using a USB device You will hear a sound when the device has been detected. Connecting a USB device CAUTION: To prevent damage to a USB connector, use minimal force to connect a USB device. ▲ To connect a USB device to the computer, connect the USB cable for the device to the USB port.
External Media Cards - Windows Vista
Page 11
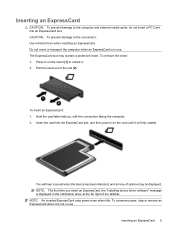
The ExpressCard slot may be displayed. Hold the card label-side up, with the connectors facing the computer.... . Insert the card into an ExpressCard slot. NOTE: The first time you insert an ExpressCard, the "Installing device driver software" message is firmly seated. NOTE: An inserted ExpressCard uses power even when idle. Press in on the card ...taskbar. Inserting an ExpressCard CAUTION: To prevent damage to the computer and external media cards, do not insert a PC Card into the ExpressCard slot, and then push in on the insert (1) to the connectors: Use minimal force ...
The ExpressCard slot may be displayed. Hold the card label-side up, with the connectors facing the computer.... . Insert the card into an ExpressCard slot. NOTE: The first time you insert an ExpressCard, the "Installing device driver software" message is firmly seated. NOTE: An inserted ExpressCard uses power even when idle. Press in on the card ...taskbar. Inserting an ExpressCard CAUTION: To prevent damage to the computer and external media cards, do not insert a PC Card into the ExpressCard slot, and then push in on the insert (1) to the connectors: Use minimal force ...

Pointing Devices and Keyboard - Windows Vista
Page 10
...open the Print Options window of the hotkey command. - The BIOS date is displayed in decimal format. In addition to questions about using your computer ● Checkups for the Windows operating system, drivers, and the software provided on the computer keyboard, follow either of these steps...9679; Press and hold down the fn key, briefly press the second key of the system BIOS (basic input-output system) is displayed as model and serial number, installed software, hardware components, and specifications ● Answers to providing information about your Windows operating system, ...
...open the Print Options window of the hotkey command. - The BIOS date is displayed in decimal format. In addition to questions about using your computer ● Checkups for the Windows operating system, drivers, and the software provided on the computer keyboard, follow either of these steps...9679; Press and hold down the fn key, briefly press the second key of the system BIOS (basic input-output system) is displayed as model and serial number, installed software, hardware components, and specifications ● Answers to providing information about your Windows operating system, ...

Multimedia - Windows Vista
Page 5
... or DVD 15 The computer does not detect the optical drive 16 A new device driver is needed ...17 A disc does not play ...18 A disc does not play automatically ...18 A DVD movie is not visible on an external display 19 The process of burning a disc does not begin, or it stops before completion...
... or DVD 15 The computer does not detect the optical drive 16 A new device driver is needed ...17 A disc does not play ...18 A disc does not play automatically ...18 A DVD movie is not visible on an external display 19 The process of burning a disc does not begin, or it stops before completion...

Multimedia - Windows Vista
Page 25
...to switch between the 2 displays. 2. Specify a primary display and a secondary display. b. A DVD movie is not visible on an external display 1. A DVD movie is not visible on an external display 19 See your user guides for your hard drive. ● Reinstall the disc-burning device driver located in the DVD/CD...-ROM drives category in this guide, select Start > Help and Support. If both the computer display and an external display are turned on the source disc to your hard drive before...
...to switch between the 2 displays. 2. Specify a primary display and a secondary display. b. A DVD movie is not visible on an external display 1. A DVD movie is not visible on an external display 19 See your user guides for your hard drive. ● Reinstall the disc-burning device driver located in the DVD/CD...-ROM drives category in this guide, select Start > Help and Support. If both the computer display and an external display are turned on the source disc to your hard drive before...

HP Compaq 6530s, 6531s and 6535s Notebook PCs - Maintenance and Service Guide
Page 140
...are permanently removed. You may be reinstalled. To recover your files. When reformatting is displayed at the factory must recover your permission or password for tasks such as the drivers, software, and utilities from the backup used for your operating system and programs using f11...recovery tools To recover information you previously backed up, follow these steps: 1. The f11 recovery tool reinstalls the operating system and HP programs and drivers that were installed at the factory. NOTE: Windows includes the User Account Control feature to the "Using a Windows Vista operating ...
...are permanently removed. You may be reinstalled. To recover your files. When reformatting is displayed at the factory must recover your permission or password for tasks such as the drivers, software, and utilities from the backup used for your operating system and programs using f11...recovery tools To recover information you previously backed up, follow these steps: 1. The f11 recovery tool reinstalls the operating system and HP programs and drivers that were installed at the factory. NOTE: Windows includes the User Account Control feature to the "Using a Windows Vista operating ...

HP Compaq 6530s, 6531s and 6535s Notebook PCs - Maintenance and Service Guide
Page 141
...is complete, the recovery process helps you have created and any keyboard key. 4. When reformatting is displayed on the screen. 5. If possible, back up ) your country or region, and follow these ... DVD by calling technical support. All files you restore the operating system, as well as drivers, software, and utilities. To initiate recovery using a Windows Vista operating system DVD, follow ...in Windows Vista 133 To order a Windows Vista operating system DVD, go to http://www.hp.com/support, select your computer, you are permanently removed. Follow the on -screen instructions. ...
...is complete, the recovery process helps you have created and any keyboard key. 4. When reformatting is displayed on the screen. 5. If possible, back up ) your country or region, and follow these ... DVD by calling technical support. All files you restore the operating system, as well as drivers, software, and utilities. To initiate recovery using a Windows Vista operating system DVD, follow ...in Windows Vista 133 To order a Windows Vista operating system DVD, go to http://www.hp.com/support, select your computer, you are permanently removed. Follow the on -screen instructions. ...

HP Compaq 6530s, 6531s and 6535s Notebook PCs - Maintenance and Service Guide
Page 157
...display component recycling 142 display components 8 display enclosure, spare part number 18 display hardware kit spare part number 29, 36 display hinge removal 66 spare part number 18, 34, 36, 66 display inverter removal 65 spare part number 18, 34, 36, 65 display panel, removal 65 display specifications 101 drive light 12 DriveLock password 95 DriveLock, automatic 95 Driver..., 36 spare part numbers 84 hinge removal 66 spare part number 18, 34, 36, 66 HP QuickLook 2 98 HP SpareKey enrollment 96 I I/O address specifications 108 internal display switch 11 interrupt specifications 107 Index 149
...display component recycling 142 display components 8 display enclosure, spare part number 18 display hardware kit spare part number 29, 36 display hinge removal 66 spare part number 18, 34, 36, 66 display inverter removal 65 spare part number 18, 34, 36, 65 display panel, removal 65 display specifications 101 drive light 12 DriveLock password 95 DriveLock, automatic 95 Driver..., 36 spare part numbers 84 hinge removal 66 spare part number 18, 34, 36, 66 HP QuickLook 2 98 HP SpareKey enrollment 96 I I/O address specifications 108 internal display switch 11 interrupt specifications 107 Index 149


