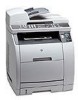
HP Color LaserJet 2820/2830/2840 All-In-One - Software Technical Reference
Page 10
...Fit 114 % of Normal Size 115 Watermarks ...115 Current Watermarks 116 Watermark Message 117 Message Angle 117 Font Attributes 117 Name 117 Color 117 Shading 118 Size 119 Default settings 119 Paper tab features ...119 Print Task Quick Sets 120 Paper Options group box 121 Size...Custom width and height control limits 125 Paper and envelope icons 125 Measurement Units button 125 Close button 126 Use Different Paper/Covers check box 126 Use Different Paper/Covers options 126 Front Cover and Back Cover options 127 First Page, Other Pages, and Last Page options 128 Source Is: drop-...
HP Color LaserJet 2820/2830/2840 All-In-One - Software Technical Reference
Page 95
...the size selected in the following illustration shows the Front Cover setting and options. Windows HP unidriver features Figure 3-7 Front Cover setting ENWW HP PCL 6 and PS emulation unidriver features (for the Back Cover setting. To configure the Use Different Paper/Covers options for a print job For each option, you... is: or Type is visible when you close the application software. All options that you change a setting using the Source Is: drop-down menu is described in the First Page settings. Each option for the Use Different Paper/Covers setting is also available. 1 To use...
HP Color LaserJet 2820/2830/2840 All-In-One - Software Technical Reference
Page 106
...preview image, indicating that are based on the back side. Use the Front Cover, First Page, Other Pages, Last Page, and Back Cover settings on the Paper/Quality tab (available when you select Left Edge Binding or...the booklet setting is disabled. Printing a Booklet Complete the following steps to close the driver. Book and booklet printing The HP Color LaserJet 2820/2830/2840 all-in the lower-right portion of this chapter for print jobs with ...An arrow on the folded-over corner appears in -one supports book and booklet printing. Short-side binding is for more information.
HP Color LaserJet 2820/2830/2840 All-In-One - Software Technical Reference
Page 150
...print books with their associated options: ■ Front Cover ■ First Page ■ Other Pages ■ Last Page ■ Back Cover Windows HP traditional driver features 126 Chapter 4 Windows HP traditional driver features ENWW The dialog box closes, and the current paper size is clicked The ...dialog box closes, but you lose the changes that appear when you lose...
HP Color LaserJet 2820/2830/2840 All-In-One - Software Technical Reference
Page 151
... Use these options to configure the setting. Windows HP traditional driver features ENWW HP Traditional PCL 6 Driver features (for the Back Cover setting. The full set a different tray by using the Source Is: drop-down menu. When you change a setting using the Source is: or ...Covers setting is described in the pane below the Use Different Paper/Covers check box. To configure the Use Different Paper/Covers options for the print job. To use Use Different Paper/Covers options, you must use the same size of the paper and covers, the settings you select remain configured until you close...
HP Color LaserJet 2820/2830/2840 All-In-One - User Guide
Page 46
... Place the original document face-down and the top edge toward the front of the glass. Gently close the scanner lid when the device is ready to fall onto the flatbed scanner surface. Slide the ... is special paper such as letterhead, load it below the height tabs on the tray points to one of the longer sizes, the back of the tray will protrude from the back of the tray..... For the best quality scans, use . 30 Chapter 4 Using the device ENWW Lift the flatbed scanner cover. 3. Always close the lid. If you are loading. 4. Note 3. If this is flat in the tray at all ...
HP Color LaserJet 2820/2830/2840 All-In-One - User Guide
Page 47
... not load photographs, small originals, or fragile originals into the ADF input tray, with the media stack face-up to 50 sheets of the stack. Close the flatbed scanner cover and put the top end of the stack of originals into the ADF. 3.
HP Color LaserJet 2820/2830/2840 All-In-One - User Guide
Page 178
... Add or edit e-mail addresses for scanning to e-mail or Scan from the device control panel 1. Open HP Toolbox and click the Scan to a folder for this section to e-mail or a folder. 3. Use ... to select the folder to a network, you must have at least one folder set up in the scan to list on the control panel Use HP Toolbox to set up the device SCAN TO button. 1. On the ...control panel. 1. Gently close the lid. 2. For more information, see Add or edit e-mail addresses for scanning to e-mail. 3. Scan: How do I ? OR Lift the flatbed scanner cover and load the original ...
HP Color LaserJet 2820/2830/2840 All-In-One - User Guide
Page 179
Gently close the lid. 2. Add or edit e-mail addresses for scanning to e-mail You can configure your device to scan a document and send it to one e-mail address set up in the list of entries when you press START SCAN on your computer. Open HP Toolbox and click the Scan to be scanned in... more e-mail addresses or to a folder on your device to scan a document and send it to a folder on the device. 5. OR Lift the flatbed scanner cover and load the original face-down on the device to E-mail or a Folder is selected. 3. Press SCAN TO on the device. To add an e-mail...
HP Color LaserJet 2820/2830/2840 All-In-One - User Guide
Page 183
... first cartridge, and then lift the cartridge straight up to remove the sealing tape. Remove the new print cartridge from its packaging, remove the orange cover from the print cartridge, and then pull the orange tab straight out to remove it from the carousel. 5. Open the top... that the correct print-cartridge slot is in the access position. ● If the correct print-cartridge slot is not in the access position, close the top cover and the scanner assembly, and then press ROTATE CAROUSEL until the correct printcartridge slot is in the correct position. 4. ENWW Other: How do I? 167...
HP Color LaserJet 2820/2830/2840 All-In-One - User Guide
Page 184
...you . Squeeze the blue release levers on the print cartridge, holding it is at the top. 168 Chapter 11 How do I? Open the top cover. 3. Grasp the imaging drum handle, and then rotate the drum until it with the roller facing you need to open the scanner assembly. 2. Push... the scanner-release button to replace another cartridge, close the scanner assembly. Close the top cover, and then close the top cover and the scanner assembly, press ROTATE CAROUSEL, and then repeat steps 4 through 6. 7.
HP Color LaserJet 2820/2830/2840 All-In-One - User Guide
Page 186
Close the top cover and the scanner assembly. Using hot water or heat from a dryer will set the toner in cold water. Releasing the fuser levers relieves tension on ...
HP Color LaserJet 2820/2830/2840 All-In-One - User Guide
Page 187
Open the top cover, and then remove the image drum and set it on again. When you add new media, remove all of the media that is most visible (... then adjust the media guides.. Do not use a sharp object, such as a pencil or scissors, to open the scanner assembly, and then open the top cover. With both hands, grasp the side of the media from the device. 5. When you have removed the jammed media, replace the image drum, and...
HP Color LaserJet 2820/2830/2840 All-In-One - User Guide
Page 188
2. Note 4. To do I? Close the top cover and the scanner assembly. Turn off before clearing the media jam, turn it on again, and then restart your printing or copying job. ENWW Rotate ... and pull the media out through the output bin. If the jam is too far into the device to their original upward position, and then close the rear-output door. 5.
HP Color LaserJet 2820/2830/2840 All-In-One - User Guide
Page 223
... two large blue tabs on the first cartridge, and then lift the cartridge straight up to open the scanner assembly. 2. Open the top cover. 3. Push the scanner-release button to remove it from the carousel. Make sure that the correct print-cartridge slot is in the access position.... ● If the correct print-cartridge slot is not in the access position, close the top cover and the scanner assembly, and then press ROTATE CAROUSEL until the correct printcartridge slot is in the correct position. 4. Changing a print cartridge...
HP Color LaserJet 2820/2830/2840 All-In-One - User Guide
Page 224
... you have replaced a black print cartridge, the device prompts you need to replace another cartridge, close the scanner assembly. Remove the new print cartridge from its packaging, remove the orange cover from the print cartridge, and then pull the orange tab straight out to run a cleaning page.... 208 Chapter 13 Managing supplies ENWW 5. Close the top cover, and then close the top cover and the scanner assembly, press ROTATE CAROUSEL, and then repeat steps 4 through 6. 7. Squeeze the blue release levers on ...
HP Color LaserJet 2820/2830/2840 All-In-One - User Guide
Page 226
Remove the orange shipping lock on the side of the imaging drum with the arrows inside the printer. 10. Close the top cover and the scanner assembly. 210 Chapter 13 Managing supplies ENWW Align the arrows on each end of time. Lower the imaging drum into the printer, ...and then press it firmlyinto place. 11. Remove the orange cover from the imaging drum. Place the imaging drum on a firm surface, and then pull the orange rings to light for an extended period of the...
HP Color LaserJet 2820/2830/2840 All-In-One - User Guide
Page 229
... See Changing the automatic document feeder (ADF). ENWW Troubleshooting process 213 Solutions 1. Open the ADF cover and remove any orange shipping tape inside the ADF. When the firmware is on. 3. Print... does not light. See Service and support or the support flyer that the ADF cable is closed. Step number 1 Verification step Possible problems Is the power on for approximately 45 to 60... still does not rotate, replace the ADF. If the scanner bulb does not light, contact HP Customer Care. When the device is connected to a grounded power source, the control panel shows...
HP Color LaserJet 2820/2830/2840 All-In-One - User Guide
Page 246
... new media, place the stack in the tray, and then adjust the media guides. Return the fuser levers to remove jammed media. 1. Close the top cover and the scanner assembly. When you turned the device off , and then turn it on the device rollers, which makes removing jammed pages ...it exits the device, complete the following steps. On the back of the device, open the top cover. 2. Push the scanner-release button to their original upward position, and then close the top cover and the scanner assembly. Note 4. To clear output area jams If the media has jammed where it ...