Product Information
Page 15
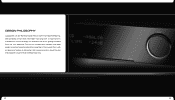
We could go on and on about this, but that good design consists of essential elements presented in architecture, music and design. The Harman Kardon team believes that would be icing on the cake. Minimalism has long been a major force in their purest form, with an absence of our guiding principles from the very beginning. We don't do icing. 28 29 It's also been one of excess or decoration. DESIGN PHILOSOPHY Ludwig Mies van der Rohe borrowed "less is more" from Mies. We borrowed it from Robert Browning.
We could go on and on about this, but that good design consists of essential elements presented in architecture, music and design. The Harman Kardon team believes that would be icing on the cake. Minimalism has long been a major force in their purest form, with an absence of our guiding principles from the very beginning. We don't do icing. 28 29 It's also been one of excess or decoration. DESIGN PHILOSOPHY Ludwig Mies van der Rohe borrowed "less is more" from Mies. We borrowed it from Robert Browning.
Owners Manual
Page 5
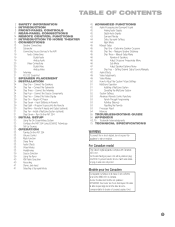
...INTRODUCTION TO HOME THEATER 18 CONNECTIONS 18 Speaker Connections 18 Subwoofer 18 Connecting Source Devices to rain or moisture. Insert Batteries in AC Power 29 Step Seven - Determine Speaker Crossover 45 Step Two - For Canadian model This Class B digital apparatus complies with a polarized plug: ...cord with Canadian ICES-003. Turn On the AVR 254 33 INITIAL SETUP 33 Using the On-Screen Menu System 33 Configure the AVR 254 Using EzSet/EQ Technology 35 Set Up Sources 38 OPERATION 38 Turning On the AVR 254 38 Volume Control 38 Mute Function 38 Sleep Timer...
...INTRODUCTION TO HOME THEATER 18 CONNECTIONS 18 Speaker Connections 18 Subwoofer 18 Connecting Source Devices to rain or moisture. Insert Batteries in AC Power 29 Step Seven - Determine Speaker Crossover 45 Step Two - For Canadian model This Class B digital apparatus complies with a polarized plug: ...cord with Canadian ICES-003. Turn On the AVR 254 33 INITIAL SETUP 33 Using the On-Screen Menu System 33 Configure the AVR 254 Using EzSet/EQ Technology 35 Set Up Sources 38 OPERATION 38 Turning On the AVR 254 38 Volume Control 38 Mute Function 38 Sleep Timer...

Owners Manual
Page 28
... audio outputs to Step Six. Figure 29 - See Figure 30. Video Components: Install video components, e.g., game consoles and camcorders, as follows (see Figure 33). Unlike HDMI connections, component video connections do not enable the AVR 254 to detect the display's capabilities and ...Figure 31): • Connect the component's S-video or composite video output (use an interconnect with HDMI connections, the AVR 254 is required, although the AVR will cause undesirable video interference. See Figure 31. To remove the covers, gently press on the front panel (if available...
... audio outputs to Step Six. Figure 29 - See Figure 30. Video Components: Install video components, e.g., game consoles and camcorders, as follows (see Figure 33). Unlike HDMI connections, component video connections do not enable the AVR 254 to detect the display's capabilities and ...Figure 31): • Connect the component's S-video or composite video output (use an interconnect with HDMI connections, the AVR 254 is required, although the AVR will cause undesirable video interference. See Figure 31. To remove the covers, gently press on the front panel (if available...

Owners Manual
Page 29
...you understand how to control many brands and models of DVD players, cable boxes, satellite receivers, the Harman Kardon DMC 1000 digital media center and TVs. Select the brand code 29 Step Seven - To remove the battery cover located on the back of your system, follow these steps ...sure no more than 50 watts. The AVR 254's remote is capable of controlling the receiver, but it will convert composite video sources to observe the correct polarity. Insert the batteries, as furniture, are blocking the remote's path to control many Harman Kardon DVD players. If the device has ...
...you understand how to control many brands and models of DVD players, cable boxes, satellite receivers, the Harman Kardon DMC 1000 digital media center and TVs. Select the brand code 29 Step Seven - To remove the battery cover located on the back of your system, follow these steps ...sure no more than 50 watts. The AVR 254's remote is capable of controlling the receiver, but it will convert composite video sources to observe the correct polarity. Insert the batteries, as furniture, are blocking the remote's path to control many Harman Kardon DVD players. If the device has ...

Owners Manual
Page 64
APPENDIX 12 34 567 8 9 10 11 12 13 14 15 16 17 18 19 20 21 22 23 24 25 26 27 29 28 30 31 32 33 34 35 36 37 38 39 40 41 Refer to the numbered buttons in Figure 72 when using the Function List. Remote Control Function List Reference 42 43 44 45 46 47 48 49 50 51 52 53 54 64 64 Figure 72 -
APPENDIX 12 34 567 8 9 10 11 12 13 14 15 16 17 18 19 20 21 22 23 24 25 26 27 29 28 30 31 32 33 34 35 36 37 38 39 40 41 Refer to the numbered buttons in Figure 72 when using the Function List. Remote Control Function List Reference 42 43 44 45 46 47 48 49 50 51 52 53 54 64 64 Figure 72 -

Owners Manual
Page 65
...Sel Input Sel Input Sel Audio Effects Video Modes Surround Modes 1 2 3 4 5 6 7 8 9 Prev. Button Name AVR FM 01 AVR Power On AVR Power On AVR Power On 02 AVR Power Off AVR Power Off AVR Power Off 03 Device Power On 04 Device Power Off 05 CBL/SAT Input Sel Input Sel 06 DVD... 5 5 20 6 6 6 21 7 7 7 22 8 8 8 23 9 9 9 24 Last Last Last 25 0 0 0 26 Activity Activity Activity 27 Back/Exit Back/Exit Back/Exit 28 Menu Menu Menu 29 Up Up Tune Up 30 Left Left Preset/Down 31 OK OK OK 32 Right Right Preset/Up 33 Down Down Tune Down 34 Disc...
...Sel Input Sel Input Sel Audio Effects Video Modes Surround Modes 1 2 3 4 5 6 7 8 9 Prev. Button Name AVR FM 01 AVR Power On AVR Power On AVR Power On 02 AVR Power Off AVR Power Off AVR Power Off 03 Device Power On 04 Device Power Off 05 CBL/SAT Input Sel Input Sel 06 DVD... 5 5 20 6 6 6 21 7 7 7 22 8 8 8 23 9 9 9 24 Last Last Last 25 0 0 0 26 Activity Activity Activity 27 Back/Exit Back/Exit Back/Exit 28 Menu Menu Menu 29 Up Up Tune Up 30 Left Left Preset/Down 31 OK OK OK 32 Right Right Preset/Up 33 Down Down Tune Down 34 Disc...

Owners Manual
Page 66
... Sel Input Sel Audio Effects Video Modes Surround Modes 1 2 3 4 5 6 7 8 9 0 Activity Open/Close Random Play Repeat Intro Scan AVR Volume + AVR Volume - Search Time Stop AVR Settings Info Settings Sleep HDTV AVR Power On AVR Power Off Power On Power Off Input Sel Input Sel Input Sel Radio Input Sel Input Sel Input Sel... Modes 14 Surround Modes 15 1 16 2 17 3 18 4 19 5 20 6 21 7 22 8 23 9 24 Last 25 0 26 Activity 27 Back/Exit 28 Menu 29 Up 30 Left 31 OK 32 Right 33 Down 34 Disc Menu 35 Red 36 Green 37 Yellow 38 Blue 39 Volume + Volume - 40 Mute...
... Sel Input Sel Audio Effects Video Modes Surround Modes 1 2 3 4 5 6 7 8 9 0 Activity Open/Close Random Play Repeat Intro Scan AVR Volume + AVR Volume - Search Time Stop AVR Settings Info Settings Sleep HDTV AVR Power On AVR Power Off Power On Power Off Input Sel Input Sel Input Sel Radio Input Sel Input Sel Input Sel... Modes 14 Surround Modes 15 1 16 2 17 3 18 4 19 5 20 6 21 7 22 8 23 9 24 Last 25 0 26 Activity 27 Back/Exit 28 Menu 29 Up 30 Left 31 OK 32 Right 33 Down 34 Disc Menu 35 Red 36 Green 37 Yellow 38 Blue 39 Volume + Volume - 40 Mute...