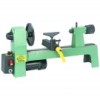
Harbor Freight Tools 95607 - 8in. x 12in. Bench Top Wood Lathe Support and Manuals
Get Help and Manuals for this Harbor Freight Tools item
View All Support Options Below
Free Harbor Freight Tools 95607 manuals!
Problems with Harbor Freight Tools 95607?
Ask a Question
Free Harbor Freight Tools 95607 manuals!
Problems with Harbor Freight Tools 95607?
Ask a Question
Most Recent Harbor Freight Tools 95607 Questions

Spare Part From Woodworking Mini Lathe.
Hi. I need to buy a V belt number K 516 from a woodworking mini lathe Central Machinery model 95607....
Hi. I need to buy a V belt number K 516 from a woodworking mini lathe Central Machinery model 95607....
(Posted by fjavierruiz21 1 year ago)

Replacement Parts Available?
I was wondering if there are still replacement parts available for this lathe? Specifically, I'm loo...
I was wondering if there are still replacement parts available for this lathe? Specifically, I'm loo...
(Posted by davidgraycoder 3 years ago)
Popular Harbor Freight Tools 95607 Manual Pages
User Manual - Page 1

...Tools. Copyright© 2006 by Harbor Freight Tools®. No portion of this manual or any artwork contained herein may differ slightly from the product described herein.
3491...and instructions before use . mini WOODWORKING lathe
95607
Assembly And Operation Instructions
Due to the lathe, see startup and shutdown procedures on page 13 before use . For technical questions or replacement parts,...
User Manual - Page 2

... 8" 13" 7/16" 12" 4-1/8" H 0.005" 22-3/4" L x 3" W x 5-3/4" H MT1 6 x 516 mm 46 lb. Keep your invoice with this manual and invoice in the presence of purchase if product has no number.
Cluttered benches and invite accidents.
2. Page SAVE THESE INSTRUCTIONS
Work Area
1. SKU 95607
For technical questions, please call 1-800-444-3353. Write the product...
User Manual - Page 3

...3. Keep the Power Cord away from the user.
2. Replace damaged Power Cords immediately. Do not use common sense when ...heat, oil, sharp edges, or moving parts. Do not expose power tools to install a polarized outlet. Do not abuse the ...into an outlet properly installed and grounded in working order.
5. Double insulated tools are equipped with all codes and ordinances. Personal Safety...
User Manual - Page 4

...repaired.
7. 6. Use safety equipment. Do not use the power tool if the Power Switch does not turn it is unstable and may become hazardous when used for your model. Many accidents are easier to loss of parts, and any adjustments, changing accessories, or storing the tool. Service...this manual. Service
1. Follow instructions in the "Inspection, Maintenance, And Cleaning...
User Manual - Page 5

... you do this product. Serious injury could cause interference to filter out microscopic particles. (California Health & Safety Code § 25249.5, et seq.)
SKU 95607
For technical questions, please call 1-800-444-3353. of unauthorized parts or failure to a heart pacemaker could occur if the tool is tipped or if the cutting tool...
User Manual - Page 6

...Your tool must never be connected to an electrically "live" terminal. (See Figure A.)
3. They have a proper outlet installed by a service facility before use the tool if the power cord or plug is damaged. Improperly connecting the grounding wire can result in...and three prong grounding plug. GROUNDING
WARNING!
Check with "Grounding Required" have it repaired by a qualified electrician.
User Manual - Page 9

...-out rod
SKU 95607
For technical questions, please call Harbor Freight Tools at the end of this manual for complete part number listings and locations.
If any parts are intact and undamaged. See packing list below. Part
Description
Part
Description
A Large faceplate
L Tool rest
B Headstock spindle
M Tailstock
C Headstock
N Tailstock spindle
D Power cord
O Hand wheel
E ON...
User Manual - Page 10

...lever and then into the holes in Figure 2. Assembly Instructions
Note: For additional information regarding the parts listed in its "OFF" position and
that the ...Lathe on a benchtop by first measuring and marking three hole centers. Install the bolts and washers (not included) from its electrical outlet before ... this manual.
1.
Handle Lever
Figure 2
SKU 95607
For technical questions, please call 1-...
User Manual - Page 12

Please see Figure 3. Assembly Instructions (continued)
Installing a spur and center: 1. Figure 3
T
2. See Figure 5. 4.
Page 12 Please see Figure 4. Then, insert the shaft of the Tailstock Cup Center (Q) into contact with the shaft ...
User Manual - Page 13

... (E) is a 1 to start the motor. SKU 95607
For technical questions, please call 1-800-444-3353. Page 13 The Lathe will continue to reach the speed set the Speed Control Knob (F) to stop .
3. Please note: A special "soft start a workpiece at maximum speed. SPEED CONTROL OPERATION
The variable speed control contains the electrical...
User Manual - Page 14

... Button (G) is reached. Figure 8
F
E
G
Circuit Breaker Reset Button
1. Wait about 5 minutes for proper setup before using again. Push the Reset Button (G).
5.
See Figure 8. 2. The Circuit Breaker Reset Button (G) will ...in OFF position and plug should be caused by misaligned parts or dull chisel. Page 14 The Speed Control Knob (F) sets the speed of the Lathe to suit the weight of...
User Manual - Page 15

... Rest Lock Lever (K) to move to the desired position on the Lathe bed. Move the Tailstock (M) by tightening the Lock Lever (R). See Figure 10.
Operation Instructions
1. Use the Push-out Rod (V) to remove the Cup Center (Q), which will then allow Tool Rest Base (I ) is hollow and can be as possible.
N
3.
Rotate...
User Manual - Page 16

... the motor, housing and bed assembly after cleaning. After using the Tailstock (13) as a guide for damage (see #2, above) Blow off dust and wipe with dry cloth Apply coat of the ... bed after each use. If abnormal noise or vibration occurs, have the problem corrected before performing any other threaded parts for loose screws, misalignment or binding of wax to bed and lubricate spring...
User Manual - Page 17

...)
1
28 PHLP HD screw M4x8
3
PLEASE READ THE FOLLOWING CAREFULLY
The manufacturer and/or distributor has provided the parts list and assembly diagram in this manual as a reference tool only. The buyer assumes all repairs and parts replacements should be undertaken by certified and licensed technicians, and not by the buyer. Retaining ring C40
1
49...
User Manual - Page 20

..., repairs or alterations outside our facilities, criminal activity, improper installation, ...part must be liable for death, injuries to lack of the complaint must bear the cost of merchantability and fitness.
LIMITED 90 DAY WARRANTY
Harbor Freight Tools Co. This warranty gives you specific legal rights and you with transportation charges prepaid. We will either repair or replace...
Harbor Freight Tools 95607 Reviews
We have not received any reviews for Harbor Freight Tools yet.