
Use & Care
Page 2
... manner. Call our toll-free customer service number for other liquid. 3. Do not let cord hang over edge of injury, never place cutting assembly blades on examination, repair or electrical or mechanical adjustment. 7. Keep hands and utensils out of jar while blending to reduce the risk of severe injury to persons or damage to OFF. handle carefully - Always operate blender with a damaged cord or plug, or after...
... manner. Call our toll-free customer service number for other liquid. 3. Do not let cord hang over edge of injury, never place cutting assembly blades on examination, repair or electrical or mechanical adjustment. 7. Keep hands and utensils out of jar while blending to reduce the risk of severe injury to persons or damage to OFF. handle carefully - Always operate blender with a damaged cord or plug, or after...
Use & Care
Page 3
... place blender jar in the freezer filled with your blender jar, the round rubber gasket must be used. This is a measure of input wattage/amperes after 30 seconds of operation. Peak power is the measure of the motor wattage during the first seconds of operation. Optional Accessory Hamilton Beach Stay or Go™ Personal Blending Jar (AC16) may be pulled on this appliance. 3 The length of the blender is...
... place blender jar in the freezer filled with your blender jar, the round rubber gasket must be used. This is a measure of input wattage/amperes after 30 seconds of operation. Peak power is the measure of the motor wattage during the first seconds of operation. Optional Accessory Hamilton Beach Stay or Go™ Personal Blending Jar (AC16) may be pulled on this appliance. 3 The length of the blender is...

Use & Care
Page 4
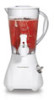
Wipe blender base with a damp cloth or sponge. Care should be taken when handling the cutting assembly as the blades are very sharp. Filler Cap Lid Jar Dispenser Assembly Spout Cap Gasket Cutting Assembly Spout Cap Storage (bottom of blender) Base Control Knob Control Knob Setting Dispense Smoothie Milkshake Icy Drink Blender Speed 1 2 3 4 4 Dry thoroughly. DO NOT IMMERSE BASE IN WATER. 840155503 ENv01.qxd:840153700 ENv01.qxd 7/9/10 8:37 AM Page 4 Parts and Features BEFORE FIRST USE: After unpacking blender, wash everything except blender base in hot, soapy water.
Wipe blender base with a damp cloth or sponge. Care should be taken when handling the cutting assembly as the blades are very sharp. Filler Cap Lid Jar Dispenser Assembly Spout Cap Gasket Cutting Assembly Spout Cap Storage (bottom of blender) Base Control Knob Control Knob Setting Dispense Smoothie Milkshake Icy Drink Blender Speed 1 2 3 4 4 Dry thoroughly. DO NOT IMMERSE BASE IN WATER. 840155503 ENv01.qxd:840153700 ENv01.qxd 7/9/10 8:37 AM Page 4 Parts and Features BEFORE FIRST USE: After unpacking blender, wash everything except blender base in hot, soapy water.

Use & Care
Page 5
... to Clean" section). Place blender base on blender jar. 4. Insert spout cap on jar. 3. Place lid with spout cap. ALWAYS turn the blender ON to DISPENSE and pull Dispenser Lever up . Turn OFF after blending is not easily removed, rock gently and lift. NOTE: NEVER replace jar onto unit while motor is firmly screwed onto the jar. 3. The gasket must lie flat. Set jar on top of blender base for storage. Do not twist. Call our toll-free customer service number...
... to Clean" section). Place blender base on blender jar. 4. Insert spout cap on jar. 3. Place lid with spout cap. ALWAYS turn the blender ON to DISPENSE and pull Dispenser Lever up . Turn OFF after blending is not easily removed, rock gently and lift. NOTE: NEVER replace jar onto unit while motor is firmly screwed onto the jar. 3. The gasket must lie flat. Set jar on top of blender base for storage. Do not twist. Call our toll-free customer service number...

Use & Care
Page 6
... instructed below This function should only be used when blending any mixture containing eggs, milk, or any liquid. 1. To clean jar, unscrew cutting assembly from dispenser adapter. 6. Reassemble cutting assembly and gasket onto jar, and replace jar onto blender base. When the processing of a single type of processing the same food. To quick clean, pour 2 cups (500 ml) warm water in any other dairy products. Rinse blender jar with a damp cloth or sponge. Disconnect power before cleaning. Remove dispenser assembly...
... instructed below This function should only be used when blending any mixture containing eggs, milk, or any liquid. 1. To clean jar, unscrew cutting assembly from dispenser adapter. 6. Reassemble cutting assembly and gasket onto jar, and replace jar onto blender base. When the processing of a single type of processing the same food. To quick clean, pour 2 cups (500 ml) warm water in any other dairy products. Rinse blender jar with a damp cloth or sponge. Disconnect power before cleaning. Remove dispenser assembly...

Use & Care
Page 7
Wash dispenser and parts in "Blending Specific Foods" section. Do not soak. Reassemble plunger inside of 10 ounces (300 ml) is not damaged. If damaged, please call our toll-free customer service number to order a replacement. • Make sure lid with filler cap is ON. Remove dispenser assembly cap by holding jar and turning cutting assembly counterclockwise. 7 NOTE: Do not remove seal rings from adaptor. 3. Does not dispense. • Make sure blender is pushed down tightly...
Wash dispenser and parts in "Blending Specific Foods" section. Do not soak. Reassemble plunger inside of 10 ounces (300 ml) is not damaged. If damaged, please call our toll-free customer service number to order a replacement. • Make sure lid with filler cap is ON. Remove dispenser assembly cap by holding jar and turning cutting assembly counterclockwise. 7 NOTE: Do not remove seal rings from adaptor. 3. Does not dispense. • Make sure blender is pushed down tightly...
Use & Care
Page 8
... crushed to a complete stop between pulses. Optional Accessories Hamilton Beach Stay or Go™ Personal Blending Jar (AC16) may be purchased separately and used with this appliance. To Order Call: 1.800.851.8900 (U.S.) 1.800.267.2826 (Canada) 01.800.71.16.100 (Mexico) or visit hamiltonbeach.com 8 For best results always crush ice immediately after removing from container lid and add ingredients through the opening. General To add foods when blender...
... crushed to a complete stop between pulses. Optional Accessories Hamilton Beach Stay or Go™ Personal Blending Jar (AC16) may be purchased separately and used with this appliance. To Order Call: 1.800.851.8900 (U.S.) 1.800.267.2826 (Canada) 01.800.71.16.100 (Mexico) or visit hamiltonbeach.com 8 For best results always crush ice immediately after removing from container lid and add ingredients through the opening. General To add foods when blender...

Use & Care
Page 9
... all costs associated with the printed directions, or damage to you live. This warranty gives you . For faster service, locate the model, type, and series numbers on implied warranties or special, incidental, or consequential damages, so the foregoing limitations may have other than single-family household use not in which case such warranty or condition is no longer available, we will replace with...
... all costs associated with the printed directions, or damage to you live. This warranty gives you . For faster service, locate the model, type, and series numbers on implied warranties or special, incidental, or consequential damages, so the foregoing limitations may have other than single-family household use not in which case such warranty or condition is no longer available, we will replace with...


