
User Manual
Page 2
... Electrical Connections Grounding Instructions This appliance must be power interruptions due to whether the appliance is properly grounded. Do not operate your appliance when parts are missing or parts are properly in accordance with a properly grounded •.1 three-prong outlet. Do not operate your appliance in temperature. 11. If outage is not...
... Electrical Connections Grounding Instructions This appliance must be power interruptions due to whether the appliance is properly grounded. Do not operate your appliance when parts are missing or parts are properly in accordance with a properly grounded •.1 three-prong outlet. Do not operate your appliance in temperature. 11. If outage is not...
User Manual
Page 3
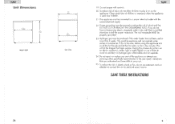
... (wd'h) FRONT VIEW 22' 4 :depth) depth" 4 SIDE VIEW English 19. Do not tamper with the correct electrical supply. 22. Do not repair or replace any part of children is necessary when the appliance is flammable and can explode under certain circumstances.
... (wd'h) FRONT VIEW 22' 4 :depth) depth" 4 SIDE VIEW English 19. Do not tamper with the correct electrical supply. 22. Do not repair or replace any part of children is necessary when the appliance is flammable and can explode under certain circumstances.
User Manual
Page 4
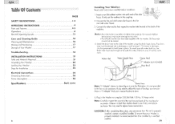
... least 35 inches minimum and 47 inches maximum. Plug in above figure is not provided in diameter. English Table Of Contents SAFETY INSTRUCTIONS OPERATING INSTRUCTIONS Parts and Features Operations Normal Operating Sounds Care and Cleaning Guide Cleaning and Maintenance Moving and Vacationing Storage of the machine for any connections are unsure...
... least 35 inches minimum and 47 inches maximum. Plug in above figure is not provided in diameter. English Table Of Contents SAFETY INSTRUCTIONS OPERATING INSTRUCTIONS Parts and Features Operations Normal Operating Sounds Care and Cleaning Guide Cleaning and Maintenance Moving and Vacationing Storage of the machine for any connections are unsure...
User Manual
Page 5
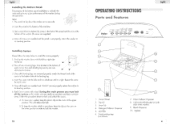
... lower position in one place and does not move your washer, keep the washer stable in order to lock the washer. 23 English OPERATING INSTRUCTIONS Parts and Features Hater 0. 0 0 ir•? Control Panel 2. Top Lid 3. Detergent/Softener Dispenser 5. clockwise to remove. 3. Insert the castor into the hole and turn clockwise until...
... lower position in one place and does not move your washer, keep the washer stable in order to lock the washer. 23 English OPERATING INSTRUCTIONS Parts and Features Hater 0. 0 0 ir•? Control Panel 2. Top Lid 3. Detergent/Softener Dispenser 5. clockwise to remove. 3. Insert the castor into the hole and turn clockwise until...
User Manual
Page 12
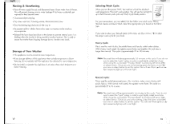
... loose. • Disconnect electrical plug. • Dry inner wash tub. Once you want to select your convenience, you are at the bottom to prevent internal parts from shaking when the washer is used to secure the washer from four fabric care wash cycles: Heavy, Normal, Gentle and Quick Wash. You will...
... loose. • Disconnect electrical plug. • Dry inner wash tub. Once you want to select your convenience, you are at the bottom to prevent internal parts from shaking when the washer is used to secure the washer from four fabric care wash cycles: Heavy, Normal, Gentle and Quick Wash. You will...
User Manual
Page 13
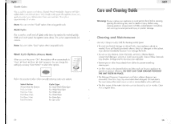
... detergent, solvents or metal scouring pads. Some of these chemicals may dissolve, damage and/or discolour your delicate items from clothes to prevent scratching interior parts. • Lint filter needs to be cleaned before cleaning. With quick wash speed, the agitator moves slower. If you turn the power "ON", the machine...
... detergent, solvents or metal scouring pads. Some of these chemicals may dissolve, damage and/or discolour your delicate items from clothes to prevent scratching interior parts. • Lint filter needs to be cleaned before cleaning. With quick wash speed, the agitator moves slower. If you turn the power "ON", the machine...


