
Instruction Manual
Page 2
... the possibility of fire, electric shock, or injury to the wash. 13. Do not use . 14. Do not tamper with the installation instructions before use this material has been removed, to reduce the risk of children is necessary when the appliance is used , we recommend that could ignite...tub is moving. Do not try to proper electrical outlet with the correct electrical supply. 21. If your appliance in this appliance unless all instructions before making any repairs. 8. The appliance loading door must be ensured to avoid an accident. 12. Do not operate this appliance and ...
... the possibility of fire, electric shock, or injury to the wash. 13. Do not use . 14. Do not tamper with the installation instructions before use this material has been removed, to reduce the risk of children is necessary when the appliance is used , we recommend that could ignite...tub is moving. Do not try to proper electrical outlet with the correct electrical supply. 21. If your appliance in this appliance unless all instructions before making any repairs. 8. The appliance loading door must be ensured to avoid an accident. 12. Do not operate this appliance and ...

Instruction Manual
Page 3
...materials. 26. Do not repair or replace any part of the appliance or attempt any servicing unless specifically recommended in the user-repair instructions that you understand and have a certified electrician install the proper receptacle. This will let the trapped hydrogen escape. SAVE THESE... electric shock or fire, do not turn on an electric appliance, smoke, light a match/lighter or use a flame to cooking oils in your dryer. Items contaminated with gasoline, dry-cleaning solvents, or other flammable or explosive substances, as hydrogen gas is the case, before and after each load....
...materials. 26. Do not repair or replace any part of the appliance or attempt any servicing unless specifically recommended in the user-repair instructions that you understand and have a certified electrician install the proper receptacle. This will let the trapped hydrogen escape. SAVE THESE... electric shock or fire, do not turn on an electric appliance, smoke, light a match/lighter or use a flame to cooking oils in your dryer. Items contaminated with gasoline, dry-cleaning solvents, or other flammable or explosive substances, as hydrogen gas is the case, before and after each load....
Instruction Manual
Page 5
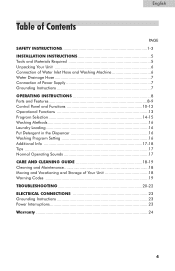
... and Materials Required 5 Unpacking Your Unit 6 Connection of Water Inlet Hose and Washing Machine 6 Water Drainage Hose 7 Connection of Power Supply 7 Grounding Instructions 7 OPERATING INSTRUCTIONS 8 Parts and Features 8-9 Control Panel and Functions 10-12 Operational Functions 13 Program Selection 14-15 Washing Methods 16 Laundry Loading 16 Put Detergent in ... 18-19 Cleaning and Maintenance 18 Moving and Vacationing and Storage of Your Unit 18 Warning Codes 19 TROUBLESHOOTING 20-22 ELECTRICAL CONNECTIONS 23 Grounding Instructions 23 Power Interruptions 23 Warranty 24 4
... and Materials Required 5 Unpacking Your Unit 6 Connection of Water Inlet Hose and Washing Machine 6 Water Drainage Hose 7 Connection of Power Supply 7 Grounding Instructions 7 OPERATING INSTRUCTIONS 8 Parts and Features 8-9 Control Panel and Functions 10-12 Operational Functions 13 Program Selection 14-15 Washing Methods 16 Laundry Loading 16 Put Detergent in ... 18-19 Cleaning and Maintenance 18 Moving and Vacationing and Storage of Your Unit 18 Warning Codes 19 TROUBLESHOOTING 20-22 ELECTRICAL CONNECTIONS 23 Grounding Instructions 23 Power Interruptions 23 Warranty 24 4
Instruction Manual
Page 6
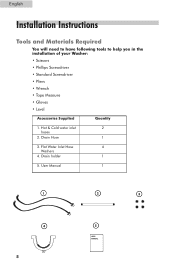
User Manual 1 1 2 3 4 5 5 USER MANUAL Drain Hose 1 3. Drain holder 1 5. English Installation Instructions Tools and Materials Required You will need to have following tools to help you in the installation of your Washer: • Scissors • Phillips Screwdriver • Standard Screwdriver • Pliers • Wrench • Tape Measure • Gloves • Level Accessories Supplied Quantity 1. Flat Water Inlet Hose 4 Washers 4. Hot & Cold water inlet 2 hoses 2.
User Manual 1 1 2 3 4 5 5 USER MANUAL Drain Hose 1 3. Drain holder 1 5. English Installation Instructions Tools and Materials Required You will need to have following tools to help you in the installation of your Washer: • Scissors • Phillips Screwdriver • Standard Screwdriver • Pliers • Wrench • Tape Measure • Gloves • Level Accessories Supplied Quantity 1. Flat Water Inlet Hose 4 Washers 4. Hot & Cold water inlet 2 hoses 2.
Instruction Manual
Page 8
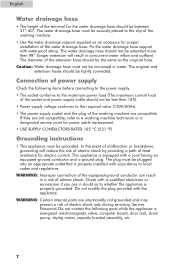
... power supply. • The socket conforms to the clip of the washing machine. • Use the water drainage support supplied as the original hose. Grounding instructions • This appliance must be securely placed to the maximum power load (The maximum current load of the socket and power supply cable should be...
... power supply. • The socket conforms to the clip of the washing machine. • Use the water drainage support supplied as the original hose. Grounding instructions • This appliance must be securely placed to the maximum power load (The maximum current load of the socket and power supply cable should be...
Instruction Manual
Page 9
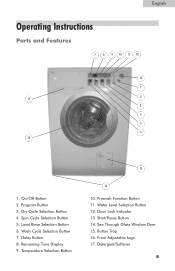
Load Rinse Selection Button 6. Temperature Selection Button 15 16 10. Start/Pause Button 14. See Through Glass Window Door 15. Dry Cycle Selection Button 4. Wash Cycle Selection Button 7. Detergent/Softener 8 Program Button 3. Delay Button 8. Prewash Function Button 11. Spin Cycle Selection Button 5. Button Trap 16. On/Off Button 2. Water Level Selection Button 12. English Operating Instructions Parts and Features 7 8 9 10 11 12 13 1 2 17 3 4 5 6 14 1. Door Lock Indicator 13. Remaining Time Display 9. Front Adjustable Legs 17.
Load Rinse Selection Button 6. Temperature Selection Button 15 16 10. Start/Pause Button 14. See Through Glass Window Door 15. Dry Cycle Selection Button 4. Wash Cycle Selection Button 7. Detergent/Softener 8 Program Button 3. Delay Button 8. Prewash Function Button 11. Spin Cycle Selection Button 5. Button Trap 16. On/Off Button 2. Water Level Selection Button 12. English Operating Instructions Parts and Features 7 8 9 10 11 12 13 1 2 17 3 4 5 6 14 1. Door Lock Indicator 13. Remaining Time Display 9. Front Adjustable Legs 17.
Instruction Manual
Page 11
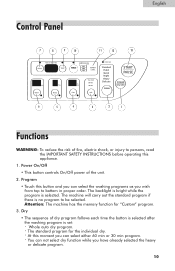
... of the unit. 2. Power On/Off • This button controls On/Off power of fire, electric shock, or injury to persons, read the IMPORTANT SAFETY INSTRUCTIONS before operating this moment you can select either 60 min or 30 min program. • You can select the washing programs as you have already...
... of the unit. 2. Power On/Off • This button controls On/Off power of fire, electric shock, or injury to persons, read the IMPORTANT SAFETY INSTRUCTIONS before operating this moment you can select either 60 min or 30 min program. • You can select the washing programs as you have already...
Instruction Manual
Page 19
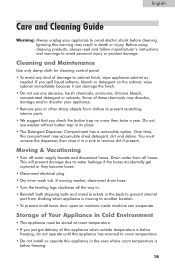
...instructions and warnings to water leakage if the hoses accidentally get ruptured or they become loose. • Disconnect electrical plug. • Dry inner wash tub. If moving to another location. • To prevent mold leave door open so moisture inside machine can damage the finish. • Do not use washer... Use only damp cloth for cleaning control panel. • To avoid any kind of this appliance when outside temperature is moving washer, disconnect drain hose. • Turn the leveling legs clockwise all hoses. Some of Your Appliance in Cold Environment • This...
...instructions and warnings to water leakage if the hoses accidentally get ruptured or they become loose. • Disconnect electrical plug. • Dry inner wash tub. If moving to another location. • To prevent mold leave door open so moisture inside machine can damage the finish. • Do not use washer... Use only damp cloth for cleaning control panel. • To avoid any kind of this appliance when outside temperature is moving washer, disconnect drain hose. • Turn the leveling legs clockwise all hoses. Some of Your Appliance in Cold Environment • This...
Instruction Manual
Page 22
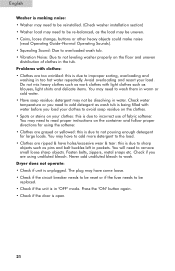
...; Washer may need to be reinstalled. (Check washer installation section) • Washer load may not be dissolving in water. English Washer is open. 21 Check water temperature or you need to be uneven. • Coins, loose change, buttons or other heavy objects could make noise (read proper instructions on...• Clothes are too wrinkled: this is unplugged. Never add undiluted bleach to improper sorting, overloading and washing in "OFF" mode. Dryer does not operate: • Check if unit is due to incorrect use of clothes in pockets. Avoid overloading and resort your clothes:...
...; Washer may need to be reinstalled. (Check washer installation section) • Washer load may not be dissolving in water. English Washer is open. 21 Check water temperature or you need to be uneven. • Coins, loose change, buttons or other heavy objects could make noise (read proper instructions on...• Clothes are too wrinkled: this is unplugged. Never add undiluted bleach to improper sorting, overloading and washing in "OFF" mode. Dryer does not operate: • Check if unit is due to incorrect use of clothes in pockets. Avoid overloading and resort your clothes:...
Instruction Manual
Page 24
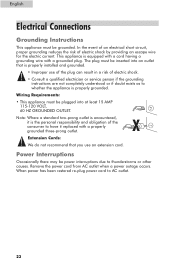
... short circuit, proper grounding reduces the risk of electric shock. • Consult a qualified electrician or service person if the grounding instructions are not completely understood or if doubt exists as to whether the appliance is properly grounded. Extension Cords: We do not recommend... that is properly installed and grounded. • Improper use an extension cord. English Electrical Connections Grounding Instructions This appliance must be power interruptions due to thunderstorms or other causes. When power has been restored re-plug power cord to AC ...
... short circuit, proper grounding reduces the risk of electric shock. • Consult a qualified electrician or service person if the grounding instructions are not completely understood or if doubt exists as to whether the appliance is properly grounded. Extension Cords: We do not recommend... that is properly installed and grounded. • Improper use an extension cord. English Electrical Connections Grounding Instructions This appliance must be power interruptions due to thunderstorms or other causes. When power has been restored re-plug power cord to AC ...
