User Manual
Page 2
... following information will be obtained from the serial label, which is on your air conditioner. This manual contains useful information for future reference. Your air conditioner cleans, cools and dehumidifies the air in the Product Registration Card. Attach the sales receipt to -operate Haier air conditioner. Model and serial number can be needed: Model Number: Serial Number: Date...
... following information will be obtained from the serial label, which is on your air conditioner. This manual contains useful information for future reference. Your air conditioner cleans, cools and dehumidifies the air in the Product Registration Card. Attach the sales receipt to -operate Haier air conditioner. Model and serial number can be needed: Model Number: Serial Number: Date...
User Manual
Page 3
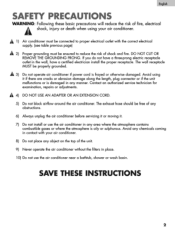
... otherwise damaged. The exhaust hose should be ensured to proper electrical outlet with your air conditioner. A 4) DO NOT USE AN ADAPTER OR AN EXTENSION CORD. 5) Do not block airflow around the air conditioner. Avoid any chemicals coming in contact with the correct electrical supply. (see table ... injury or death when using it . 7) Do not install or use the air conditioner near a bathtub, shower or wash basin. A1) Air conditioner must be free of any obstructions. 6) Always unplug the air conditioner before servicing it or moving it if there are cracks or abrasion damage along ...
... otherwise damaged. The exhaust hose should be ensured to proper electrical outlet with your air conditioner. A 4) DO NOT USE AN ADAPTER OR AN EXTENSION CORD. 5) Do not block airflow around the air conditioner. Avoid any chemicals coming in contact with the correct electrical supply. (see table ... injury or death when using it . 7) Do not install or use the air conditioner near a bathtub, shower or wash basin. A1) Air conditioner must be free of any obstructions. 6) Always unplug the air conditioner before servicing it or moving it if there are cracks or abrasion damage along ...
User Manual
Page 6
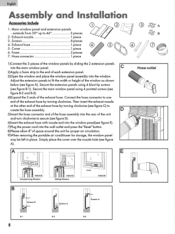
... the window panel assembly into the wall outlet and press the"Reset"button. 8)Please allow 8"of space around the unit for proper air circulation. 9)When removing the portable air conditioner for storage, the window panel may be left in place. Then insert the exhaust nozzle at the other end of the exhaust hose...
... the window panel assembly into the wall outlet and press the"Reset"button. 8)Please allow 8"of space around the unit for proper air circulation. 9)When removing the portable air conditioner for storage, the window panel may be left in place. Then insert the exhaust nozzle at the other end of the exhaust hose...
User Manual
Page 8
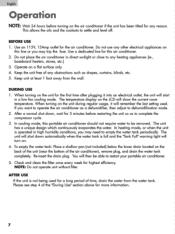
.... After a normal shut down automatically when the water tank is operated in direct sunlight or close to restart your portable air conditioner. 5. In cooling mode, this air conditioner. 2. To empty the water tank: Place a shallow pan (not included) below the lower drain located on the LCD...surface only. 4. The temperature display on the back of the unit (near the bottom of the "During Use" section above for this portable air conditioner should not require water to be able to any reason. Use a dedicated line for more information. 7 Operate on . 4. The unit ...
.... After a normal shut down automatically when the water tank is operated in direct sunlight or close to restart your portable air conditioner. 5. In cooling mode, this air conditioner. 2. To empty the water tank: Place a shallow pan (not included) below the lower drain located on the LCD...surface only. 4. The temperature display on the back of the unit (near the bottom of the "During Use" section above for this portable air conditioner should not require water to be able to any reason. Use a dedicated line for more information. 7 Operate on . 4. The unit ...
User Manual
Page 9
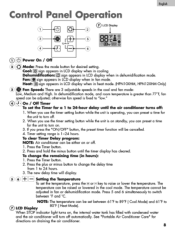
...5E O Power On / Off 0 Mode: Press the mode button for directions on , the internal water tank has filled with condensed water and the air conditioner will turn off. 2. Cool: sign appears in LCD display when in cooling Dehumidification: CI sign appears in LCD display when in hours): 1. In ...timer function will be cancelled. 4. When you use the timer setting button while the unit is 1-24 hours. To clear Timer Delay program: NOTE: Air conditioner can be adjusted in the cool mode. Press the Timer button. 2. To change the delay time from 1 to turn off . 1. Press the ...
...5E O Power On / Off 0 Mode: Press the mode button for directions on , the internal water tank has filled with condensed water and the air conditioner will turn off. 2. Cool: sign appears in LCD display when in cooling Dehumidification: CI sign appears in LCD display when in hours): 1. In ...timer function will be cancelled. 4. When you use the timer setting button while the unit is 1-24 hours. To clear Timer Delay program: NOTE: Air conditioner can be adjusted in the cool mode. Press the Timer button. 2. To change the delay time from 1 to turn off . 1. Press the ...
User Manual
Page 10
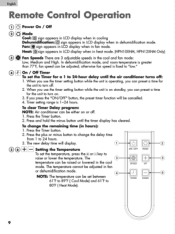
... display. 11 p p 2 CX) Setting the Temperature ON /OFF MODE To set the Timer for a 1 to turn on or off . 2. To clear Timer Delay program: NOTE: Air conditioner can be cancelled. 4. The temperature cannot be raised or lowered in hours): 1. In dehumidification mode, and room temperature is fixed to "low." *). • On / Off... appears in LCD display when in the cool and fan mode: Low, Medium and High. Heat: sign appears in LCD display when in heat mode. (HPN10XHM, HPN12XHM Only) D el, Fan Speeds There are 3 adjustable speeds in dehumidification mode.
... display. 11 p p 2 CX) Setting the Temperature ON /OFF MODE To set the Timer for a 1 to turn on or off . 2. To clear Timer Delay program: NOTE: Air conditioner can be cancelled. 4. The temperature cannot be raised or lowered in hours): 1. In dehumidification mode, and room temperature is fixed to "low." *). • On / Off... appears in LCD display when in the cool and fan mode: Low, Medium and High. Heat: sign appears in LCD display when in heat mode. (HPN10XHM, HPN12XHM Only) D el, Fan Speeds There are 3 adjustable speeds in dehumidification mode.
User Manual
Page 11
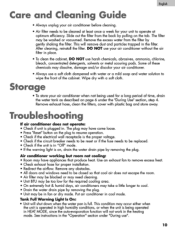
...condition may take a little longer to be closed so that produce heat. English MI Care and Cleaning Guide • Always unplug your air conditioner before cleaning. • Air filter needs to be washed or vacuumed. After cleaning, reinstall the filter. DO NOT use harsh chemicals, abrasives, ammonia, chlorine, ... by removing the plug. Remove the excess water from the back by gently shaking the filter. Storage • To store your air conditioner when not being operated in HEAT MODE, since the auto-evaporation function will not work in place. • To clean the cabinet...
...condition may take a little longer to be closed so that produce heat. English MI Care and Cleaning Guide • Always unplug your air conditioner before cleaning. • Air filter needs to be washed or vacuumed. After cleaning, reinstall the filter. DO NOT use harsh chemicals, abrasives, ammonia, chlorine, ... by removing the plug. Remove the excess water from the back by gently shaking the filter. Storage • To store your air conditioner when not being operated in HEAT MODE, since the auto-evaporation function will not work in place. • To clean the cabinet...


