Gigabyte M32U Arm Edition Support and Manuals
Get Help and Manuals for this Gigabyte item
View All Support Options Below
Free Gigabyte M32U Arm Edition manuals!
Problems with Gigabyte M32U Arm Edition?
Ask a Question
Free Gigabyte M32U Arm Edition manuals!
Problems with Gigabyte M32U Arm Edition?
Ask a Question
Popular Gigabyte M32U Arm Edition Manual Pages
OSD Sidekick User Guide - Page 2
... website at:
https://www.gigabyte.com
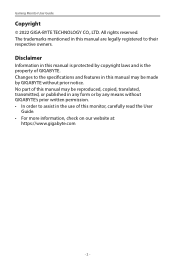
- 2 - No part of GIGABYTE. Changes to the specifications and features in any means without prior notice. Disclaimer
Information in this manual may be made by any form or by GIGABYTE without GIGABYTE's prior written permission. • In order to their respective owners.
All rights reserved. Gaming Monitor User Guide
Copyright
© 2022...
OSD Sidekick User Guide - Page 3
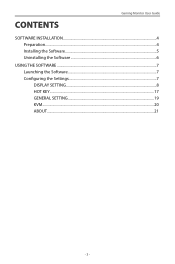
CONTENTS
Gaming Monitor User Guide
SOFTWARE INSTALLATION...4 Preparation...4 Installing the Software...5 Uninstalling the Software 6
USING THE SOFTWARE...7 Launching the Software 7 Configuring the Settings 7 DISPLAY SETTING...8 HOT KEY...17 GENERAL SETTING 19 KVM...20 ABOUT...21
- 3 -
OSD Sidekick User Guide - Page 5
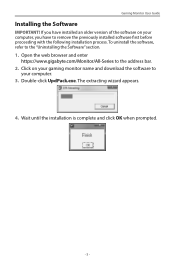
.... 2. Open the web browser and enter
https://www.gigabyte.com/Monitor/All-Series to the "Uninstalling the Software" section. 1. Double-click UpdPack.exe. Gaming Monitor User Guide
Installing the Software
IMPORTANT! If you have to
your computer, you have installed an older version of the software on your gaming monitor name and download the software to remove the previously...
OSD Sidekick User Guide - Page 7
....
Gaming Monitor User Guide
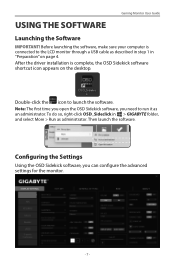
USING THE SOFTWARE
Launching the Software
IMPORTANT! Note: The first time you open the OSD Sidekick software, you can configure the advanced settings for the monitor.
- 7 - Double-click the icon to the LCD monitor through a USB cable as described in step 1 in > GIGABYTE folder, and select More > Run as an administrator. After the driver installation...
OSD Sidekick User Guide - Page 11
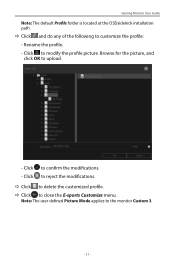
... the modifications. DD Click to customize the profile: - DD Click and do any of the following to close the E-sports Customize menu. Click to the monitor Custom 3.
- 11 - Gaming Monitor User Guide
Note: The default Profile folder is located at the OSDsidekick installation path. Note: The user defined Picture Mode applies to confirm the modifications. -
OSD Sidekick User Guide - Page 12
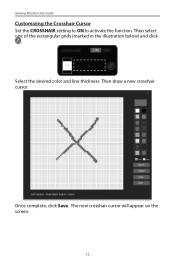
Then select one of the rectangular grids (marked in the illustration below) and click
.
The new crosshair cursor will appear on the screen.
- 12 - Once complete, click Save. Then draw a new crosshair cursor.
Select the desired color and line thickness. Gaming Monitor User Guide
Customizing the Crosshair Cursor Set the CROSSHAIR setting to ON to activate the function.
OSD Sidekick User Guide - Page 13
... Crosshair Cursor
Gaming Monitor User Guide
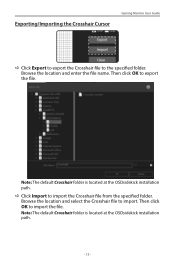
DD Click Export to export the Crosshair file to import the file. Then click OK to the specified folder. Browse the location and select the Crosshair file to import the Crosshair file from the specified folder.
Note: The default Crosshair folder is located at the OSDsidekick installation path...
OSD Sidekick User Guide - Page 14
Gaming Monitor User Guide
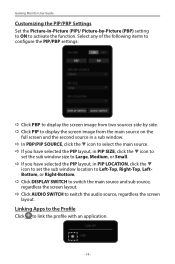
Customizing the PIP/PBP Settings Set the Picture-in-Picture (PIP)/ Picture-by side. DD In PBP/PIP SOURCE, click the q icon to... source, regardless the screen layout. DD If you have selected the PIP layout, in PIP SIZE, click the q icon to
set the sub window location to activate the function. DD Click PIP to link the profile with an application.
- 14 - DD...
OSD Sidekick User Guide - Page 15
... left side of the options on the screen to set the location of the screen depends on the right side of the screen and vice versa.
- 15 - Gaming Monitor User Guide
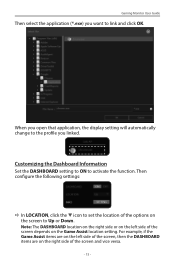
Then select the application (*.exe) you linked.
When you open that application, the display setting will automatically change to the profile you want to...
OSD Sidekick User Guide - Page 16
... screen.
Note: Uncheck the option to set the countdown time.
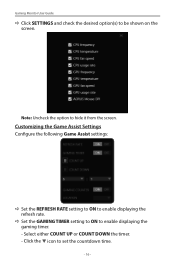
- 16 - DD Set the GAMING TIMER setting to ON to enable displaying the refresh rate. Customizing the Game Assist Settings Configure the following Game Assist settings:
DD Set the REFRESH RATE setting to ON to enable displaying the gaming timer. - Gaming Monitor User Guide
DD Click SETTINGS and check the desired option(s) to be...
OSD Sidekick User Guide - Page 17
Gaming Monitor User Guide
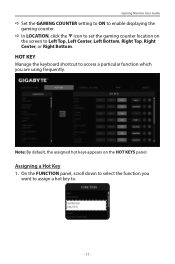
DD Set the GAMING COUNTER setting to ON to access a particular function which you
want to assign a hot key to set the gaming counter location on the HOT KEYS panel.
HOT KEY Manage the keyboard shortcut to enable displaying the gaming counter. Note: By default, the assigned hot keys appears on the screen to Left Top...
OSD Sidekick User Guide - Page 18
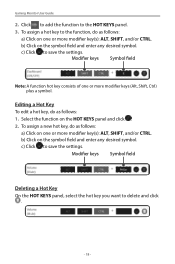
... To assign a new hot key, do as follows: 1.
b) Click on the HOT KEYS panel and click . 2. Gaming Monitor User Guide
2.
Editing a Hot Key To edit a hot key, do as follows:
a) Click on one or more modifier key(s): ALT, SHIFT, and/or CTRL. ... panel, select the hot key you want to save the settings. Click to add the function to save the settings. c) Click to the HOT KEYS panel.
3.
OSD Sidekick User Guide - Page 19
Gaming Monitor User Guide
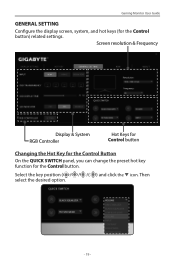
GENERAL SETTING Configure the display screen, system, and hot keys (for the Control button. Then select the desired option.
- 19 - Select the key position ( / / /( ) and click the q ... the Hot Key for the Control Button
On the QUICK SWITCH panel, you can change the preset hot key function for the Control button) related settings.
OSD Sidekick User Guide - Page 20
Display Select
Display Select
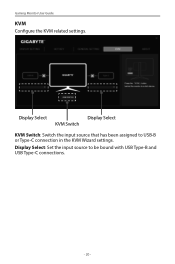
KVM Switch
KVM Switch: Switch the input source that has been assigned to be bound with USB Type-B and USB Type-C connections.
- 20 -
Gaming Monitor User Guide
KVM Configure the KVM related settings. Display Select: Set the input source to USB-B or Type-C connection in the KVM Wizard settings.
OSD Sidekick User Guide - Page 22
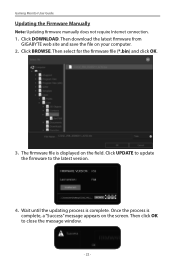
... is complete, a "Success" message appears on your computer. 2. Gaming Monitor User Guide
Updating the Firmware Manually
Note: Updating firmware manually does not require Internet connection. 1. Then download the latest firmware from
GIGABYTE web site and save the file on the screen. The firmware file is complete. Wait until the updating process is displayed on the field. Then click OK to...
Gigabyte M32U Arm Edition Reviews
We have not received any reviews for Gigabyte yet.