Manual
Page 3
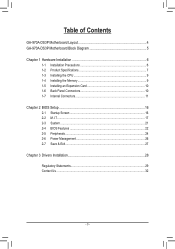
Table of Contents GA-970A-DS3P Motherboard Layout 4 GA-970A-DS3P Motherboard Block Diagram 5 Chapter 1 Hardware Installation 6 1-1 Installation Precautions 6 1-2 Product Specifications 7 1-3 Installing the CPU 9 1-4 Installing the Memory 9 1-5 Installing an Expansion Card 10 1-6 Back Panel Connectors 10 1-7 Internal Connectors 11 Chapter 2 BIOS Setup 16 2-1 Startup Screen 16 2-2 M.I.T...17 2-3 System...21 2-4 BIOS Features 22 2-5 Peripherals...24 2-6 Power Management 26 2-7 Save & Exit...27 Chapter 3 Drivers Installation 28 Regulatory Statements 29 Contact Us...32 - 3 -
Table of Contents GA-970A-DS3P Motherboard Layout 4 GA-970A-DS3P Motherboard Block Diagram 5 Chapter 1 Hardware Installation 6 1-1 Installation Precautions 6 1-2 Product Specifications 7 1-3 Installing the CPU 9 1-4 Installing the Memory 9 1-5 Installing an Expansion Card 10 1-6 Back Panel Connectors 10 1-7 Internal Connectors 11 Chapter 2 BIOS Setup 16 2-1 Startup Screen 16 2-2 M.I.T...17 2-3 System...21 2-4 BIOS Features 22 2-5 Peripherals...24 2-6 Power Management 26 2-7 Save & Exit...27 Chapter 3 Drivers Installation 28 Regulatory Statements 29 Contact Us...32 - 3 -
Manual
Page 16
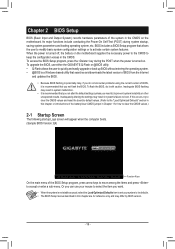
... jumper in the CMOS on . To upgrade the BIOS, use your system to its defaults. •• The BIOS Setup menus described in the CMOS. Or you can use either the GIGABYTE Q-Flash or @BIOS utility. •• Q-Flash allows the user to quickly and easily upgrade or back up BIOS... in this chapter are for how to clear the CMOS values.) 2-1 Startup Screen The following startup Logo screen will appear when the computer boots. (Sample BIOS Version: E4) Function Keys On the main menu of the BIOS Setup program, press arrow keys to move among the items and press to accept or...
... jumper in the CMOS on . To upgrade the BIOS, use your system to its defaults. •• The BIOS Setup menus described in the CMOS. Or you can use either the GIGABYTE Q-Flash or @BIOS utility. •• Q-Flash allows the user to quickly and easily upgrade or back up BIOS... in this chapter are for how to clear the CMOS values.) 2-1 Startup Screen The following startup Logo screen will appear when the computer boots. (Sample BIOS Version: E4) Function Keys On the main menu of the BIOS Setup program, press arrow keys to move among the items and press to accept or...
Manual
Page 22
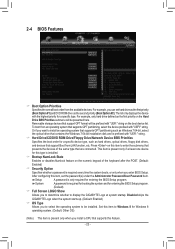
...Drive/CD/DVD ROM Drive/Floppy Drive/Network Device BBS Priorities Specifies the boot order for entering the BIOS Setup program. (Default) && Full Screen LOGO Show Allows you enter BIOS Setup. Disabled skips the GIGABYTE Logo when the system starts up. (Default: Enabled) && OS Type Allows you install a CPU that...the POST. (Default: Enabled) && Security Option Specifies whether a password is present only when you to select the operating system to display the GIGABYTE Logo at least one device for this item, set hard drive as the first priority (Boot Option #1) and DVD ROM drive as the ...
...Drive/CD/DVD ROM Drive/Floppy Drive/Network Device BBS Priorities Specifies the boot order for entering the BIOS Setup program. (Default) && Full Screen LOGO Show Allows you enter BIOS Setup. Disabled skips the GIGABYTE Logo when the system starts up. (Default: Enabled) && OS Type Allows you install a CPU that...the POST. (Default: Enabled) && Security Option Specifies whether a password is present only when you to select the operating system to display the GIGABYTE Logo at least one device for this item, set hard drive as the first priority (Boot Option #1) and DVD ROM drive as the ...
Manual
Page 28
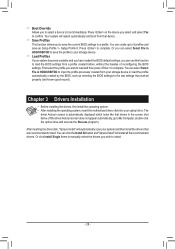
...as reverting the BIOS settings to boot immediately. First select the profile you wish to load and then press to install. The driver Autorun screen is automatically displayed which looks like that shown in HDD/USB/FDD to input the profile previously created from a profile created before, without... button and "Xpress Install" will automatically scan your storage device or load the profile automatically created by the BIOS, such as Setup Profile 1~ Setup Profile 8. Press to install. - 28 - Or click Install Single Items to manually select the drivers you wish to complete.
...as reverting the BIOS settings to boot immediately. First select the profile you wish to load and then press to install. The driver Autorun screen is automatically displayed which looks like that shown in HDD/USB/FDD to input the profile previously created from a profile created before, without... button and "Xpress Install" will automatically scan your storage device or load the profile automatically created by the BIOS, such as Setup Profile 1~ Setup Profile 8. Press to install. - 28 - Or click Install Single Items to manually select the drivers you wish to complete.


