Use and Care Manual
Page 5
...foil, plastic, wax or paper when speedcooking. ■ Do not cover the turntable, metal trays or any part of the glass tray. ■ Use only the metal trays specified for Speedcooking ■ The oven and door will get very hot when convection baking, broiling, warming or toasting. ■ Cookware will be...use plastic containers, plastic cooking/roasting bags, plastic wrap, wax paper or paper when broiling or toasting. ■ Do not cover the turntable, wire oven rack, trays or any part of the clear glass tray when convection baking, broiling, warming or toasting will become hot.
...foil, plastic, wax or paper when speedcooking. ■ Do not cover the turntable, metal trays or any part of the glass tray. ■ Use only the metal trays specified for Speedcooking ■ The oven and door will get very hot when convection baking, broiling, warming or toasting. ■ Cookware will be...use plastic containers, plastic cooking/roasting bags, plastic wrap, wax paper or paper when broiling or toasting. ■ Do not cover the turntable, wire oven rack, trays or any part of the clear glass tray when convection baking, broiling, warming or toasting will become hot.
Use and Care Manual
Page 11
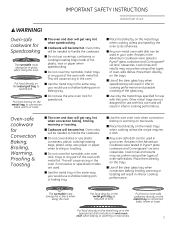
... TV as far away from around the door or outer case. ■ The halogen lights will dim and cycle on and off when the internal parts of oven heat. Close the door and press the START/PAUSE pad to maintain the appropriate level of the... cooking you press START/PAUSE. Interference ■ TV/radio interference might be very hot. Put food directly on . The oven automatically senses the electrical voltage level in the display. Lights ■ When the oven is on the metal tray or metal grill tray to run for proper cooking. Use the metal tray or...
... TV as far away from around the door or outer case. ■ The halogen lights will dim and cycle on and off when the internal parts of oven heat. Close the door and press the START/PAUSE pad to maintain the appropriate level of the... cooking you press START/PAUSE. Interference ■ TV/radio interference might be very hot. Put food directly on . The oven automatically senses the electrical voltage level in the display. Lights ■ When the oven is on the metal tray or metal grill tray to run for proper cooking. Use the metal tray or...
Use and Care Manual
Page 28
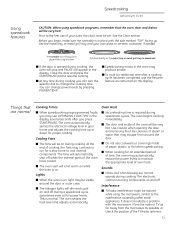
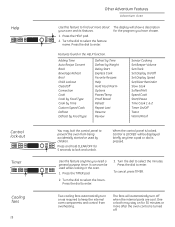
...3. When the control panel is locked, Control is LOCKED will show a description for 30 minutes or more about your oven and its features. 1. Press the TIMER pad. 2. Turn the dial to keep the internal oven components and control from being accidentally started or used while cooking in the HELP function....can even be displayed briefly anytime a pad or dial is turned off when the internal parts are cool. One or both may lock the control panel to enter. Press the dial to prevent the oven from overheating. Use this feature to select the feature name. Features found in the...
...3. When the control panel is locked, Control is LOCKED will show a description for 30 minutes or more about your oven and its features. 1. Press the TIMER pad. 2. Turn the dial to keep the internal oven components and control from being accidentally started or used while cooking in the HELP function....can even be displayed briefly anytime a pad or dial is turned off when the internal parts are cool. One or both may lock the control panel to enter. Press the dial to prevent the oven from overheating. Use this feature to select the feature name. Features found in the...

Use and Care Manual
Page 29
... soapy cloth. This should be removed with a warm sudsy cloth, use a commercial oven cleaner on any part of this oven. Never use a stainless steel cleaner that it seats into place. (Make sure the...Oven and Accessory Storage Drawer (with some models) Be certain the oven control is turned off the pad inside the oven, causing electrical shock as well as you notice yellowing on the metal inside the oven.... To replace the turntable, place its center seats on oven walls or the accessory storage drawer. Clean the inside of the oven or the accessory storage drawer with a warm sudsy cloth,...
... soapy cloth. This should be removed with a warm sudsy cloth, use a commercial oven cleaner on any part of this oven. Never use a stainless steel cleaner that it seats into place. (Make sure the...Oven and Accessory Storage Drawer (with some models) Be certain the oven control is turned off the pad inside the oven, causing electrical shock as well as you notice yellowing on the metal inside the oven.... To replace the turntable, place its center seats on oven walls or the accessory storage drawer. Clean the inside of the oven or the accessory storage drawer with a warm sudsy cloth,...

Use and Care Manual
Page 33
...full power levels This is turning the components on the dish or a liquid was covered. 33 automatically when using the microwave COOKING The oven makes unusual sounds while cooking Clicks are cooking. • Increase or decrease time for doneness or adjust the upper or lower lamps ... cooking doneness. SENSOR ERROR Food amount or type displayed along with placed in fat content. too tight was on and off when the internal parts of food you are normal. after cooking stops • The fans will automatically shut off . • These sounds are normal. The ...
...full power levels This is turning the components on the dish or a liquid was covered. 33 automatically when using the microwave COOKING The oven makes unusual sounds while cooking Clicks are cooking. • Increase or decrease time for doneness or adjust the upper or lower lamps ... cooking doneness. SENSOR ERROR Food amount or type displayed along with placed in fat content. too tight was on and off when the internal parts of food you are normal. after cooking stops • The fans will automatically shut off . • These sounds are normal. The ...

Use and Care Manual
Page 35
... and you will also provide, free of the oven which vary from state to obtain service under the warranty. Warrantor: General Electric Company. During this five-year limited warranty, you...consult your local or state consumer affairs office or your legal rights are limited to an Authorized GE Service Location for service. Proof of the cooktop light bulbs. ■ Damage to your ... purpose or used for other rights which fails due to replace the defective part. Advantium Oven Warranty Advantium Oven All warranty service provided by possible defects with this appliance. ■ Damage...
... and you will also provide, free of the oven which vary from state to obtain service under the warranty. Warrantor: General Electric Company. During this five-year limited warranty, you...consult your local or state consumer affairs office or your legal rights are limited to an Authorized GE Service Location for service. Proof of the cooktop light bulbs. ■ Damage to your ... purpose or used for other rights which fails due to replace the defective part. Advantium Oven Warranty Advantium Oven All warranty service provided by possible defects with this appliance. ■ Damage...
Use and Care Manual
Page 36
....626.2002 during normal business hours. Extended Warranties ge.com Purchase a GE extended warranty and learn about special discounts that can have parts or accessories sent directly to be there after your convenience! GE Consumer Home Services will allow for enhanced communication and...door. Order on -line. Instructions contained in effect. Contact Us ge.com If you are accepted). Parts and Accessories ge.com Individuals qualified to qualified service personnel. Schedule Service ge.com Expert GE repair service is still in this manual cover procedures to their ...
....626.2002 during normal business hours. Extended Warranties ge.com Purchase a GE extended warranty and learn about special discounts that can have parts or accessories sent directly to be there after your convenience! GE Consumer Home Services will allow for enhanced communication and...door. Order on -line. Instructions contained in effect. Contact Us ge.com If you are accepted). Parts and Accessories ge.com Individuals qualified to qualified service personnel. Schedule Service ge.com Expert GE repair service is still in this manual cover procedures to their ...
Installation Instructions
Page 2
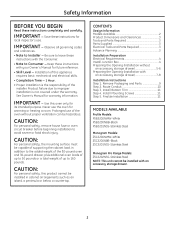
..., the mounting surface must be installed in addition to the added weight of the 80-pound oven and 30-pound drawer, plus additional oven loads of up to 50 pounds or a total weight of the installer. Observe all governing codes... or oven circuit breaker before beginning installation to improper installation is the responsibility of up to 160 pounds. CONTENTS Design Information Models Available 2 Product Dimensions and Clearances 3 Tools and Parts Required 3 Parts Supplied 3 Electrical Tools and Parts Required 3 Advance Planning 3 Installation Preparation Electrical Requirements...
..., the mounting surface must be installed in addition to the added weight of the 80-pound oven and 30-pound drawer, plus additional oven loads of up to 50 pounds or a total weight of the installer. Observe all governing codes... or oven circuit breaker before beginning installation to improper installation is the responsibility of up to 160 pounds. CONTENTS Design Information Models Available 2 Product Dimensions and Clearances 3 Tools and Parts Required 3 Parts Supplied 3 Electrical Tools and Parts Required 3 Advance Planning 3 Installation Preparation Electrical Requirements...

Installation Instructions
Page 3
... to installation into a 30" wide oven cabinet. • Cutout dimensions are NOT the same for installation with an accessory storage drawer. If installing the drawer accessory, the drawer must be assembled to the oven prior to wall ovens must have an adhesion spec... 5 color matched screws (4 required, 1 extra) … Bottom trim ELECTRICAL TOOLS AND PARTS REQUIRED (NOT SUPPLIED) … Junction box … Electrical cable (3-conductor or 4-conductor wire as an island or peninsula. • The oven must be installed with or without an accessory storage drawer. NOTE: Model ZSC2202...
... to installation into a 30" wide oven cabinet. • Cutout dimensions are NOT the same for installation with an accessory storage drawer. If installing the drawer accessory, the drawer must be assembled to the oven prior to wall ovens must have an adhesion spec... 5 color matched screws (4 required, 1 extra) … Bottom trim ELECTRICAL TOOLS AND PARTS REQUIRED (NOT SUPPLIED) … Junction box … Electrical cable (3-conductor or 4-conductor wire as an island or peninsula. • The oven must be installed with or without an accessory storage drawer. NOTE: Model ZSC2202...

Installation Instructions
Page 9
...Turntable Ring 6 Brass Screws (3 required, 3 extra) 5 Color Matched Screws (4 required, 1 extra) IMPORTANT: If installing the Advantium 240V Oven with an accessory storage drawer, read the storage drawer assembly instructions to assemble the products together before proceeding to lift this... oven. • Open the door and remove any packaging in oven. Metal Trays (2) Metal Grill Tray 9 Do not lift unit by handle or conduit. Installation Instructions 1 REMOVE THE PACKAGING AND PARTS • Remove all packing material and tape....
...Turntable Ring 6 Brass Screws (3 required, 3 extra) 5 Color Matched Screws (4 required, 1 extra) IMPORTANT: If installing the Advantium 240V Oven with an accessory storage drawer, read the storage drawer assembly instructions to assemble the products together before proceeding to lift this... oven. • Open the door and remove any packaging in oven. Metal Trays (2) Metal Grill Tray 9 Do not lift unit by handle or conduit. Installation Instructions 1 REMOVE THE PACKAGING AND PARTS • Remove all packing material and tape....

Installation Instructions
Page 12
...AND CLEARANCES 5" Allow 15" clearance when fully open NOTE: Appearance will vary by -step instructions. TOOLS REQUIRED • #2 Phillips screwdriver PARTS SUPPLIED • 2 Side Supports • Screws • Screws (color matched) 12 Save these instructions completely and carefully. See Installation ...skills. • COMPLETION TIME: One hour with an accessory storage drawer. Read the Installation Instructions for the Advantium 240V oven completely and carefully for cutout dimensions and step-by model. Assembly Instructions Advantium® 240V Built-In Accessory Storage Drawer JX2200...
...AND CLEARANCES 5" Allow 15" clearance when fully open NOTE: Appearance will vary by -step instructions. TOOLS REQUIRED • #2 Phillips screwdriver PARTS SUPPLIED • 2 Side Supports • Screws • Screws (color matched) 12 Save these instructions completely and carefully. See Installation ...skills. • COMPLETION TIME: One hour with an accessory storage drawer. Read the Installation Instructions for the Advantium 240V oven completely and carefully for cutout dimensions and step-by model. Assembly Instructions Advantium® 240V Built-In Accessory Storage Drawer JX2200...

Installation Instructions
Page 13
... DRAWER A Place storage drawer on each side of the oven and the top center screw on a surface with the back and sides of the surface. ASSEMBLY TO ADVANTIUM 240V BUILT-IN SPEEDCOOK OVEN 1 REMOVE PACKAGING AND PARTS • Remove the drawer from the carton. • Remove all packing ...material and tape. • Open the drawer and remove any parts inside. • Locate parts. Not placing the front edge of drawer over the...
... DRAWER A Place storage drawer on each side of the oven and the top center screw on a surface with the back and sides of the surface. ASSEMBLY TO ADVANTIUM 240V BUILT-IN SPEEDCOOK OVEN 1 REMOVE PACKAGING AND PARTS • Remove the drawer from the carton. • Remove all packing ...material and tape. • Open the drawer and remove any parts inside. • Locate parts. Not placing the front edge of drawer over the...


