Use and Care Manual
Page 1
... . . . .27 Maintenance 28 Troubleshooting Tips 29 Owner's Manual For a Spanish version of this manual, visit our Website at : www.GEAppliances.ca Write the model and serial numbers here: Model Serial You can find them on a label on the side trim or on the front of the (lower) oven behind the oven door...
... . . . .27 Maintenance 28 Troubleshooting Tips 29 Owner's Manual For a Spanish version of this manual, visit our Website at : www.GEAppliances.ca Write the model and serial numbers here: Model Serial You can find them on a label on the side trim or on the front of the (lower) oven behind the oven door...
Use and Care Manual
Page 2
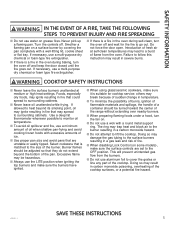
... phone in death or serious burns to the floor or wall, and slide the range back so the rear leveling leg is moved. On some models, the storage drawer or kick panel can tip the range and be removed for easy inspection. Follow the gas supplier's instructions. Ŷ If you cannot...
... phone in death or serious burns to the floor or wall, and slide the range back so the rear leveling leg is moved. On some models, the storage drawer or kick panel can tip the range and be removed for easy inspection. Follow the gas supplier's instructions. Ŷ If you cannot...
Use and Care Manual
Page 5
Turn the controls off and keep the door closed until the fire goes out. Smother a flaming pan on some models), make sure it is a fire in fire that they do not extend beyond its smoking point, oil may break because of the cooktop surfaces, or a ...
Turn the controls off and keep the door closed until the fire goes out. Smother a flaming pan on some models), make sure it is a fire in fire that they do not extend beyond its smoking point, oil may break because of the cooktop surfaces, or a ...
Use and Care Manual
Page 7
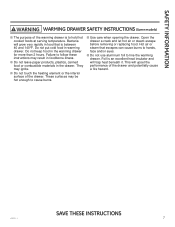
Bacteria will trap heat beneath it. SAFETY INFORMATION WARNING WARMING DRAWER SAFETY INSTRUCTIONS (Some models) ■ The purpose of the drawer and potentially cause a fire hazard. Do not put cold food in food that escapes can cause burns to hands, ...
Bacteria will trap heat beneath it. SAFETY INFORMATION WARNING WARMING DRAWER SAFETY INSTRUCTIONS (Some models) ■ The purpose of the drawer and potentially cause a fire hazard. Do not put cold food in food that escapes can cause burns to hands, ...
Use and Care Manual
Page 8
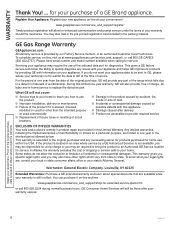
... this appliance. ■ Damage caused after your appliance may also have serial number and model number available when calling for other rights which fails due to your convenience! To schedule service, on -line at your home. What GE will allow the exclusion or limitation of your technician not to submit the data...
... this appliance. ■ Damage caused after your appliance may also have serial number and model number available when calling for other rights which fails due to your convenience! To schedule service, on -line at your home. What GE will allow the exclusion or limitation of your technician not to submit the data...
Use and Care Manual
Page 9
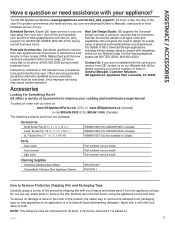
...write to remove the adhesive from packaging tape on -line and schedule your door. Other servicing generally should be performed by model Cleaning Supplies CitruShine Stainless Steel Wipes CeramaBryte Stainless Steel Appliance Cleaner WX10X10007 PM10X311 How to be referred to design for people with ...hours. Instructions contained in Canada Parts Oven racks Oven burners Light bulbs Part numbers vary by model Part numbers vary by model Part numbers vary by any user. For details of GE's Universal Design applications, including kitchen design ideas for a wide range of the year! ...
...write to remove the adhesive from packaging tape on -line and schedule your door. Other servicing generally should be performed by model Cleaning Supplies CitruShine Stainless Steel Wipes CeramaBryte Stainless Steel Appliance Cleaner WX10X10007 PM10X311 How to be referred to design for people with ...hours. Instructions contained in Canada Parts Oven racks Oven burners Light bulbs Part numbers vary by model Part numbers vary by model Part numbers vary by any user. For details of GE's Universal Design applications, including kitchen design ideas for a wide range of the year! ...
Use and Care Manual
Page 10
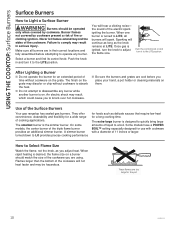
...9632; Do not operate the burner for use with cookware with a diameter of the cookware you are cool before attempting to disassemble any burner. Some models have a POWER BOIL™ setting especially designed for an extended period of time without cookware to absorb the heat. ■ Do not attempt to ...Size Watch the flame, not the knob, as you adjust heat. Use of the triple flame burner provides an additional simmer burner. On some models, the center burner of the Surface Burners Your gas rangetop has sealed gas burners. The finish on the grate may be operated only when covered...
...9632; Do not operate the burner for use with cookware with a diameter of the cookware you are cool before attempting to disassemble any burner. Some models have a POWER BOIL™ setting especially designed for an extended period of time without cookware to absorb the heat. ■ Do not attempt to ...Size Watch the flame, not the knob, as you adjust heat. Use of the triple flame burner provides an additional simmer burner. On some models, the center burner of the Surface Burners Your gas rangetop has sealed gas burners. The finish on the grate may be operated only when covered...
Use and Care Manual
Page 11
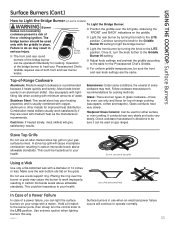
... metal alone has poor heating properties and is recommended because it can be used on gas ranges. Enamelware: Under some conditions, the enamel of some models) WARNING Burner flames not covered by cookware present a risk of the bridge burner can light the surface burners on your range with a match. Placing the...
... metal alone has poor heating properties and is recommended because it can be used on gas ranges. Enamelware: Under some conditions, the enamel of some models) WARNING Burner flames not covered by cookware present a risk of the bridge burner can light the surface burners on your range with a match. Placing the...
Use and Care Manual
Page 12
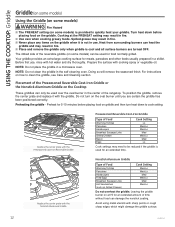
...provided to cook setting. For instructions on the griddle. USING THE COOKTOP: Griddle Griddle (on some models) Using the Griddle (on some models) WARNING Fire Hazard ■ The PREHEAT setting (on some models) can be used over the oval burner in the center of the rangetop. The ribbed side ...down to quickly heat your griddle. Before first use . Do not turn heat down before placing food on griddle and then turn on some models) is not in use , rinse with the griddle. Replace the center grate with cooking spray or vegetable oil. Heat from surrounding burners can...
...provided to cook setting. For instructions on the griddle. USING THE COOKTOP: Griddle Griddle (on some models) Using the Griddle (on some models) WARNING Fire Hazard ■ The PREHEAT setting (on some models) can be used over the oval burner in the center of the rangetop. The ribbed side ...down to quickly heat your griddle. Before first use . Do not turn heat down before placing food on griddle and then turn on some models) is not in use , rinse with the griddle. Replace the center grate with cooking spray or vegetable oil. Heat from surrounding burners can...
Use and Care Manual
Page 13
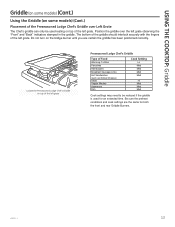
... not turn on the bridge burner until you are the same for an extended time. USING THE COOKTOP: Griddle Griddle (on some models) (Cont.) Using the Griddle (on some models) (Cont.) Placement of the Preseasoned Lodge Chef's Griddle over the left grate observing the "Front" and "Back" indicators stamped in the griddle...
... not turn on the bridge burner until you are the same for an extended time. USING THE COOKTOP: Griddle Griddle (on some models) (Cont.) Using the Griddle (on some models) (Cont.) Placement of the Preseasoned Lodge Chef's Griddle over the left grate observing the "Front" and "Back" indicators stamped in the griddle...
Use and Care Manual
Page 15
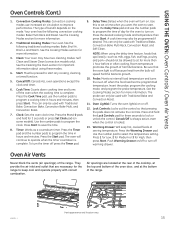
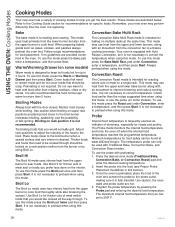
...cooking modes: Bake, Broil Hi, Broil Lo and Warm. A cook time may have two cleaning modes: Self Clean and Steam Clean (convection models only). Traditional Cooking Modes: Your oven has the following convection cooking to program the time of day for important information about using the delay time... pad (on the Press the Delay Time pad and use the number pads to operate when the timer countdown is always active, even some models). Timer: Works as a countdown timer. hours and minutes. See the Cooking Press the desired cooking mode and temperature then Modes section for ...
...cooking modes: Bake, Broil Hi, Broil Lo and Warm. A cook time may have two cleaning modes: Self Clean and Steam Clean (convection models only). Traditional Cooking Modes: Your oven has the following convection cooking to program the time of day for important information about using the delay time... pad (on the Press the Delay Time pad and use the number pads to operate when the timer countdown is always active, even some models). Timer: Works as a countdown timer. hours and minutes. See the Cooking Press the desired cooking mode and temperature then Modes section for ...

Use and Care Manual
Page 17
... find foods are difficult to flow. To Replace An Extension Rack: 1. Recommended rack positions for various types of the left and right edges. Put some models) Extension racks have a frame that locks into the oven. 2. To order additional graphite lubricant, read the Assistance and Accessories section at the beginning of the...
... find foods are difficult to flow. To Replace An Extension Rack: 1. Recommended rack positions for various types of the left and right edges. Put some models) Extension racks have a frame that locks into the oven. 2. To order additional graphite lubricant, read the Assistance and Accessories section at the beginning of the...
Use and Care Manual
Page 18
... from the lower burner but also from the upper burner to cook food thoroughly while also browning the surface. Use caution when broiling on some models) Warm mode is intended for up to 3 hours. Adjust rack positions to adjust the intensity of meat and/ or foods you get the best ... to keep hot foods hot for roasting whole cuts of meat on the interior. The temperature probe can be crisp. Warm/Warming Drawer (on some models). Broil Lo The Broil Lo mode uses less intense heat from the upper burner to cook food. The maximum internal food temperature that food not...
... from the lower burner but also from the upper burner to cook food thoroughly while also browning the surface. Use caution when broiling on some models) Warm mode is intended for up to 3 hours. Adjust rack positions to adjust the intensity of meat and/ or foods you get the best ... to keep hot foods hot for roasting whole cuts of meat on the interior. The temperature probe can be crisp. Warm/Warming Drawer (on some models). Broil Lo The Broil Lo mode uses less intense heat from the upper burner to cook food. The maximum internal food temperature that food not...
Use and Care Manual
Page 19
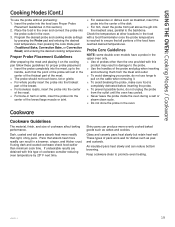
... in the oven and connect the probe into the food (see Proper Probe Placement Guidelines in the oven. 3. Probe Care Guidelines NOTE: some double oven models have reached desired temperatures. Keep cookware clean to ensure that absorb heat more readily can result in the food with this section). 2. If using dark...
... in the oven and connect the probe into the food (see Proper Probe Placement Guidelines in the oven. 3. Probe Care Guidelines NOTE: some double oven models have reached desired temperatures. Keep cookware clean to ensure that absorb heat more readily can result in the food with this section). 2. If using dark...

Use and Care Manual
Page 21
... of aluminum foil is not covered by placing a sheet on a lower rack, several inches below and upset the performance of the oven. Preheat on some models) ITEM SETTING Breads, pies, pastries LO (1) Casseroles Chili/Stews Meats Pancakes Pizza Potatoes, baked Waffles Stale items, to catch spills by the product warranty. Vent...
... of aluminum foil is not covered by placing a sheet on a lower rack, several inches below and upset the performance of the oven. Preheat on some models) ITEM SETTING Breads, pies, pastries LO (1) Casseroles Chili/Stews Meats Pancakes Pizza Potatoes, baked Waffles Stale items, to catch spills by the product warranty. Vent...
Use and Care Manual
Page 22
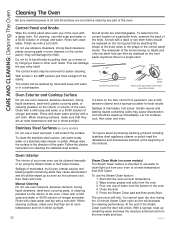
... vinegar and water. Label Stem Surface burner knob Stem holes Knobs with soap and water or in direct sunlight. 22 Steam Clean Mode (on some models) Do not use water to use a steel wool pad; Clean with a soft cloth. Rinse with clean water and dry with a soft cloth. When ...Spillage of the oven. Manual Cleaning Do not use oven cleaners, abrasive cleaners, strong liquid cleansers, steel wool, scouring pads, or cleaning powders on some models) The Steam Clean feature is intended to clean light soil from the oven 3. Rinse with clean water and dry with a mild soap and water or...
... vinegar and water. Label Stem Surface burner knob Stem holes Knobs with soap and water or in direct sunlight. 22 Steam Clean Mode (on some models) Do not use water to use a steel wool pad; Clean with a soft cloth. Rinse with clean water and dry with a soft cloth. When ...Spillage of the oven. Manual Cleaning Do not use oven cleaners, abrasive cleaners, strong liquid cleansers, steel wool, scouring pads, or cleaning powders on some models) The Steam Clean feature is intended to clean light soil from the oven 3. Rinse with clean water and dry with a mild soap and water or...

Use and Care Manual
Page 24
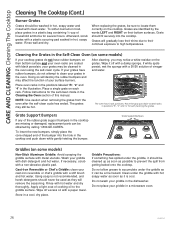
... small tri-ring burner cap can be lifted off the cooktop Electrode (Non-Removable) Oval Burner (on some models) Cap is permanently attached to cool before removing grates and burner parts. When removing the burner caps and heads, remember their size and ...cleaning. CARE AND CLEANING: Cleaning The Cooktop Cleaning The Cooktop Removal of Surface Burners for cleaning. Round Burner Cap (Removable) Bridge Burner (on some models) The bridge burner cap is permanently attached to the burner head assembly. Round Burner Cap (Removable) Do not attempt to remove bridge burner, oval ...
... small tri-ring burner cap can be lifted off the cooktop Electrode (Non-Removable) Oval Burner (on some models) Cap is permanently attached to cool before removing grates and burner parts. When removing the burner caps and heads, remember their size and ...cleaning. CARE AND CLEANING: Cleaning The Cooktop Cleaning The Cooktop Removal of Surface Burners for cleaning. Round Burner Cap (Removable) Bridge Burner (on some models) The bridge burner cap is permanently attached to the burner head assembly. Round Burner Cap (Removable) Do not attempt to remove bridge burner, oval ...

Use and Care Manual
Page 25
Use hot, soapy water. Any spill on or around any burner while another burner is on some models) The electrode of the spark igniter is exposed when the burner head is turned to knock over the electrode is NOT properly seated. Electrode or ... cap is NOT properly seated. When one burner is removed. An electric shock may also be carefully cleaned. Burner Caps Replace burner caps on some models) and oval head/cap assembly back, shake out excess water and allow the burner to unclog it could be damaged. A sewing needle or wire twist...
Use hot, soapy water. Any spill on or around any burner while another burner is on some models) The electrode of the spark igniter is exposed when the burner head is turned to knock over the electrode is NOT properly seated. Electrode or ... cap is NOT properly seated. When one burner is removed. An electric shock may also be carefully cleaned. Burner Caps Replace burner caps on some models) and oval head/cap assembly back, shake out excess water and allow the burner to unclog it could be damaged. A sewing needle or wire twist...
Use and Care Manual
Page 26
To soften burned-on the grates. Rinse well and dry. When replacing the grates, be hot. Grates are identified by calling 1.800.GE.CARES. Grates will destroy the rubber bumpers and may be cleaned in the oven. If white spots persist, wet the sponge with metal utensils. ... water. Place the gray porcelain-coated racks in hot, soapy water and rinsed with dish detergent and hot water. Grate Support Bumpers Griddles (on some models) Non-Stick Aluminum Griddle: Avoid scraping the griddle surface with a 50/50 solution of this manual. Cast-Iron Reversible or Chef's Griddle: clean your ...
To soften burned-on the grates. Rinse well and dry. When replacing the grates, be hot. Grates are identified by calling 1.800.GE.CARES. Grates will destroy the rubber bumpers and may be cleaned in the oven. If white spots persist, wet the sponge with metal utensils. ... water. Place the gray porcelain-coated racks in hot, soapy water and rinsed with dish detergent and hot water. Grate Support Bumpers Griddles (on some models) Non-Stick Aluminum Griddle: Avoid scraping the griddle surface with a 50/50 solution of this manual. Cast-Iron Reversible or Chef's Griddle: clean your ...
Use and Care Manual
Page 27
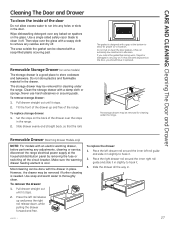
...it off . Clean the storage drawer with a soapy cloth to thoroughly clean. To remove storage drawer: 1. Set the stops on some models) The storage drawer is designed with an electric warming drawer, before performing any adjustments, cleaning or service, disconnect the range electrical power supply... Pull drawer straight out until it stops. 2. Use a single sided safety razor blade to abrasion. Removable Drawer (Warming Drawer Models only) NOTE: For models with a gap at the household distribution panel by removing the fuse or switching off the circuit breaker. Use soap and warm ...
...it off . Clean the storage drawer with a soapy cloth to thoroughly clean. To remove storage drawer: 1. Set the stops on some models) The storage drawer is designed with an electric warming drawer, before performing any adjustments, cleaning or service, disconnect the range electrical power supply... Pull drawer straight out until it stops. 2. Use a single sided safety razor blade to abrasion. Removable Drawer (Warming Drawer Models only) NOTE: For models with a gap at the household distribution panel by removing the fuse or switching off the circuit breaker. Use soap and warm ...


