
Owners Manual
Page 1
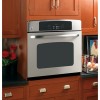
..., 21 Self-Cleaning Oven 15, 16 Special Features 17-19 Thermostat 14 Timed Baking and Roasting . .10 Care and Cleaning Broiler Pan and Grid 23 Control Panel 22 Glass Surfaces 25 Knob 22 Lift-Off Oven Door 22, 23 Light Bulb 24 Oven Interior 25 Packaging Tape 22 Painted Surfaces 25 Racks...
..., 21 Self-Cleaning Oven 15, 16 Special Features 17-19 Thermostat 14 Timed Baking and Roasting . .10 Care and Cleaning Broiler Pan and Grid 23 Control Panel 22 Glass Surfaces 25 Knob 22 Lift-Off Oven Door 22, 23 Light Bulb 24 Oven Interior 25 Packaging Tape 22 Painted Surfaces 25 Racks...
Owners Manual
Page 2
... the oven door open window or using electrical appliances, basic safety precautions should be minimized by venting with the controls or any service, disconnect the oven power supply at the household distribution panel by a qualified technician in accordance with the provided installation instructions. ■ Be sure the oven is in self-clean...
... the oven door open window or using electrical appliances, basic safety precautions should be minimized by venting with the controls or any service, disconnect the oven power supply at the household distribution panel by a qualified technician in accordance with the provided installation instructions. ■ Be sure the oven is in self-clean...
Owners Manual
Page 20
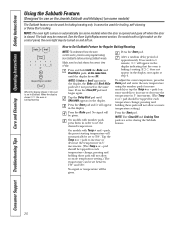
... a random delay period of day. It cannot be tapped for each temperature change ; pad should be given. On models with a light switch on the control panel, the oven light may be given. Press and hold both the Bake and Broil Hi/Lo pads, at the same time, until SAb bAtH appears... self-cleaning or Delay Start cooking. pressing and holding these pads will automatically be used for Regular Baking/Roasting NOTE: To understand how the oven control works, practice using the number pads (on some models) when the door is opened and goes off when the door is baking/roasting. If ...
... a random delay period of day. It cannot be tapped for each temperature change ; pad should be given. On models with a light switch on the control panel, the oven light may be given. Press and hold both the Bake and Broil Hi/Lo pads, at the same time, until SAb bAtH appears... self-cleaning or Delay Start cooking. pressing and holding these pads will automatically be used for Regular Baking/Roasting NOTE: To understand how the oven control works, practice using the number pads (on some models) when the door is opened and goes off when the door is baking/roasting. If ...
Owners Manual
Page 22
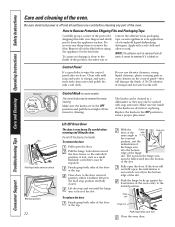
...must be removed for cleaning. It cannot be removed from all parts. Control Panel It's a good idea to wipe the control panel after each use abrasive cleansers, strong liquid cleansers, plastic scouring pads or oven cleaners on the control panel-they may also be required. Make sure the knobs are in the ...water. Molded rib Spring clip Clear groove in the OFF position to the locked position. Replace the knobs in stem Control Knob (on some models) The control knobs may be washed with your fingers and slowly peel it is clear of the oven cavity, to ensure proper placement...
...must be removed for cleaning. It cannot be removed from all parts. Control Panel It's a good idea to wipe the control panel after each use abrasive cleansers, strong liquid cleansers, plastic scouring pads or oven cleaners on the control panel-they may also be required. Make sure the knobs are in the ...water. Molded rib Spring clip Clear groove in the OFF position to the locked position. Replace the knobs in stem Control Knob (on some models) The control knobs may be washed with your fingers and slowly peel it is clear of the oven cavity, to ensure proper placement...

