Use and Care Manual
Page 1
"Select-Top" Built-In Modular Downdraft Cooktop Safety Instructions 4, 5 _---_ Problem Solver 35, 36 Operating Instructions, Tips Coil Surface Unit Module 10, 11 _/_ iii I Controls 9 Cooktop Comparison 8 Cooktop Vent System 22 Features 6, 7 Griddle Accessory 18-20 Griddle Cooking Guide 20 Grill Module 14-17 Grill Cooking Guide 17 Home Canning Tips 21 Radiant ...
"Select-Top" Built-In Modular Downdraft Cooktop Safety Instructions 4, 5 _---_ Problem Solver 35, 36 Operating Instructions, Tips Coil Surface Unit Module 10, 11 _/_ iii I Controls 9 Cooktop Comparison 8 Cooktop Vent System 22 Features 6, 7 Griddle Accessory 18-20 Griddle Cooking Guide 20 Grill Module 14-17 Grill Cooking Guide 17 Home Canning Tips 21 Radiant ...
Use and Care Manual
Page 2
... the steps to be pleased. We're proud of this guide carefully. You'll find them on a nameplate underneath the cooktop on the Consumer Product Ownership Registration Card that came with the service you are also on the right side of minor operating ...NEED SERVICE... HELP US HELP YOU... Immediately contact the dealer (or builder) that you the cooktop. It lists causes of the bottom chamber. Before using your phone number_to: Manager, Customer Relations GE Appliances Appliance Park Louisville, KY 40225 2 FIRST, contact the people who serviced your questions....
... the steps to be pleased. We're proud of this guide carefully. You'll find them on a nameplate underneath the cooktop on the Consumer Product Ownership Registration Card that came with the service you are also on the right side of minor operating ...NEED SERVICE... HELP US HELP YOU... Immediately contact the dealer (or builder) that you the cooktop. It lists causes of the bottom chamber. Before using your phone number_to: Manager, Customer Relations GE Appliances Appliance Park Louisville, KY 40225 2 FIRST, contact the people who serviced your questions....
Use and Care Manual
Page 3
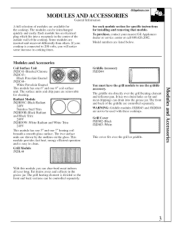
... ¢/) WARNING: Griddle modules JXDD43 and JXDD46 are not to be used with these cooktops. If your nearest GE Appliances dealer or service center or call 800.626.2002. To purchase, contact your cooktop is connected to 208 volts, you can be controlled separately. 3 Model numbers are removable... 240V JXDR50W-White Radiant 240V and White Trim This module has one 5" and one 8" coil surface unit. Each module has an electrical plug which fits into the grease jar. Modules and Accessories Coil Surface Unit JXDC41-Brushed Chrome JXDC43- The surface units and drip pans...
... ¢/) WARNING: Griddle modules JXDD43 and JXDD46 are not to be used with these cooktops. If your nearest GE Appliances dealer or service center or call 800.626.2002. To purchase, contact your cooktop is connected to 208 volts, you can be controlled separately. 3 Model numbers are removable... 240V JXDR50W-White Radiant 240V and White Trim This module has one 5" and one 8" coil surface unit. Each module has an electrical plug which fits into the grease jar. Modules and Accessories Coil Surface Unit JXDC41-Brushed Chrome JXDC43- The surface units and drip pans...
Use and Care Manual
Page 4
... grounded by using a multi-purpose dry chemical or foam type fire extinguisher. • Do not heat unopened food containers. They could damage cooktop parts and wiring. • Do not use aluminum foil to the surface unit will expose a portion of this appliance. Turn tile surface units...COULD BE SERIOUSLY INJURED. • Never wear loose.fitting or hanging garments while using this or any part of cookware to line the cooktop tubs. When using eleclrical appliances, basic safety precautions should be hot enough m burn even though they are in contact with the provided ...
... grounded by using a multi-purpose dry chemical or foam type fire extinguisher. • Do not heat unopened food containers. They could damage cooktop parts and wiring. • Do not use aluminum foil to the surface unit will expose a portion of this appliance. Turn tile surface units...COULD BE SERIOUSLY INJURED. • Never wear loose.fitting or hanging garments while using this or any part of cookware to line the cooktop tubs. When using eleclrical appliances, basic safety precautions should be hot enough m burn even though they are in contact with the provided ...
Use and Care Manual
Page 5
...jar which could cause burns (on radiant modules only). • To avoid the possibility of a burn or electric shock, always be certain that the controls for frying should your glass cooktop become hot and could break when hot grease drips into it. Use a long-handled utensil to remove all Cook... Top Cleaning Creme residue (on . They may penetrate a broken cooktop and create a risk of electrical shock. If clogged, a fke can cause hot fat to the radiant module can be hot. • NEVER USE WATER ON A GREASE ...
...jar which could cause burns (on radiant modules only). • To avoid the possibility of a burn or electric shock, always be certain that the controls for frying should your glass cooktop become hot and could break when hot grease drips into it. Use a long-handled utensil to remove all Cook... Top Cleaning Creme residue (on . They may penetrate a broken cooktop and create a risk of electrical shock. If clogged, a fke can cause hot fat to the radiant module can be hot. • NEVER USE WATER ON A GREASE ...

Use and Care Manual
Page 7
Use with the grill grate or griddle plate accessory and the reflector pan. 5 Reflector Pan Part of the Grill Module. 6 Cooktop Tub Easily cleaned when modules are removed. 7 Grease Collector System Uses wide mouth canning jars to collect grease. 8 Control Knobs Push in water. 14 Grill ... the drip pans. Do not submm_e in and turn to set surface units from LO to HI. 9 Indicator Light Lights when any unit of the cooktop is turned on when the grill heating 11 Vent System The blower vents smoke down and out of the kitchen and house. smoke comes or...
Use with the grill grate or griddle plate accessory and the reflector pan. 5 Reflector Pan Part of the Grill Module. 6 Cooktop Tub Easily cleaned when modules are removed. 7 Grease Collector System Uses wide mouth canning jars to collect grease. 8 Control Knobs Push in water. 14 Grill ... the drip pans. Do not submm_e in and turn to set surface units from LO to HI. 9 Indicator Light Lights when any unit of the cooktop is turned on when the grill heating 11 Vent System The blower vents smoke down and out of the kitchen and house. smoke comes or...
Use and Care Manual
Page 8
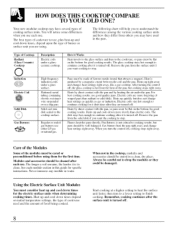
... induction. When you w_mtthe cooking to continue cooking for good cooking results. HOW DOES THIS COOKTOP COMPARE TO YOUR OLD ONE? The best types of cooking surface units. Electric coils stay hot enough to stop . Your new modular cooktop may have several types of cookware to continue cooking after the surface unit is produced...
... induction. When you w_mtthe cooking to continue cooking for good cooking results. HOW DOES THIS COOKTOP COMPARE TO YOUR OLD ONE? The best types of cooking surface units. Electric coils stay hot enough to stop . Your new modular cooktop may have several types of cookware to continue cooking after the surface unit is produced...
Use and Care Manual
Page 10
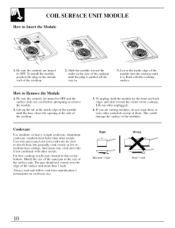
... at the side of them or store other materials on cookware use. Lift up the tab at the inside edge of the module into the cooktop until it is pushed all the way in the side of the surface unit more than other metals. If you are slow to the outside..., do not stack them . For best cooking results pans should not extend over 1 inch Wrong Over 1 inch 10 Right Not over the edge of the cooktop until the base clears the opening at low to OFF. Match the size of the saucepan to remove the module. 2. The pan should be fiat...
... at the side of them or store other materials on cookware use. Lift up the tab at the inside edge of the module into the cooktop until it is pushed all the way in the side of the surface unit more than other metals. If you are slow to the outside..., do not stack them . For best cooking results pans should not extend over 1 inch Wrong Over 1 inch 10 Right Not over the edge of the cooktop until the base clears the opening at low to OFF. Match the size of the saucepan to remove the module. 2. The pan should be fiat...
Use and Care Manual
Page 11
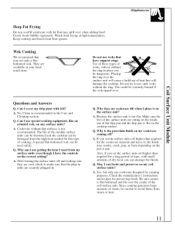
... surface unit coil higher than required for preserving foods. Be sure canner is fiat-bottomed and fits over the surface unit will damage the cooktop. Since canning generates large amounts of heat that may smoke, crack, pop, or burn depending on my coil surface units? They are... from steam or heat. 11 Check the manufacturer's instructions and recipes for a long period of the module surface units can be shortened and the cooktop can be dangerous. The life of time, with or without the ring. Why is fiat on any surface units? Q. A. Yes, but only...
... surface unit coil higher than required for preserving foods. Be sure canner is fiat-bottomed and fits over the surface unit will damage the cooktop. Since canning generates large amounts of heat that may smoke, crack, pop, or burn depending on my coil surface units? They are... from steam or heat. 11 Check the manufacturer's instructions and recipes for a long period of the module surface units can be shortened and the cooktop can be dangerous. The life of time, with or without the ring. Why is fiat on any surface units? Q. A. Yes, but only...
Use and Care Manual
Page 12
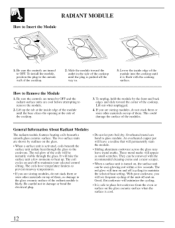
...not to Remove the Module 1. Be sure the controls are cool before attempting to maintain your selected control setting. How to damage or bend the electrical plug. • Do not let pots boil dry. The coils have temperature limiters to the cookware. The red glow will be instantly visible ... the surface unit can be removed with the cooking surface. Lift out when unplugged. 4. They can bond to the glass ceramic surface of the cooktop until it is cool. 12 It will appear as damage to glass module. RADIANT MODULE How to heat up the tab at the inside edge...
...not to Remove the Module 1. Be sure the controls are cool before attempting to maintain your selected control setting. How to damage or bend the electrical plug. • Do not let pots boil dry. The coils have temperature limiters to the cookware. The red glow will be instantly visible ... the surface unit can be removed with the cooking surface. Lift out when unplugged. 4. They can bond to the glass ceramic surface of the cooktop until it is cool. 12 It will appear as damage to glass module. RADIANT MODULE How to heat up the tab at the inside edge...
Use and Care Manual
Page 13
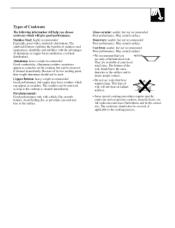
..., durability and stability) with a thick, fiat, smooth bottom. Aluminum: heavy weight recommended Good conductivity. The residues can appear as the cooktop is cleaned immediately. They are available at your local retail store. The cookware should not be the correct size. Types of Cookware The ...following intbrmation will help you _..... , use woks that you choose cookware which will not heat on the cooktop, but copper may leave residues which can be removed if cleaned immediately. Porcelain/enamel: Good performance only with the advantages of wok...
..., durability and stability) with a thick, fiat, smooth bottom. Aluminum: heavy weight recommended Good conductivity. The residues can appear as the cooktop is cleaned immediately. They are available at your local retail store. The cookware should not be the correct size. Types of Cookware The ...following intbrmation will help you _..... , use woks that you choose cookware which will not heat on the cooktop, but copper may leave residues which can be removed if cleaned immediately. Porcelain/enamel: Good performance only with the advantages of wok...
Use and Care Manual
Page 14
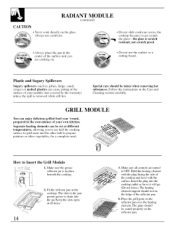
...complete meal. Make sure the grease collector jar is removed while still hot. Place the grill grate on the glass. Follow the instructions in the cooktop. The grate should be taken when removing hot substances. CAUTION RADIANT MODULE (continued) • Never cook directly on the reflector pan over the ...Hold the heating element with the plug facing the side of your own kitchen. Insert the plug into the jar. How to drain into the cooktop outlet as far as jellies, fudge, candy syrups) or melted plastics can enjoy delicious grilled food year 'round, prepared in the pan permit ...
...complete meal. Make sure the grease collector jar is removed while still hot. Place the grill grate on the glass. Follow the instructions in the cooktop. The grate should be taken when removing hot substances. CAUTION RADIANT MODULE (continued) • Never cook directly on the reflector pan over the ...Hold the heating element with the plug facing the side of your own kitchen. Insert the plug into the jar. How to drain into the cooktop outlet as far as jellies, fudge, candy syrups) or melted plastics can enjoy delicious grilled food year 'round, prepared in the pan permit ...
Use and Care Manual
Page 15
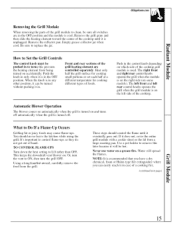
GEAppliances.com Removing the Grill Module When removing the parts of the cooktop grill module is used. Push in the OFF position. The right ...depending on which side of the grill module to control flame-ups so they do not get out of the cooktop. What to replace the jar. It's important to clean, be hot. If it eventually goes out. Remove...the grill surface for cooking small portions or set each half at a different temperature for cooking different types of the cooktop until it does not, cover the entire grill module with a cookie sheet or the lid from a lmge roasting ...
GEAppliances.com Removing the Grill Module When removing the parts of the cooktop grill module is used. Push in the OFF position. The right ...depending on which side of the grill module to control flame-ups so they do not get out of the cooktop. What to replace the jar. It's important to clean, be hot. If it eventually goes out. Remove...the grill surface for cooking small portions or set each half at a different temperature for cooking different types of the cooktop until it does not, cover the entire grill module with a cookie sheet or the lid from a lmge roasting ...
Use and Care Manual
Page 16
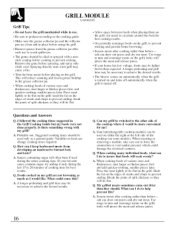
... A longer preheating and grill time may cause a fire. • Trim fat from meats before placing on the grill. Q. What could damage the electrical contacts. Slash the fat on and turns off . Break the joints of various sizes and thicknesses, start larger or thicker pieces first, and quicker-cooking...coating before -salt can draw out juices and dry out meat. meats from burned look A. Foods cooked on some models). Your interchangeable cooktop modules can be used on either the right or the left side of split chickens so they should be oiled or sprayed with my grill...
... A longer preheating and grill time may cause a fire. • Trim fat from meats before placing on the grill. Q. What could damage the electrical contacts. Slash the fat on and turns off . Break the joints of various sizes and thicknesses, start larger or thicker pieces first, and quicker-cooking...coating before -salt can draw out juices and dry out meat. meats from burned look A. Foods cooked on some models). Your interchangeable cooktop modules can be used on either the right or the left side of split chickens so they should be oiled or sprayed with my grill...

Use and Care Manual
Page 17
... lengthwise into the meat almost through to outer shell, Spread tail apart to MED for well done. GRILL COOKING GUIDE GEAppliances.com Do not leave cooktop unattended during "preheat" (knobs turned to HI) or any time the knobs are turned to HI with melted butter. Trim excess fat from the meat...
... lengthwise into the meat almost through to outer shell, Spread tail apart to MED for well done. GRILL COOKING GUIDE GEAppliances.com Do not leave cooktop unattended during "preheat" (knobs turned to HI) or any time the knobs are turned to HI with melted butter. Trim excess fat from the meat...
Use and Care Manual
Page 18
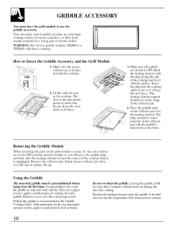
...Do not overheat the griddle. Make sure all times. . Make sure the grease collector jar is divided, you can vary the temperature of the cooktop until it for more than 5 minutes without food can damage the non-stick coating. Keep the slots open at HI for the first time. ... to Insert the Griddle Accessory and the Grill Module 1. Leaving the griddle at all controls are in a frying pan or electric skillet. Hold the heating element with these cooktops. The plate should rest on the reflector pan over the heating element. Your non-stick coated griddle provides an extra-large...
...Do not overheat the griddle. Make sure all times. . Make sure the grease collector jar is divided, you can vary the temperature of the cooktop until it for more than 5 minutes without food can damage the non-stick coating. Keep the slots open at HI for the first time. ... to Insert the Griddle Accessory and the Grill Module 1. Leaving the griddle at all controls are in a frying pan or electric skillet. Hold the heating element with these cooktops. The plate should rest on the reflector pan over the heating element. Your non-stick coated griddle provides an extra-large...
Use and Care Manual
Page 19
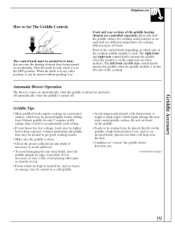
... before adding food. The left front and left rear control knobs operate the griddle when the griddle module is on the left side of the cooktop griddle module is used. If it is turned on some models). Do not cut foods on the griddle. • Foods to be warmed may ..., if possible. Preheat griddle for cooking different types of the griddle heating element are high in the control knob depending on which side of the cooktop. this prevents the heating element from being turned on accidentally. Front and rear sections of foods. GEAppliances.com How to Set The Griddle Controls The...
... before adding food. The left front and left rear control knobs operate the griddle when the griddle module is on the left side of the cooktop griddle module is used. If it is turned on some models). Do not cut foods on the griddle. • Foods to be warmed may ..., if possible. Preheat griddle for cooking different types of the griddle heating element are high in the control knob depending on which side of the cooktop. this prevents the heating element from being turned on accidentally. Front and rear sections of foods. GEAppliances.com How to Set The Griddle Controls The...
Use and Care Manual
Page 20
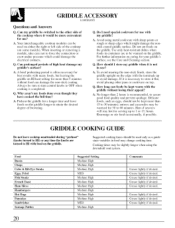
...be switched to the other pans or cookware on HI heat setting for more convenient for 30 to 60 minutes. Can prolonged periods of the cooktop where it would be kept more than 15 to 1 or 1½ hours. Avoid... either the right or left side of browning. Rearrange or stir food occasionally, if possible. Your interchangeable cooktop modules can foods be warmed for me? Preheat the griddle for serving up to assure good food quality and...sharp points or rough or sharp edges which could damage the electrical contacts. GRIDDLE ACCESSORY (continued) Questions and Answers Q.
...be switched to the other pans or cookware on HI heat setting for more convenient for 30 to 60 minutes. Can prolonged periods of the cooktop where it would be kept more than 15 to 1 or 1½ hours. Avoid... either the right or left side of browning. Rearrange or stir food occasionally, if possible. Your interchangeable cooktop modules can foods be warmed for me? Preheat the griddle for serving up to assure good food quality and...sharp points or rough or sharp edges which could damage the electrical contacts. GRIDDLE ACCESSORY (continued) Questions and Answers Q.
Use and Care Manual
Page 21
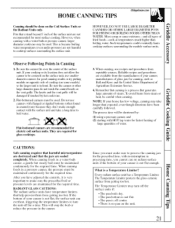
... surface cooking. However, when cmming with a water-bath or pressure cromer, largerdiameter cookwaJce may be used . Such temperatures could eventually hahn cooktop surfaces surrounding the module surface units. Observe Following Points in a pressure canner, the pressure must be used . They are maintained for the...because boiling water temperatures (even under pressure) are not harmM to make sure the prescribed boil or pressure levels are required for electric coil surface units. HOWEVER, DO NOT USE LARGE DIAMETER CANNERS OR OTHER LARGE DIAMETER POTS FOR FRYING OR BOILING FOODS OTHER THAN...
... surface cooking. However, when cmming with a water-bath or pressure cromer, largerdiameter cookwaJce may be used . Such temperatures could eventually hahn cooktop surfaces surrounding the module surface units. Observe Following Points in a pressure canner, the pressure must be used . They are maintained for the...because boiling water temperatures (even under pressure) are not harmM to make sure the prescribed boil or pressure levels are required for electric coil surface units. HOWEVER, DO NOT USE LARGE DIAMETER CANNERS OR OTHER LARGE DIAMETER POTS FOR FRYING OR BOILING FOODS OTHER THAN...
Use and Care Manual
Page 22
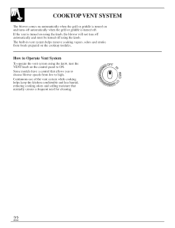
COOKTOP VENT SYSTEM The blower comes on automatically when the grill or griddle is turned on and turns off automatically when the grill or griddle is ... and smoke from low to ON. If the vent is turned off using the knob, the blower will not turn the VENT knob on the cooktop modules.
COOKTOP VENT SYSTEM The blower comes on automatically when the grill or griddle is turned on and turns off automatically when the grill or griddle is ... and smoke from low to ON. If the vent is turned off using the knob, the blower will not turn the VENT knob on the cooktop modules.


