
Owners Manual
Page 1
... 10 Demand Response 13 Dryer Features 10, 11 Quick Start Guide 5 Settings Option 10 Using the Dryer 12 Installation Instructions Before You Begin 14, 15 Connecting the Inlet Hoses 17 Connecting a Gas Dryer 18-21 Connecting an Electric Dryer 22-24 Exhausting the Dryer 25-31 Final Setup 32... Installing the Pedestal 42-44 Location of your Dryer 15, 16 Reversing the Door Swing . . . . . .33-38 Stacking the Washer and Dryer 39-41 Troubleshooting Tips . . . ...
... 10 Demand Response 13 Dryer Features 10, 11 Quick Start Guide 5 Settings Option 10 Using the Dryer 12 Installation Instructions Before You Begin 14, 15 Connecting the Inlet Hoses 17 Connecting a Gas Dryer 18-21 Connecting an Electric Dryer 22-24 Exhausting the Dryer 25-31 Final Setup 32... Installing the Pedestal 42-44 Location of your Dryer 15, 16 Reversing the Door Swing . . . . . .33-38 Stacking the Washer and Dryer 39-41 Troubleshooting Tips . . . ...

Owners Manual
Page 2
... any other appliance. ■ Installation and service must be minimized further by the incomplete combustion of all occupants. Exhaust/Ducting 1 Dryers MUST be followed to minimize the risk of fire or explosion, electric shock, or to avoid electrical overload. ■ Remove all sharp packing items and dispose of natural gas or LP fuels.
... any other appliance. ■ Installation and service must be minimized further by the incomplete combustion of all occupants. Exhaust/Ducting 1 Dryers MUST be followed to minimize the risk of fire or explosion, electric shock, or to avoid electrical overload. ■ Remove all sharp packing items and dispose of natural gas or LP fuels.

Owners Manual
Page 3
... around your appliances free of the lint filter). Do not allow children to play on the floor around your washer or dryer during subsequent dryer uses. ■ To minimize the possibility of electric shock, unplug this appliance from the remaining particles that have used in homes such as acetone, denatured alcohol, gasoline, kerosene...
... around your appliances free of the lint filter). Do not allow children to play on the floor around your washer or dryer during subsequent dryer uses. ■ To minimize the possibility of electric shock, unplug this appliance from the remaining particles that have used in homes such as acetone, denatured alcohol, gasoline, kerosene...

Owners Manual
Page 4
... instructions that their product can be stepped on page 12. ■ If yours is a gas dryer, it is equipped with items such as wool, leather, silk, lingerie, foam products or electric blankets. ■ Do not use of these products are the responsibility of the manufacturers of those ... from traffic areas so it will not be safely used in your laundered fabrics or reduce the static electricity in this appliance to avoid damage to exhaust from hiding inside the dryer should be cleaned at least once a year by a qualified technician. Additionally, it is highly recommended ...
... instructions that their product can be stepped on page 12. ■ If yours is a gas dryer, it is equipped with items such as wool, leather, silk, lingerie, foam products or electric blankets. ■ Do not use of these products are the responsibility of the manufacturers of those ... from traffic areas so it will not be safely used in your laundered fabrics or reduce the static electricity in this appliance to avoid damage to exhaust from hiding inside the dryer should be cleaned at least once a year by a qualified technician. Additionally, it is highly recommended ...

Owners Manual
Page 5
... Support 2 3 1 6 7 5 1 Power Press to "wake up " the display. 1 Press the POWER button. select your heat setting and the amount of fire, electric shock, or injury to "wake up " the display. If the display is dark, press the POWER button to persons, read the IMPORTANT SAFETY INSTRUCTIONS before... and appearance may vary from the power supply. 5 NOTE: Pressing POWER does not disconnect the appliance from your items to turn the dryer off. Throughout this appliance. GEAppliances.com WARNING! Quick Start If the screen is active, press to dry by turning the Cycle Knob....
... Support 2 3 1 6 7 5 1 Power Press to "wake up " the display. 1 Press the POWER button. select your heat setting and the amount of fire, electric shock, or injury to "wake up " the display. If the display is dark, press the POWER button to persons, read the IMPORTANT SAFETY INSTRUCTIONS before... and appearance may vary from the power supply. 5 NOTE: Pressing POWER does not disconnect the appliance from your items to turn the dryer off. Throughout this appliance. GEAppliances.com WARNING! Quick Start If the screen is active, press to dry by turning the Cycle Knob....

Owners Manual
Page 13
...This screen means the module is attached correctly and you are available as part of the clothes dryer. NOTE: When YES (default) is selected, your DR-enabled appliance following demand response features .... Safety Instructions Demand Response. (on some models) GEAppliances.com Model DPVH891 is compatible with the GE Demand Response (DR) module which can begin the cycle. The following the instructions below . Contact... the local utility company to help consumers reduce peak electricity usage in Timed Dry Mode and the utility rate switches to interface with less energy than ...
...This screen means the module is attached correctly and you are available as part of the clothes dryer. NOTE: When YES (default) is selected, your DR-enabled appliance following demand response features .... Safety Instructions Demand Response. (on some models) GEAppliances.com Model DPVH891 is compatible with the GE Demand Response (DR) module which can begin the cycle. The following the instructions below . Contact... the local utility company to help consumers reduce peak electricity usage in Timed Dry Mode and the utility rate switches to interface with less energy than ...

Owners Manual
Page 14
...UL-listed duct. If flexible metal (semi-rigid or foil-type) duct is above 50°F for local electrical inspector's use. • IMPORTANT - Call 800.GE.CARES (800.432.2737) or visit our Web site at: GEAppliances.com In Canada, call 1.800.561.3344...used near children. • Proper installation is used , must be easily crushed and trap lint. FOR YOUR SAFETY: WARNING - Installation Instructions Dryer DPVH891, DPVH890, UPVH890 Questions? Close supervision of children is necessary when the appliance is the responsibility of potential exposure to collapse, be performed by...
...UL-listed duct. If flexible metal (semi-rigid or foil-type) duct is above 50°F for local electrical inspector's use. • IMPORTANT - Call 800.GE.CARES (800.432.2737) or visit our Web site at: GEAppliances.com In Canada, call 1.800.561.3344...used near children. • Proper installation is used , must be easily crushed and trap lint. FOR YOUR SAFETY: WARNING - Installation Instructions Dryer DPVH891, DPVH890, UPVH890 Questions? Close supervision of children is necessary when the appliance is the responsibility of potential exposure to collapse, be performed by...
Owners Manual
Page 16
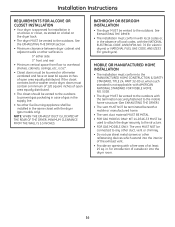
...doors must conform with local codes or, in the absence of local codes, with the dryer (gas models only). in the same closet with the NATIONAL ELECTRICAL CODE, ANSI/NFPA NO. 70 (for electric dryers) or NATIONAL FUEL GAS CODE, ANSI Z223 (for introduction of open area equally distributed.... See EXHAUSTING THE DRYER. • The installation must be louvered or otherwise ventilated and have ...
...doors must conform with local codes or, in the absence of local codes, with the dryer (gas models only). in the same closet with the NATIONAL ELECTRICAL CODE, ANSI/NFPA NO. 70 (for electric dryers) or NATIONAL FUEL GAS CODE, ANSI Z223 (for introduction of open area equally distributed.... See EXHAUSTING THE DRYER. • The installation must be louvered or otherwise ventilated and have ...

Owners Manual
Page 18
...❒ Flexible gas line connector ❒ Duct clamps (2) or Spring clamps (2) ❒ Safety glasses ❒ Gloves ❒ Soap solution for electric dryers) TOOLS YOU WILL NEED ❒ 10″ Adjustable wrenches (2) ❒ 8″ Pipe wrench ❒ Flat-blade screwdriver ❒ Level FOR... YOUR SAFETY: WARNING Before beginning the installation, turn off the circuit breaker(s) or remove the dryer's circuit fuse(s) at the electrical box. Shut-off Valve Disconnect and discard old flexible gas connector and ducting material. ❒ 4″ dia. ...
...❒ Flexible gas line connector ❒ Duct clamps (2) or Spring clamps (2) ❒ Safety glasses ❒ Gloves ❒ Soap solution for electric dryers) TOOLS YOU WILL NEED ❒ 10″ Adjustable wrenches (2) ❒ 8″ Pipe wrench ❒ Flat-blade screwdriver ❒ Level FOR... YOUR SAFETY: WARNING Before beginning the installation, turn off the circuit breaker(s) or remove the dryer's circuit fuse(s) at the electrical box. Shut-off Valve Disconnect and discard old flexible gas connector and ducting material. ❒ 4″ dia. ...

Owners Manual
Page 21
... properly grounded branch circuit, protected by attaching to the green ground screw on the rear of the dryer, and to an alternate established ground. ELECTRICAL CONNECTION INFORMATION FOR GAS DRYERS WARNING - Apply a soap solution. Do not cut or remove the grounding terminal from this appliance.... directly into a properly grounded threeprong receptacle. Never use . Open Gas Valve ELECTRICAL REQUIREMENTS FOR GAS DRYERS This appliance must not contain ammonia, which meets local codes, may be electrically grounded in accordance with local codes and ordinances, or in the absence of ...
... properly grounded branch circuit, protected by attaching to the green ground screw on the rear of the dryer, and to an alternate established ground. ELECTRICAL CONNECTION INFORMATION FOR GAS DRYERS WARNING - Apply a soap solution. Do not cut or remove the grounding terminal from this appliance.... directly into a properly grounded threeprong receptacle. Never use . Open Gas Valve ELECTRICAL REQUIREMENTS FOR GAS DRYERS This appliance must not contain ammonia, which meets local codes, may be electrically grounded in accordance with local codes and ordinances, or in the absence of ...

Owners Manual
Page 22
...plug type as per the house receptacle before purchasing line cord. Be sure the dryer cord is unplugged from the wall. Installation Instructions CONNECTING AN ELECTRIC DRYER (skip for gas dryers) TOOLS YOU WILL NEED ❒ Slip-joint pliers ❒ Phillips screwdriver ...-blade screwdriver ❒ Level FOR YOUR SAFETY: WARNING Before making the electrical connection, turn off the circuit breaker(s) or remove the dryer's circuit fuse(s) at the electrical box. ELECTRICAL CONNECTION INFORMATION FOR ELECTRIC DRYERS WARNING - metal duct (recommended) ❒ 4″ dia., UL-listed...
...plug type as per the house receptacle before purchasing line cord. Be sure the dryer cord is unplugged from the wall. Installation Instructions CONNECTING AN ELECTRIC DRYER (skip for gas dryers) TOOLS YOU WILL NEED ❒ Slip-joint pliers ❒ Phillips screwdriver ...-blade screwdriver ❒ Level FOR YOUR SAFETY: WARNING Before making the electrical connection, turn off the circuit breaker(s) or remove the dryer's circuit fuse(s) at the electrical box. ELECTRICAL CONNECTION INFORMATION FOR ELECTRIC DRYERS WARNING - metal duct (recommended) ❒ 4″ dia., UL-listed...

Owners Manual
Page 23
.... 3-wire connection is NOT for Step 7. 5. Tighten all terminal block screws (3) completely. 8. Installation Instructions ELECTRICAL REQUIREMENTS FOR ELECTRIC DRYERS This dryer must be run with the circuit conductors and connected to the equipment grounding terminal on new construction. Remove ground ...strap and discard. Properly secure power cord to an electric dryer. B. Connect the neutral (white) line to an individual branch circuit, protected by the required timedelay fuses or circuit breakers. CONNECTING DRYER USING 4-WIRE CONNECTION (MUST BE USED FOR MOBILE HOME...
.... 3-wire connection is NOT for Step 7. 5. Tighten all terminal block screws (3) completely. 8. Installation Instructions ELECTRICAL REQUIREMENTS FOR ELECTRIC DRYERS This dryer must be run with the circuit conductors and connected to the equipment grounding terminal on new construction. Remove ground ...strap and discard. Properly secure power cord to an electric dryer. B. Connect the neutral (white) line to an individual branch circuit, protected by the required timedelay fuses or circuit breakers. CONNECTING DRYER USING 4-WIRE CONNECTION (MUST BE USED FOR MOBILE HOME...

Owners Manual
Page 24
.... 2. Connect the neutral (white) line to green ground screw on cabinet rear. Installation Instructions CONNECTING AN ELECTRIC DRYER (cont.) CONNECTING DRYER USING 3-WIRE CONNECTION If required, by local code, install external ground (not provided) to power cord entry hole. Install 3/4-in... secure power cord to the outer screws of the terminal block (marked N). 6. Turn off the circuit breaker(s) (30 amp) or remove the dryer's circuit fuse at the lower back. 4. Green Ground Screw Ground Strap Strain Relief Hot Wire Bracket Screws (3) Cover Neutral (white) Hot Wire ...
.... 2. Connect the neutral (white) line to green ground screw on cabinet rear. Installation Instructions CONNECTING AN ELECTRIC DRYER (cont.) CONNECTING DRYER USING 3-WIRE CONNECTION If required, by local code, install external ground (not provided) to power cord entry hole. Install 3/4-in... secure power cord to the outer screws of the terminal block (marked N). 6. Turn off the circuit breaker(s) (30 amp) or remove the dryer's circuit fuse at the lower back. 4. Green Ground Screw Ground Strap Strain Relief Hot Wire Bracket Screws (3) Cover Neutral (white) Hot Wire ...

Owners Manual
Page 29
...° ADDING A NEW DUCT Fixing hole Portion "A" Left side exhaust Reconnect the cut portion (A) of the dryer. BEFORE PERFORMING THIS EXHAUST INSTALLATION, BE SURE TO DISCONNECT THE DRYER FROM ITS ELECTRICAL SUPPLY. Remove Right screw and save . Side opening • Insert the 4″ duct through the rear... duct out of the duct to the blower housing. CAUTION: Do not pull or damage the electrical wires and do not remove the vinyl cover from the electrical components inside the dryer exhaust duct and save Left Bottom Remove desired knockout (one only) Detach and remove the bottom...
...° ADDING A NEW DUCT Fixing hole Portion "A" Left side exhaust Reconnect the cut portion (A) of the dryer. BEFORE PERFORMING THIS EXHAUST INSTALLATION, BE SURE TO DISCONNECT THE DRYER FROM ITS ELECTRICAL SUPPLY. Remove Right screw and save . Side opening • Insert the 4″ duct through the rear... duct out of the duct to the blower housing. CAUTION: Do not pull or damage the electrical wires and do not remove the vinyl cover from the electrical components inside the dryer exhaust duct and save Left Bottom Remove desired knockout (one only) Detach and remove the bottom...

Owners Manual
Page 30
...(Kit WE1M454) Connect standard metal elbows and ducts to the bottom of the dryer. BEFORE PERFORMING THIS EXHAUST INSTALLATION, BE SURE TO DISCONNECT THE DRYER FROM ITS ELECTRICAL SUPPLY. Pull the duct out of cabinet for Gas and Electric models. Fixing hole A 123⁄8″ Cut the duct as shown on ...the joint Duct tape between the dryer internal duct and the elbow, and also the ...
...(Kit WE1M454) Connect standard metal elbows and ducts to the bottom of the dryer. BEFORE PERFORMING THIS EXHAUST INSTALLATION, BE SURE TO DISCONNECT THE DRYER FROM ITS ELECTRICAL SUPPLY. Pull the duct out of cabinet for Gas and Electric models. Fixing hole A 123⁄8″ Cut the duct as shown on ...the joint Duct tape between the dryer internal duct and the elbow, and also the ...

Owners Manual
Page 31
... not to prevent rotation. • Insert the elbow through the rear opening . otherwise, they may separate and cause a safety hazard. WARNING - Place dryer in portion A where it to the elbow. NEVER LEAVE THE BACK OPENING WITHOUT THE PLATE. (Kit WE1M454) 31 Fixing hole • Tape the elbow... in a 90-degree position to pull or damage the electrical wires inside the dryer when inserting the duct. • While still holding down the pipe and elbow from your hand through the rear hole and connect...
... not to prevent rotation. • Insert the elbow through the rear opening . otherwise, they may separate and cause a safety hazard. WARNING - Place dryer in portion A where it to the elbow. NEVER LEAVE THE BACK OPENING WITHOUT THE PLATE. (Kit WE1M454) 31 Fixing hole • Tape the elbow... in a 90-degree position to pull or damage the electrical wires inside the dryer when inserting the duct. • While still holding down the pipe and elbow from your hand through the rear hole and connect...

Owners Manual
Page 32
...parts and other end of Dryer 3 PLUG DRYER IN Ensure proper ground exists before pressing POWER. The plug must be plugged into its final position. 5 DRYER STARTUP Press the POWER button. Attach the other information, refer to the back cover for electric current. Otherwise, the display... will reduce the risk of electric shock by providing a path of malfunction or breakdown, grounding...
...parts and other end of Dryer 3 PLUG DRYER IN Ensure proper ground exists before pressing POWER. The plug must be plugged into its final position. 5 DRYER STARTUP Press the POWER button. Attach the other information, refer to the back cover for electric current. Otherwise, the display... will reduce the risk of electric shock by providing a path of malfunction or breakdown, grounding...

Owners Manual
Page 35
... panel. 1 REMOVE THE DOOR ASSEMBLY Remove the side hinge cap by opening the dryer door and removing the screw from its electrical outlet. 1 REMOVE THE DOOR ASSEMBLY (cont.) Hold the door and remove the 2 hinge screws (#10 x 0.75″ tapping screws). Put the inner door aside ...on the handle side). Then using your hand, pop the hinge cap off the dryer. 1 x C Screw 2 x B Screws 2 DISASSEMBLE THE DOOR...
... panel. 1 REMOVE THE DOOR ASSEMBLY Remove the side hinge cap by opening the dryer door and removing the screw from its electrical outlet. 1 REMOVE THE DOOR ASSEMBLY (cont.) Hold the door and remove the 2 hinge screws (#10 x 0.75″ tapping screws). Put the inner door aside ...on the handle side). Then using your hand, pop the hinge cap off the dryer. 1 x C Screw 2 x B Screws 2 DISASSEMBLE THE DOOR...

Owners Manual
Page 39
...BEFORE YOU BEGIN Read these instructions with the dryer (gas models only). Failure to do so could result in the same closet with the Consumer. • Note to Consumer - FOR YOUR SAFETY: WARNING - • Electric Shock Hazard. Disconnect power before installing. Failure ...to do so could result in a mobile home or manufactured home. Failure to Installer - REQUIREMENTS FOR ALCOVE OR CLOSET INSTALLATION • Your dryer is not permitted in personal injury or death....
...BEFORE YOU BEGIN Read these instructions with the dryer (gas models only). Failure to do so could result in the same closet with the Consumer. • Note to Consumer - FOR YOUR SAFETY: WARNING - • Electric Shock Hazard. Disconnect power before installing. Failure ...to do so could result in a mobile home or manufactured home. Failure to Installer - REQUIREMENTS FOR ALCOVE OR CLOSET INSTALLATION • Your dryer is not permitted in personal injury or death....

Owners Manual
Page 45
... accidentally put more moisture and take too long to dry The DRY dryness level was accidentally paused when starting Delay Start Dryer is normal. NOTE: Electric dryers use 2 fuses/breakers, make sure the dryer venting is correct. • Make sure ducting is clean, free of moisture in the clothes • Inspect and clean exhaust...
... accidentally put more moisture and take too long to dry The DRY dryness level was accidentally paused when starting Delay Start Dryer is normal. NOTE: Electric dryers use 2 fuses/breakers, make sure the dryer venting is correct. • Make sure ducting is clean, free of moisture in the clothes • Inspect and clean exhaust...


