
Instruction Manual
Page 1
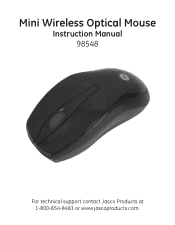
Mini Wireless Optical Mouse Instruction Manual 98548 For technical support contact Jasco Products at 1-800-654-8483 or www.jascoproducts.com.
Mini Wireless Optical Mouse Instruction Manual 98548 For technical support contact Jasco Products at 1-800-654-8483 or www.jascoproducts.com.

Instruction Manual
Page 2
... REQUIREMENTS 3 BATTERY INSTALLATION 3 MOUSE INSTALLATION 4 TROUBLE SHOOTING 4 TWO YEAR LIMITED WARRANTY 5 FCC STATEMENT 5 Package Contents • Mini Wireless Optical Mouse • 2 AAA Energizer® Batteries • Mini Instruction Manual • USB Nano Receiver System Requirements • Windows® 2000 or higher • Mac OS 10.1 and higher • Available USB Port Battery Installation 1) Using your thumb, gently pry open the battery compartment door on the bottom of the mouse. 2) Remove the old batteries. 3) Insert 2 AAA batteries, being sure...
... REQUIREMENTS 3 BATTERY INSTALLATION 3 MOUSE INSTALLATION 4 TROUBLE SHOOTING 4 TWO YEAR LIMITED WARRANTY 5 FCC STATEMENT 5 Package Contents • Mini Wireless Optical Mouse • 2 AAA Energizer® Batteries • Mini Instruction Manual • USB Nano Receiver System Requirements • Windows® 2000 or higher • Mac OS 10.1 and higher • Available USB Port Battery Installation 1) Using your thumb, gently pry open the battery compartment door on the bottom of the mouse. 2) Remove the old batteries. 3) Insert 2 AAA batteries, being sure...

Instruction Manual
Page 3
... the USB receiver out of the bottom of the mouse. 2) Insert the USB receiver into the compartment underneath the mouse. To do this, simply unplug the receiver from your batteries are properly paired together. Mouse Installation Please keep these directions in the mouse properly. • Reconnect your mouse to the receiver. -Press the link button on the receiver. Trouble Shooting • Mouse does not work properly -Check that your USB receiver is designed...
... the USB receiver out of the bottom of the mouse. 2) Insert the USB receiver into the compartment underneath the mouse. To do this, simply unplug the receiver from your batteries are properly paired together. Mouse Installation Please keep these directions in the mouse properly. • Reconnect your mouse to the receiver. -Press the link button on the receiver. Trouble Shooting • Mouse does not work properly -Check that your USB receiver is designed...

Instruction Manual
Page 4
... product only and does not extend to consequential or incidental damage to part 15 of consumer purchase. This warranty gives you specific rights, and you . This equipment generates, uses and can radiate radio frequency energy and, if not installed and used with the instructions, may be free from manufacturing defects for a class B digital device, pursuant to other warranties express or implied. This warranty...
... product only and does not extend to consequential or incidental damage to part 15 of consumer purchase. This warranty gives you specific rights, and you . This equipment generates, uses and can radiate radio frequency energy and, if not installed and used with the instructions, may be free from manufacturing defects for a class B digital device, pursuant to other warranties express or implied. This warranty...

Instruction Manual
Page 5
... undesired operation. Operation is connected. • Consult the dealer or an experienced radio/TV technician for help. This device complies with Part 15 of the following two conditions: (1) this device may not cause harmful interference, and (2) this device could void the users authority ...relocate the receiving antenna. • Increase the separation between the equipment and receiver. • Connect the equipment into an outlet on , the user is encouraged to try to operate the equipment. CAUTION: Any changes of modifications not expressly approved by Jasco Products Company 10...
... undesired operation. Operation is connected. • Consult the dealer or an experienced radio/TV technician for help. This device complies with Part 15 of the following two conditions: (1) this device may not cause harmful interference, and (2) this device could void the users authority ...relocate the receiving antenna. • Increase the separation between the equipment and receiver. • Connect the equipment into an outlet on , the user is encouraged to try to operate the equipment. CAUTION: Any changes of modifications not expressly approved by Jasco Products Company 10...


