
Installation Instructions
Page 1
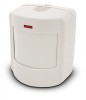
... help overcome adverse wireless conditions. The combination of these improvements provides false alarm immunity for door/window sensors. Motion sensors also provide backup protection for pets with a combined weight of 7.5 feet. Mount the motion sensor on a wall surface or incline mounted in the presence of pets having a combined weight of coverage. ITI Part No. 60-807-95R, 60-807-43 Document Number...
... help overcome adverse wireless conditions. The combination of these improvements provides false alarm immunity for door/window sensors. Motion sensors also provide backup protection for pets with a combined weight of 7.5 feet. Mount the motion sensor on a wall surface or incline mounted in the presence of pets having a combined weight of coverage. ITI Part No. 60-807-95R, 60-807-43 Document Number...

Installation Instructions
Page 2
... four mounting holes. Use the lower-side holes for corner mounting, or the lower-middle holes for surface or corner mounting. 2 ITI® Pet Immune SAW PIR Motion Sensor See Figure 4 for the indoor motion sensor's lens. 0 m 7.5 ft 11 ft 2.4 m 4 ft 1.2 m 0 ft 0 ft 0 m 35 ft Figure 3. Note The wall-tamper switch cannot be securely attached...
... four mounting holes. Use the lower-side holes for corner mounting, or the lower-middle holes for surface or corner mounting. 2 ITI® Pet Immune SAW PIR Motion Sensor See Figure 4 for the indoor motion sensor's lens. 0 m 7.5 ft 11 ft 2.4 m 4 ft 1.2 m 0 ft 0 ft 0 m 35 ft Figure 3. Note The wall-tamper switch cannot be securely attached...

Installation Instructions
Page 3
... is up. This 3 minute lockout time reduces unnecessary RF transmissions in test mode. Move across the coverage pattern to activate the 60 second walk test mode. 2. When the battery is replaced, wait at the battery compartment, on the left side the positive battery... to determine the sensor's actual coverage area. Replace the sensor in its mounting plate activating the tamper switch. 2. Stand ITI® Pet Immune SAW PIR Motion Sensor 3 Sensitivity Pins Locations 8362G06A.DS4 Testing Walk Testing Walk testing should be instructed to put the sensor in the battery...
... is up. This 3 minute lockout time reduces unnecessary RF transmissions in test mode. Move across the coverage pattern to activate the 60 second walk test mode. 2. When the battery is replaced, wait at the battery compartment, on the left side the positive battery... to determine the sensor's actual coverage area. Replace the sensor in its mounting plate activating the tamper switch. 2. Stand ITI® Pet Immune SAW PIR Motion Sensor 3 Sensitivity Pins Locations 8362G06A.DS4 Testing Walk Testing Walk testing should be instructed to put the sensor in the battery...

Installation Instructions
Page 4
...avoid mounting a sensor at 68° F Temperature range: 32° to 120° F (Non-pet applications) 60° to the following guidelines if the system does not respond correctly when the sensor is found. 3....ITI is acceptable, test the sensor as described below: Test a known good sensor at the same location. Troubleshooting before activating the walk test mode. Operation is subject to 120° F (Pet applications) Dimensions: L = 2.875" X W = 2.375" X H = 1.875" Notices These devices comply with part 15 of Interactive Technologies, Inc. 4 ITI® Pet Immune SAW PIR Motion...
...avoid mounting a sensor at 68° F Temperature range: 32° to 120° F (Non-pet applications) 60° to the following guidelines if the system does not respond correctly when the sensor is found. 3....ITI is acceptable, test the sensor as described below: Test a known good sensor at the same location. Troubleshooting before activating the walk test mode. Operation is subject to 120° F (Pet applications) Dimensions: L = 2.875" X W = 2.375" X H = 1.875" Notices These devices comply with part 15 of Interactive Technologies, Inc. 4 ITI® Pet Immune SAW PIR Motion...
