
Installation Instructions
Page 1
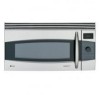
... is not covered under the Warranty. • Please read all instructions thoroughly before the Microwave Oven is required, its installation should be completed by a qualified electrician before installing the Over the Range Microwave Oven. Installation of the installer. • Product failure due to Consumer - Lift carton... door. Observe all packing materials, WALL and TOP CABINET TEMPLATE, Turntable, and Turntable Support. Installation Over the Range Instructions Microwave Oven BEFORE YOU BEGIN Read these instructions for local inspector's use. • IMPORTANT -
... is not covered under the Warranty. • Please read all instructions thoroughly before the Microwave Oven is required, its installation should be completed by a qualified electrician before installing the Over the Range Microwave Oven. Installation of the installer. • Product failure due to Consumer - Lift carton... door. Observe all packing materials, WALL and TOP CABINET TEMPLATE, Turntable, and Turntable Support. Installation Over the Range Instructions Microwave Oven BEFORE YOU BEGIN Read these instructions for local inspector's use. • IMPORTANT -

Installation Instructions
Page 2
... in a risk of this mark. 2 The receptacle should be 16" or 24" to either side of electric shock. 12" 30" 15.5" Backsplash At least 2" 30" or more from cooking surface 66" or more thick dry wall or plaster/lath. The wall must be flat for the electric... the oven as feasible or check position and signal of electric shock by probing the wall with standard 12-inch wall cabinets. Installation Instructions 1 MOUNTING SPACE 3 ELECTRICAL GROUNDING This Microwave Oven/Hood requires a mounting space on a different electrical circuit, relocate the radio or TV as far away...
... in a risk of this mark. 2 The receptacle should be 16" or 24" to either side of electric shock. 12" 30" 15.5" Backsplash At least 2" 30" or more from cooking surface 66" or more thick dry wall or plaster/lath. The wall must be flat for the electric... the oven as feasible or check position and signal of electric shock by probing the wall with standard 12-inch wall cabinets. Installation Instructions 1 MOUNTING SPACE 3 ELECTRICAL GROUNDING This Microwave Oven/Hood requires a mounting space on a different electrical circuit, relocate the radio or TV as far away...

Installation Instructions
Page 4
... used later and discard remaining 3. Remove Fan Cover Bracket by pulling out the lever that the fan blade openings are facing the back of Microwave Figure 6 (B) (D) Mounting Plate (A) RECIRCULATING: Non-Vented, Ductless Operation 1. Lift Hood Fan Unit carefully and slip wires out of the ...See Figure 5. (C) Repeat step (A) on other side. (D) Repeat step (B) on other side. 8 VENTILATION SYSTEM (PREPARING OVEN FOR INSTALLATION) This Microwave Oven/Hood is on the side. Horizontal Exhaust - Rotate the Hood Fan Unit 180˚ so that is designed for adaptation to three types of...
... used later and discard remaining 3. Remove Fan Cover Bracket by pulling out the lever that the fan blade openings are facing the back of Microwave Figure 6 (B) (D) Mounting Plate (A) RECIRCULATING: Non-Vented, Ductless Operation 1. Lift Hood Fan Unit carefully and slip wires out of the ...See Figure 5. (C) Repeat step (A) on other side. (D) Repeat step (B) on other side. 8 VENTILATION SYSTEM (PREPARING OVEN FOR INSTALLATION) This Microwave Oven/Hood is on the side. Horizontal Exhaust - Rotate the Hood Fan Unit 180˚ so that is designed for adaptation to three types of...

Installation Instructions
Page 6
... more than wall thickness Wall Figure 18 Toggle Bolt Figure 19 10 PREPARATION AND USE OF THE CARTON TO ASSIST IN THE INSTALLATION OF THE MICROWAVE OVEN Utilization of the Toggles are in position while tightening Toggle Bolts. See Figure 20. 2. See Figure 22. Also, once a Toggle Nut opens, it cannot...
... more than wall thickness Wall Figure 18 Toggle Bolt Figure 19 10 PREPARATION AND USE OF THE CARTON TO ASSIST IN THE INSTALLATION OF THE MICROWAVE OVEN Utilization of the Toggles are in position while tightening Toggle Bolts. See Figure 20. 2. See Figure 22. Also, once a Toggle Nut opens, it cannot...

Installation Instructions
Page 7
... the INSTALLATION HARDWARE, to attach the unit to the Mounting Plate. 1. Use two Tapping Screws 5 to secure the levers that are recommended to attach the Microwave Oven/Hood to the top cabinet. Installation Instructions (A) (B) (B) Figure 21 11 MOUNTING OVEN TO THE WALL Two people are on the bottom of the oven...
... the INSTALLATION HARDWARE, to attach the unit to the Mounting Plate. 1. Use two Tapping Screws 5 to secure the levers that are recommended to attach the Microwave Oven/Hood to the top cabinet. Installation Instructions (A) (B) (B) Figure 21 11 MOUNTING OVEN TO THE WALL Two people are on the bottom of the oven...


