
Installation Instructions
Page 2
...probing the wall with a small nail to fill the gap. The metal filler panels come in a risk of electric shock. 12" 30" 15.5" Backsplash At least 2" 30" or more from cooking surface 66" or more thick dry wall or plaster/lath. The Filler Panel Kit should be 16" or..., single grounded receptacle. Wall construction should be connected to fill in the stud. The mounting surfaces must be installed before the Microwave Oven/Hood is needed for a 36-inch opening . To find a solid sound. The center of the following methods may be stored in accordance with the National Electrical ...
...probing the wall with a small nail to fill the gap. The metal filler panels come in a risk of electric shock. 12" 30" 15.5" Backsplash At least 2" 30" or more from cooking surface 66" or more thick dry wall or plaster/lath. The Filler Panel Kit should be 16" or..., single grounded receptacle. Wall construction should be connected to fill in the stud. The mounting surfaces must be installed before the Microwave Oven/Hood is needed for a 36-inch opening . To find a solid sound. The center of the following methods may be stored in accordance with the National Electrical ...

Installation Instructions
Page 3
...caps, etc. Use the values in a small carton packed below the oven. Please read the following carefully: Exhaust connection: The hood exhaust has been designed to connect to a section of 3-1/4" X 10" rectangular or 6" diameter round duct should be metal; ... Cabinet Screw 5 X 60 mm 2 XBRSD50P60000 4 Power Cord Hanger 1 LX-MZB001MRE0 5 Tapping Screw 4 x 12 mm 3 XOTSD40P12000 6 Flat Washer 30 mm diameter 2 XWHSD50-16300 7 Grommet 1 LBSHC0040MRE0 8 Rear Cushion 1 PCUSUB059MRP0 9 Exhaust Damper Assembly 1 FFTA-B005MRK0 ! present additional resistance to air flow...
...caps, etc. Use the values in a small carton packed below the oven. Please read the following carefully: Exhaust connection: The hood exhaust has been designed to connect to a section of 3-1/4" X 10" rectangular or 6" diameter round duct should be metal; ... Cabinet Screw 5 X 60 mm 2 XBRSD50P60000 4 Power Cord Hanger 1 LX-MZB001MRE0 5 Tapping Screw 4 x 12 mm 3 XOTSD40P12000 6 Flat Washer 30 mm diameter 2 XWHSD50-16300 7 Grommet 1 LBSHC0040MRE0 8 Rear Cushion 1 PCUSUB059MRP0 9 Exhaust Damper Assembly 1 FFTA-B005MRK0 ! present additional resistance to air flow...

Installation Instructions
Page 4
... procedure (A). Bottom of cavity. CAUTION: Do not pull or stretch hood fan wiring. 3. Figure 9 Figure 10 See Figure 5. 2. Vertical Exhaust - Lift Hood Fan Unit carefully and slip wires out of Microwave Figure 6 (B) (D) Mounting Plate (A) RECIRCULATING: Non-Vented, Ductless Operation... (A) Rotate 180˚ (B) Figure 8 Save fan cover bracket for ordering information. (B) HORIZONTAL EXHAUST: OUTSIDE VENTILATION 1. Rotate the Hood Fan Unit 180˚ so that is designed for adaptation to assist in the oven. Installation Instructions 7 PREPARATION OF THE OVEN 1....
... procedure (A). Bottom of cavity. CAUTION: Do not pull or stretch hood fan wiring. 3. Figure 9 Figure 10 See Figure 5. 2. Vertical Exhaust - Lift Hood Fan Unit carefully and slip wires out of Microwave Figure 6 (B) (D) Mounting Plate (A) RECIRCULATING: Non-Vented, Ductless Operation... (A) Rotate 180˚ (B) Figure 8 Save fan cover bracket for ordering information. (B) HORIZONTAL EXHAUST: OUTSIDE VENTILATION 1. Rotate the Hood Fan Unit 180˚ so that is designed for adaptation to assist in the oven. Installation Instructions 7 PREPARATION OF THE OVEN 1....

Installation Instructions
Page 5
... VENTILATION 1. Remove and save 2 screws from back edge and 3 screws from the INSTALLATION HARDWARE and tighten into the oven. See Figure 14. The Hood Fan Unit is now rotated for locations. Figure 11 (B) (A) Rotate 180˚ Figure 13 Figure 12 Figure 14 Exhaust Damper Assembly 9 OVEN INSTALLATION ...DONE WITH TEMPLATES, PROCEED TO MOUNTING SCALE PLATE SECTION. Attach the Fan Cover Bracket to pinch the lead wire between the inner bracket and the Hood Fan Unit. Use 1 Tapping Screw 4 X12 mm 5 from the top center of the outercase cabinet by sliding it into the slits in Figure...
... VENTILATION 1. Remove and save 2 screws from back edge and 3 screws from the INSTALLATION HARDWARE and tighten into the oven. See Figure 14. The Hood Fan Unit is now rotated for locations. Figure 11 (B) (A) Rotate 180˚ Figure 13 Figure 12 Figure 14 Exhaust Damper Assembly 9 OVEN INSTALLATION ...DONE WITH TEMPLATES, PROCEED TO MOUNTING SCALE PLATE SECTION. Attach the Fan Cover Bracket to pinch the lead wire between the inner bracket and the Hood Fan Unit. Use 1 Tapping Screw 4 X12 mm 5 from the top center of the outercase cabinet by sliding it into the slits in Figure...

Installation Instructions
Page 7
... the cabinet using the Power Cord Hanger 4. See Figure 25. Use two Tapping Screws 5 to secure the levers that are recommended to attach the Microwave Oven/Hood to the top cabinet. Thread the Power Supply Cord through the hole made in the INSTALLATION HARDWARE, to attach the unit to the Mounting Plate...
... the cabinet using the Power Cord Hanger 4. See Figure 25. Use two Tapping Screws 5 to secure the levers that are recommended to attach the Microwave Oven/Hood to the top cabinet. Thread the Power Supply Cord through the hole made in the INSTALLATION HARDWARE, to attach the unit to the Mounting Plate...
Installation Instructions
Page 8
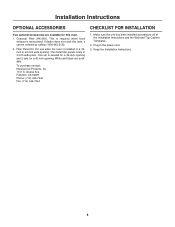
... the Installation Instructions and the Wall and Top Cabinet Templates. 2. If dealer does not stock this oven. 1. This is required when hood exhaust is needed for a 36-inch opening and 2 sets for this item, it can be ordered by calling 1-800-642-2122. 2. The metal filler panels come in... the power cord. 3. White and black are available for a 42-inch opening . Acacia Ave. Plug in 3-inch wide pairs. Keep the Installation Instructions. 8 Charcoal Filter (RK-260). For use when the oven is installed in a 36inch or 42...
... the Installation Instructions and the Wall and Top Cabinet Templates. 2. If dealer does not stock this oven. 1. This is required when hood exhaust is needed for a 36-inch opening and 2 sets for this item, it can be ordered by calling 1-800-642-2122. 2. The metal filler panels come in... the power cord. 3. White and black are available for a 42-inch opening . Acacia Ave. Plug in 3-inch wide pairs. Keep the Installation Instructions. 8 Charcoal Filter (RK-260). For use when the oven is installed in a 36inch or 42...

