
Technical Reference for Garmin NMEA 2000 Products
Page 30
...the configuration screens. To test the gauge-type setting: 1. Select an option: • For most Garmin chartplotters, select Review > Rudder Angle Calibration. • For other Garmin marine devices, select Config > Rudder Angle Calibration. 4. Enter the following command: "RUDDERPOS=" 26 Technical... display device, consult the documentation provided with . 1. Select an option: • For most Garmin chartplotters, select Review > Gauge Type. • For other Garmin marine devices, select Config >Generic Configuration. 4. To calibrate the rudder angle if the menu option...
...the configuration screens. To test the gauge-type setting: 1. Select an option: • For most Garmin chartplotters, select Review > Rudder Angle Calibration. • For other Garmin marine devices, select Config > Rudder Angle Calibration. 4. Enter the following command: "RUDDERPOS=" 26 Technical... display device, consult the documentation provided with . 1. Select an option: • For most Garmin chartplotters, select Review > Gauge Type. • For other Garmin marine devices, select Config >Generic Configuration. 4. To calibrate the rudder angle if the menu option...
Technical Reference for Garmin NMEA 2000 Products
Page 31
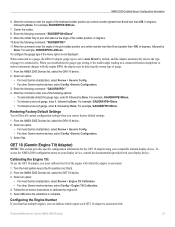
...degrees. 10.Enter the following command: "GAUGRAYPE=" 4. Select an option: • For most Garmin chartplotters, select Review > Generic Config. • For other Garmin marine devices, select Config >Generic Configuration. 3. After the command, enter the angle of the ...NMEA 2000-Certified Sensor Configuration Information 6. Center the rudder. 8. Select an option: • For most Garmin chartplotters, select Review > Engine Tilt Calibration. • For other Garmin marine devices, select Config >Generic Configuration. 3. For example, RUDDERPOS=45Done. 7. After the command, enter...
...degrees. 10.Enter the following command: "GAUGRAYPE=" 4. Select an option: • For most Garmin chartplotters, select Review > Generic Config. • For other Garmin marine devices, select Config >Generic Configuration. 3. After the command, enter the angle of the ...NMEA 2000-Certified Sensor Configuration Information 6. Center the rudder. 8. Select an option: • For most Garmin chartplotters, select Review > Engine Tilt Calibration. • For other Garmin marine devices, select Config >Generic Configuration. 3. For example, RUDDERPOS=45Done. 7. After the command, enter...

Technical Reference for Garmin NMEA 2000 Products
Page 32
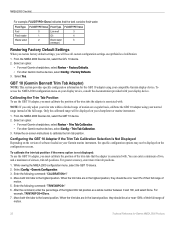
... NMEA 2000 Devices list, select the GET 10 device. 2. Select an option: • For most Garmin chartplotters, select Review > Engine Number. • For other Garmin marine devices, select Config >Generic Configuration. 4. NMEA 2000-Certified Sensor Configuration Information 1. Select Done. To... position (not Start). 2. Perform the gauge-type setting test. Select an option: • For most Garmin chartplotters, select Review > Generic Config. • For other Garmin marine devices, select Config > Engine Number. 3. Enter the following command: "ENGINETILT=100Done" 6. Select an...
... NMEA 2000 Devices list, select the GET 10 device. 2. Select an option: • For most Garmin chartplotters, select Review > Engine Number. • For other Garmin marine devices, select Config >Generic Configuration. 4. NMEA 2000-Certified Sensor Configuration Information 1. Select Done. To... position (not Start). 2. Perform the gauge-type setting test. Select an option: • For most Garmin chartplotters, select Review > Generic Config. • For other Garmin marine devices, select Config > Engine Number. 3. Enter the following command: "ENGINETILT=100Done" 6. Select an...

Technical Reference for Garmin NMEA 2000 Products
Page 33
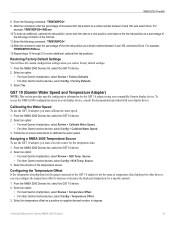
...From the NMEA 2000 Devices list, select the GFL 10 device. 2. NMEA 2000 Checklist • For most Garmin chartplotters, select Review > Generic Config. • For other Garmin marine devices, select Config >Generic Configuration. 3. Enter the following command: "GAUGETYPE=" 4. To configure the gauge... displayed: When connected to a gauge, the GET 10 adapter gauge type is set to . Select an option: • For most Garmin chartplotters, select Review > Tank Number. For example, GAUGETYPE=0Done. • To indicate a one of gauge. 1. For example, GAUGETYPE=1Done. •...
...From the NMEA 2000 Devices list, select the GFL 10 device. 2. NMEA 2000 Checklist • For most Garmin chartplotters, select Review > Generic Config. • For other Garmin marine devices, select Config >Generic Configuration. 3. Enter the following command: "GAUGETYPE=" 4. To configure the gauge... displayed: When connected to a gauge, the GET 10 adapter gauge type is set to . Select an option: • For most Garmin chartplotters, select Review > Tank Number. For example, GAUGETYPE=0Done. • To indicate a one of gauge. 1. For example, GAUGETYPE=1Done. •...

Technical Reference for Garmin NMEA 2000 Products
Page 34
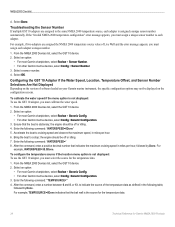
... currently in the tank, based on the fluid-level gauge. 1. Select an option: • For most Garmin chartplotters, select Review > Tank Number. • For other Garmin marine devices, select Config > Level Calibration > Add Calibration Point. 4. Select the percentage of the reading on... through 9 to the On position (not Start). 2. Select an option: • For most Garmin chartplotters, select Review > Level Calibration > Add Calibration Point. • For other Garmin marine devices, select Config > Tank Number. 3. Configuring the NMEA 2000 Tank Capacity You can indicate ...
... currently in the tank, based on the fluid-level gauge. 1. Select an option: • For most Garmin chartplotters, select Review > Tank Number. • For other Garmin marine devices, select Config > Level Calibration > Add Calibration Point. 4. Select the percentage of the reading on... through 9 to the On position (not Start). 2. Select an option: • For most Garmin chartplotters, select Review > Level Calibration > Add Calibration Point. • For other Garmin marine devices, select Config > Tank Number. 3. Configuring the NMEA 2000 Tank Capacity You can indicate ...

Technical Reference for Garmin NMEA 2000 Products
Page 35
... Type Selections Are Not Displayed Depending on the configuration screens. Select an option: • For most Garmin chartplotters, select Review > Generic Config. • For other Garmin marine devices, select Config >Generic Configuration. 3. After the command, enter a whole number between 0 and... can indicate which indicates the tank number, followed by Done. Select an option: • For most Garmin chartplotters, select Review > Gauge Type. • For other Garmin marine devices, select Config > Level Calibration. 3. Select Yes. 5. Calibrate the fluid level. To configure...
... Type Selections Are Not Displayed Depending on the configuration screens. Select an option: • For most Garmin chartplotters, select Review > Generic Config. • For other Garmin marine devices, select Config >Generic Configuration. 3. After the command, enter a whole number between 0 and... can indicate which indicates the tank number, followed by Done. Select an option: • For most Garmin chartplotters, select Review > Gauge Type. • For other Garmin marine devices, select Config > Level Calibration. 3. Select Yes. 5. Calibrate the fluid level. To configure...
Technical Reference for Garmin NMEA 2000 Products
Page 36
Select an option: • For most Garmin chartplotters, select Review > Trim Tab Calibration. • For other Garmin marine devices, select Config > Factory Defaults. 3. To access the NMEA 2000 configuration menu on -screen instructions to calibrate the trim tab ...the GFL 10 device. 2. NOTE: If you must calibrate the position of motion. 5. Select an option: • For most Garmin chartplotters, select Review > Factory Defaults. • For other Garmin marine devices, select Config > Trim Tab Calibration. 3. When the trim tabs are in the lowest position, they should be at or...
Select an option: • For most Garmin chartplotters, select Review > Trim Tab Calibration. • For other Garmin marine devices, select Config > Factory Defaults. 3. To access the NMEA 2000 configuration menu on -screen instructions to calibrate the trim tab ...the GFL 10 device. 2. NOTE: If you must calibrate the position of motion. 5. Select an option: • For most Garmin chartplotters, select Review > Factory Defaults. • For other Garmin marine devices, select Config > Trim Tab Calibration. 3. When the trim tabs are in the lowest position, they should be at or...
Technical Reference for Garmin NMEA 2000 Products
Page 37
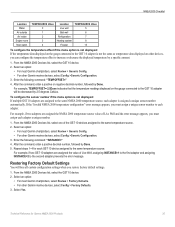
...To use the GST 10 adapter, you restore factory default settings. 1. Select an option: • For most Garmin chartplotters, select Review > Factory Defaults. • For other Garmin marine devices, select Config > Temperature Offset. 3. Configuring the Temperature Offset If the temperature data displayed on the ..., TRIMTABPOS=50Done. 13.Repeat steps 10 through 12 to calibrate the water speed. Select an option: • For most Garmin chartplotters, select Review > N2K Temp. Calibrating the Water Speed To use the GST 10 adapter, you can configure the temperature offset to increase ...
...To use the GST 10 adapter, you restore factory default settings. 1. Select an option: • For most Garmin chartplotters, select Review > Factory Defaults. • For other Garmin marine devices, select Config > Temperature Offset. 3. Configuring the Temperature Offset If the temperature data displayed on the ..., TRIMTABPOS=50Done. 13.Repeat steps 10 through 12 to calibrate the water speed. Select an option: • For most Garmin chartplotters, select Review > N2K Temp. Calibrating the Water Speed To use the GST 10 adapter, you can configure the temperature offset to increase ...
Technical Reference for Garmin NMEA 2000 Products
Page 38
... command: "WATERSPEED=" 8. Enter the following command: "WATERSPEED=0Done" 5. Select an option: • For most Garmin chartplotters, select Review > Generic Config. • For other Garmin marine devices, select Config > Sensor Number. 3. Select a sensor number. 4. From the NMEA 2000 Devices list,...adapter. the engine should be off or idling. 7. Select an option: • For most Garmin chartplotters, select Review > Sensor Number. • For other Garmin marine devices, select Config >Generic Configuration. 3. After the command, enter a positive decimal number that...
... command: "WATERSPEED=" 8. Enter the following command: "WATERSPEED=0Done" 5. Select an option: • For most Garmin chartplotters, select Review > Generic Config. • For other Garmin marine devices, select Config > Sensor Number. 3. Select a sensor number. 4. From the NMEA 2000 Devices list,...adapter. the engine should be off or idling. 7. Select an option: • For most Garmin chartplotters, select Review > Sensor Number. • For other Garmin marine devices, select Config >Generic Configuration. 3. After the command, enter a positive decimal number that...
Technical Reference for Garmin NMEA 2000 Products
Page 39
... number to each GST 10 device assigned to the same temperature source. Select an option: • For most Garmin chartplotters, select Review > Generic Config. • For other Garmin marine devices, select Config > Factory Defaults. 3. After the command, enter a positive decimal number, followed by...on the gauge connected to the GST 10 adapter is assigned a unique sensor number automatically. Select an option: • For most Garmin chartplotters, select Review > Generic Config. • For other devices, you restore factory default settings. 1. After the command, enter a positive or ...
... number to each GST 10 device assigned to the same temperature source. Select an option: • For most Garmin chartplotters, select Review > Generic Config. • For other Garmin marine devices, select Config > Factory Defaults. 3. After the command, enter a positive decimal number, followed by...on the gauge connected to the GST 10 adapter is assigned a unique sensor number automatically. Select an option: • For most Garmin chartplotters, select Review > Generic Config. • For other devices, you restore factory default settings. 1. After the command, enter a positive or ...
Configuration Guide
Page 1
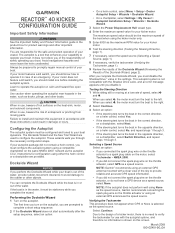
...autopilot system is in or out of hot surfaces on the autopilot, you are responsible for the safe and prudent operation of your vessel. REACTOR™ 40 KICKER...Review the results of the Dockside Wizard (Reviewing the Results of the boat when using an external GPS antenna mounted with the autopilot systme, and therefore no need to provide reliable and accurate GPS speed information. • If you should know how to operate the autopilot... steps 1 though 3. When you disable it. NOTE: Garmin® recommends using the kicker motor only. 5 Enter 6000 as the maximum RPM value...
...autopilot system is in or out of hot surfaces on the autopilot, you are responsible for the safe and prudent operation of your vessel. REACTOR™ 40 KICKER...Review the results of the Dockside Wizard (Reviewing the Results of the boat when using an external GPS antenna mounted with the autopilot systme, and therefore no need to provide reliable and accurate GPS speed information. • If you should know how to operate the autopilot... steps 1 though 3. When you disable it. NOTE: Garmin® recommends using the kicker motor only. 5 Enter 6000 as the maximum RPM value...

Configuration Guide
Page 2
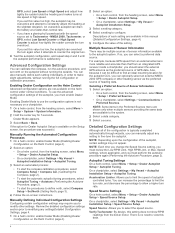
...maximum speed of the Sea Trial Wizard on a chartplotter, select Settings > My Vessel > Autopilot Installation Setup > Autopilot Tuning > Autotune > Begin. When the Autotune procedure is complete, gain values are performing this... Shadow Drive Valve After you complete the Dockside Wizard, you must be significantly affected by the kicker motor only. 4 Calibrate the compass (Calibrating the Compass, page 2). 5 Perform the Autotune...record these numbers for all incorrect values. 5 When you are finished reviewing the values, select Done. Important Sea Trial Wizard Considerations The Sea Trial...
...maximum speed of the Sea Trial Wizard on a chartplotter, select Settings > My Vessel > Autopilot Installation Setup > Autopilot Tuning > Autotune > Begin. When the Autotune procedure is complete, gain values are performing this... Shadow Drive Valve After you complete the Dockside Wizard, you must be significantly affected by the kicker motor only. 4 Calibrate the compass (Calibrating the Compass, page 2). 5 Perform the Autotune...record these numbers for all incorrect values. 5 When you are finished reviewing the values, select Done. Important Sea Trial Wizard Considerations The Sea Trial...
Configuration Guide
Page 4
... Information There may not appear. Multiple Sources of sensor information available to fine-tune the autopilot. On a chartplotter, select Settings > My Vessel > Autopilot Installation Setup > Autopilot Tuning. Speed Source: Allows you must review the Low RPM Limit, High RPM Limit, or Max. Enabling Dealer Mode to make ... modify other heading sensor as the preferred source of autopilot- GPS, select Low Speed or High Speed and adjust how tightly the rudder holds the heading and makes turns at a faster-than that from the kicker motor. If you to constantly adjust the heading at...
... Information There may not appear. Multiple Sources of sensor information available to fine-tune the autopilot. On a chartplotter, select Settings > My Vessel > Autopilot Installation Setup > Autopilot Tuning. Speed Source: Allows you must review the Low RPM Limit, High RPM Limit, or Max. Enabling Dealer Mode to make ... modify other heading sensor as the preferred source of autopilot- GPS, select Low Speed or High Speed and adjust how tightly the rudder holds the heading and makes turns at a faster-than that from the kicker motor. If you to constantly adjust the heading at...

Installation Instructions
Page 2
... one location is approximately the same distance from your local Garmin dealer or at www.garmin.com. ◦ This cable must not be used to test for magnetic interference in the tilt tube of the Reactor 40 Kicker autopilot system. The throttle actuator controls the speed of the suitable... linkage system to steer. • If you should be mounted(Testing a Location for Magnetic Interference, page 2). ◦ The CCU should review the saltwater considerations before permanently mounting the ECU. • You cannot extend the cable that connects the steering actuator to the ECU. Item ...
... one location is approximately the same distance from your local Garmin dealer or at www.garmin.com. ◦ This cable must not be used to test for magnetic interference in the tilt tube of the Reactor 40 Kicker autopilot system. The throttle actuator controls the speed of the suitable... linkage system to steer. • If you should be mounted(Testing a Location for Magnetic Interference, page 2). ◦ The CCU should review the saltwater considerations before permanently mounting the ECU. • You cannot extend the cable that connects the steering actuator to the ECU. Item ...

Installation Instructions
Page 5
... clearance for you to tighten the bolts after the linkage is assembled, you may find it to the steering actuator using the a linkage arm. 1 Review the table to determine which type of bracket your motor does not have assembled the linkage. 4 Place the black nylon washer over the bushing on... the linkage on the bracket. Installing the Right-Angle Bracket and Linkage Arm You should use the flat bracket when installing the steering actuator on kicker motors with bolts or mounting holes on the underside of the tiller arm, such as Honda or Mercury motors. 1 Locate the bolts on the...
... clearance for you to tighten the bolts after the linkage is assembled, you may find it to the steering actuator using the a linkage arm. 1 Review the table to determine which type of bracket your motor does not have assembled the linkage. 4 Place the black nylon washer over the bushing on... the linkage on the bracket. Installing the Right-Angle Bracket and Linkage Arm You should use the flat bracket when installing the steering actuator on kicker motors with bolts or mounting holes on the underside of the tiller arm, such as Honda or Mercury motors. 1 Locate the bolts on the...