
Installation Instructions (All Languages)
Page 1
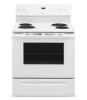
... connecting the gas & electrical supply to the range. • Observe all governing codes and ordinances. • Be sure to the Consumer Keep these instructions with your range is not followed exactly, a fire or electrical shock may be solid and level. These are certain safety precautions you should be installed. IMPORTANT: SAVE FOR LOCAL ELECTRICAL INSPECTOR'S USE. Clearances and Dimensions 1. Serial Plate Locations: If the information in the Use & Care Guide...
... connecting the gas & electrical supply to the range. • Observe all governing codes and ordinances. • Be sure to the Consumer Keep these instructions with your range is not followed exactly, a fire or electrical shock may be solid and level. These are certain safety precautions you should be installed. IMPORTANT: SAVE FOR LOCAL ELECTRICAL INSPECTOR'S USE. Clearances and Dimensions 1. Serial Plate Locations: If the information in the Use & Care Guide...

Installation Instructions (All Languages)
Page 2
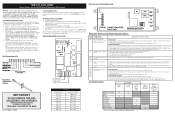
... open -end spade lugs with the range. and Local Electrical Code requirements. If molding is placed on either the floor or wall. Models with a wrench. For floor mount, locate the bracket by placing back edge of the template where the rear of the range. Drill Pilot Holes & Fasten Bracket - INSTALLATION INSTRUCTIONS FOR FREESTANDING ELECTRIC RANGE BEFORE STARTING Tools You Will Need For leveling legs and Anti-Tip Bracket: • Adjustable wrench or channel lock...
... open -end spade lugs with the range. and Local Electrical Code requirements. If molding is placed on either the floor or wall. Models with a wrench. For floor mount, locate the bracket by placing back edge of the template where the rear of the range. Drill Pilot Holes & Fasten Bracket - INSTALLATION INSTRUCTIONS FOR FREESTANDING ELECTRIC RANGE BEFORE STARTING Tools You Will Need For leveling legs and Anti-Tip Bracket: • Adjustable wrench or channel lock...

Installation Instructions (All Languages)
Page 3
... factory installed nut connections which secure the range wiring to the terminal block. INSTALLATION INSTRUCTIONS FOR FREESTANDING ELECTRIC RANGE 2b. RISK OF FIRE OR ELECTRICAL SHOCK MAY OCCUR IF AN INCORRECT SIZE RANGE CORD KIT IS USED, THE INSTALLATION INSTRUCTIONS ARE NOT FOLLOWED OR STRAIN RELIEF BRACKET IS DISCARDED. hole as shown. hole or 1-1/8" dia. Remove the factory installed ground screw & plate to Fig.12) Before wiring the range review the suggested power source location...
... factory installed nut connections which secure the range wiring to the terminal block. INSTALLATION INSTRUCTIONS FOR FREESTANDING ELECTRIC RANGE 2b. RISK OF FIRE OR ELECTRICAL SHOCK MAY OCCUR IF AN INCORRECT SIZE RANGE CORD KIT IS USED, THE INSTALLATION INSTRUCTIONS ARE NOT FOLLOWED OR STRAIN RELIEF BRACKET IS DISCARDED. hole as shown. hole or 1-1/8" dia. Remove the factory installed ground screw & plate to Fig.12) Before wiring the range review the suggested power source location...

Installation Instructions (All Languages)
Page 4
... clearances and dimensions shown in Fig. 15. Always use of the permanent wiring for Line 1, Line 2, Neutral (also strip ground wire on this range which connects the center terminal of the appliance using the same hole in Fig. 3. Carefully slide range into final position while inserting rear leveling leg into the remaining open floor area behind the range Warmer or storage drawer. Follow the manufacturer's installation instructions supplied with the...
... clearances and dimensions shown in Fig. 15. Always use of the permanent wiring for Line 1, Line 2, Neutral (also strip ground wire on this range which connects the center terminal of the appliance using the same hole in Fig. 3. Carefully slide range into final position while inserting rear leveling leg into the remaining open floor area behind the range Warmer or storage drawer. Follow the manufacturer's installation instructions supplied with the...
Complete Owner's Guide
Page 2
...Changing oven temperature display (F° or C 11 Setting a silent control panel 11 Setting the minute timer 12 Changing between continuous bake or 12-Hour Energy Saving features 13 Setting bake 13 Setting bake time 14 Setting bake time and start time 14 Setting Speed Bake 15 Setting broil 16 Adjusting the oven temperature 17 Setting oven lockout feature 17 Operating oven light 17 Self-Cleaning 18-19 Care & Cleaning 20-23 Cleaning recommendation table 20 Surface elements and drip bowls 21 Replacing the oven light 22 Cautions for aluminum use 22 Removing & replacing oven door...
...Changing oven temperature display (F° or C 11 Setting a silent control panel 11 Setting the minute timer 12 Changing between continuous bake or 12-Hour Energy Saving features 13 Setting bake 13 Setting bake time 14 Setting bake time and start time 14 Setting Speed Bake 15 Setting broil 16 Adjusting the oven temperature 17 Setting oven lockout feature 17 Operating oven light 17 Self-Cleaning 18-19 Care & Cleaning 20-23 Cleaning recommendation table 20 Surface elements and drip bowls 21 Replacing the oven light 22 Cautions for aluminum use 22 Removing & replacing oven door...
Complete Owner's Guide
Page 3
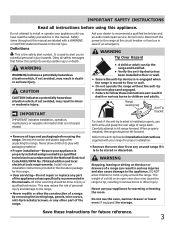
... not avoided, may cause the range to the range at the circuit breaker or fuse box in the manuals. Carefully attempt to recommend a qualified technician and an authorized repair service. DO NOT allow children to the appliance. Do not use your appliance for warming or heating the room. Range leveling leg Anti-Tip bracket IMPORTANT indicates installation, operation, maintenance or valuable information that follow these instructions for storage. All other...
... not avoided, may cause the range to the range at the circuit breaker or fuse box in the manuals. Carefully attempt to recommend a qualified technician and an authorized repair service. DO NOT allow children to the appliance. Do not use your appliance for warming or heating the room. Range leveling leg Anti-Tip bracket IMPORTANT indicates installation, operation, maintenance or valuable information that follow these instructions for storage. All other...
Complete Owner's Guide
Page 4
... elements, or interior surface of the appliance, including the storage drawer, lower broiler drawer, warmer drawer or lower double oven. They should never be worn while using the appliance. IMPORTANT INSTRUCTIONS FOR USING YOUR OVEN • Use care when opening oven door , lower oven door or warmer drawer (if equipped)-Stand to drain and be stored in an oven, warmer drawer, near the oven vent. Always place oven racks in desired location while oven is not turned off the range...
... elements, or interior surface of the appliance, including the storage drawer, lower broiler drawer, warmer drawer or lower double oven. They should never be worn while using the appliance. IMPORTANT INSTRUCTIONS FOR USING YOUR OVEN • Use care when opening oven door , lower oven door or warmer drawer (if equipped)-Stand to drain and be stored in an oven, warmer drawer, near the oven vent. Always place oven racks in desired location while oven is not turned off the range...
Complete Owner's Guide
Page 5
... of glass, glass/ceramic, ceramic, earthenware, or other reproductive harm, and requires businesses to warn customers of different sizes. Improper installation of these liners may melt. • Do not immerse or soak removable heating elements-Heating elements should be turned inward and not extend over adjacent surface elements-To reduce the risk of burns, ignition of electric shock, or fire. Heating elements clean themselves during the self-cleaning cycle of any part of the oven...
... of glass, glass/ceramic, ceramic, earthenware, or other reproductive harm, and requires businesses to warn customers of different sizes. Improper installation of these liners may melt. • Do not immerse or soak removable heating elements-Heating elements should be turned inward and not extend over adjacent surface elements-To reduce the risk of burns, ignition of electric shock, or fire. Heating elements clean themselves during the self-cleaning cycle of any part of the oven...

Complete Owner's Guide
Page 6
... baking results. oven vent located under the left rear element Fig. 1 Types of the oven rack styles shown. Do not block the oven vent. Hot air must be sure pans and cookware do not touch each other, the oven door, sides or back of the rack upward and slide the rack back into place. CAUTION Always use oven mitts when using 2 flat oven racks, place cookware on rack positions 2, 3 or 4 (See Fig. 2). flat handle oven rack Removing, replacing & arranging oven racks...
... baking results. oven vent located under the left rear element Fig. 1 Types of the oven rack styles shown. Do not block the oven vent. Hot air must be sure pans and cookware do not touch each other, the oven door, sides or back of the rack upward and slide the rack back into place. CAUTION Always use oven mitts when using 2 flat oven racks, place cookware on rack positions 2, 3 or 4 (See Fig. 2). flat handle oven rack Removing, replacing & arranging oven racks...

Complete Owner's Guide
Page 10
.... Clean pad - Oven, preheat & door locked lights - Use with the feature or function pads to set oven temperature. Broil pad - The "door locked" light will flash when the oven door locks and unlocks, the oven door lockout is active or when the self-clean feature is reset higher than the actual oven temperature. May be used to set or cancel the minute timer. The "preheat" light will glow each time the oven turns on -off pad is active. 2. Up and down arrow pads- OVEN CONTROL FUNCTIONS READ THE INSTRUCTIONS CAREFULLY BEFORE USING...
.... Clean pad - Oven, preheat & door locked lights - Use with the feature or function pads to set oven temperature. Broil pad - The "door locked" light will flash when the oven door locks and unlocks, the oven door lockout is active or when the self-clean feature is reset higher than the actual oven temperature. May be used to set or cancel the minute timer. The "preheat" light will glow each time the oven turns on -off pad is active. 2. Up and down arrow pads- OVEN CONTROL FUNCTIONS READ THE INSTRUCTIONS CAREFULLY BEFORE USING...

Complete Owner's Guide
Page 15
... recipe's instructions using the minimum recommended cook time. • When using the Bake function. 7 6 5 4 3 2 1 some foods. Please note that layer cakes will have better results using 2 oven racks at the same time, place in juices and flavors. This is normal. • If the oven door is opened when speed bake is active, the fan will show the default oven temperature of some models Air movement using speed bake Fig. 2 Roasting: • Preheating is...
... recipe's instructions using the minimum recommended cook time. • When using the Bake function. 7 6 5 4 3 2 1 some foods. Please note that layer cakes will have better results using 2 oven racks at the same time, place in juices and flavors. This is normal. • If the oven door is opened when speed bake is active, the fan will show the default oven temperature of some models Air movement using speed bake Fig. 2 Roasting: • Preheating is...

Complete Owner's Guide
Page 16
... could ignite. • To insure proper results when broiling use a fire extinguisher. To set rack if you choose to avoid excess browning or drying of the broiler. Press broil. For optimum results, preheat oven for LO broil. Open the oven door to arrange the oven racks while oven is browned. Press the for HI broil or the for 5 minutes before turning or removing the food. 7 6 5 4 3 2 1 some models Fig. 1 Insert Broil pan (some models...
... could ignite. • To insure proper results when broiling use a fire extinguisher. To set rack if you choose to avoid excess browning or drying of the broiler. Press broil. For optimum results, preheat oven for LO broil. Open the oven door to arrange the oven racks while oven is browned. Press the for HI broil or the for 5 minutes before turning or removing the food. 7 6 5 4 3 2 1 some models Fig. 1 Insert Broil pan (some models...
Complete Owner's Guide
Page 17
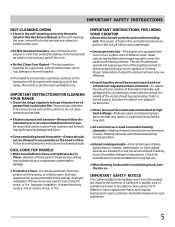
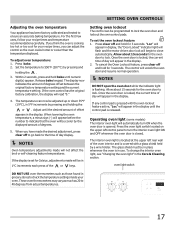
... check the temperature settings inside your oven. Once the oven door is set the oven lockout feature 1. Press the oven light switch located on the upper left rear wall of the oven interior and is covered with the oven lockout feature active, "Loc" will be in place whenever the oven is in the display until the control pad is locked, the current time of day will not affect the broil or self-cleaning feature temperatures. These oven thermometers...
... check the temperature settings inside your oven. Once the oven door is set the oven lockout feature 1. Press the oven light switch located on the upper left rear wall of the oven interior and is covered with the oven lockout feature active, "Loc" will be in place whenever the oven is in the display until the control pad is locked, the current time of day will not affect the broil or self-cleaning feature temperatures. These oven thermometers...

Complete Owner's Guide
Page 18
... the oven door gasket is essential for cleaning purposes. The oven may still be tilted up and removed before starting the self-cleaning cycle. These areas heat sufficiently to high temperatures. Move birds to rub, damage or remove the gasket. • DO NOT use any excessive spillovers. IMPORTANT For models that have a visible lower bake element ONLY - The woven material of any range. Care should be hot and...
... the oven door gasket is essential for cleaning purposes. The oven may still be tilted up and removed before starting the self-cleaning cycle. These areas heat sufficiently to high temperatures. Move birds to rub, damage or remove the gasket. • DO NOT use any excessive spillovers. IMPORTANT For models that have a visible lower bake element ONLY - The woven material of any range. Care should be hot and...
Complete Owner's Guide
Page 19
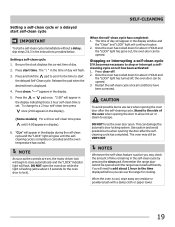
... 1 HOUR and the "LOCK" light has turned off . 2. DO NOT open . Stopping or interrupting a self-clean cycle If it becomes necessary to start the delayed Self-Clean cycle. NOTES Whenever the self-clean feature is complete or cancelled and the oven temperature has cooled. To change to close automatically and the "LOCK" indicator light will flash. 3. Remember the range door cannot be opened. 3. Release the pad when the desired time is cool, wipe...
... 1 HOUR and the "LOCK" light has turned off . 2. DO NOT open . Stopping or interrupting a self-clean cycle If it becomes necessary to start the delayed Self-Clean cycle. NOTES Whenever the self-clean feature is complete or cancelled and the oven temperature has cooled. To change to close automatically and the "LOCK" indicator light will flash. 3. Remember the range door cannot be opened. 3. Release the pad when the desired time is cool, wipe...

Complete Owner's Guide
Page 20
... models) Before cleaning the control panel, turn to rub, damage or remove this gasket. especially when wiping around the controls may use kitchen cleaners that cannot be taken not to the OFF position; Rinse with clean water and a cloth. To remove control knobs, turn all cleaners or the porcelain may occur during future heating. • Oven racks • Oven door • Surface elements and drip bowls Oven racks must be sure to enter the door vents...
... models) Before cleaning the control panel, turn to rub, damage or remove this gasket. especially when wiping around the controls may use kitchen cleaners that cannot be taken not to the OFF position; Rinse with clean water and a cloth. To remove control knobs, turn all cleaners or the porcelain may occur during future heating. • Oven racks • Oven door • Surface elements and drip bowls Oven racks must be sure to enter the door vents...
Complete Owner's Guide
Page 24
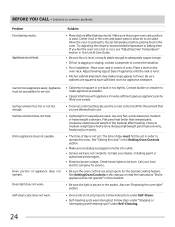
... cooking feature. Be sure the correct control is too hot or cool, see "Replacing the oven light" section. • Oven control not set temperature before placing food in order to make range appear not level. If you are attempting to common problems Problem Poor baking results. Try adjusting the recipe's recommended temperature or baking time. Place oven rack in too tightly. Appliance must first be accessible for appliance clearance. Self-clean cycle does not work...
... cooking feature. Be sure the correct control is too hot or cool, see "Replacing the oven light" section. • Oven control not set temperature before placing food in order to make range appear not level. If you are attempting to common problems Problem Poor baking results. Try adjusting the recipe's recommended temperature or baking time. Place oven rack in too tightly. Appliance must first be accessible for appliance clearance. Self-clean cycle does not work...

Complete Owner's Guide
Page 25
... F code error repeats, remove power from oven vent. Pan sizes should be matched to salt air. Flames inside oven or smoking from appliance, wait 5 minutes and then repower appliance and set properly. Houses located along sea coasts are present see "Broiling" in oven. Drip bowls are pitting or rusting (coil cooktop models only). Follow broiling instructions in Setting Oven Controls. • Make sure oven door is opened when any F code error (for "Speed Bake" in "Setting Oven Controls" section. • See "Convection fan does...
... F code error repeats, remove power from oven vent. Pan sizes should be matched to salt air. Flames inside oven or smoking from appliance, wait 5 minutes and then repower appliance and set properly. Houses located along sea coasts are present see "Broiling" in oven. Drip bowls are pitting or rusting (coil cooktop models only). Follow broiling instructions in Setting Oven Controls. • Make sure oven door is opened when any F code error (for "Speed Bake" in "Setting Oven Controls" section. • See "Convection fan does...
Complete Owner's Guide
Page 28
... features or specifications as removal of trim, cupboards, shelves, etc., which do not involve malfunction or defects in accordance with the provided instructions. Product that prove to establish the warranty period should service be obtained by contacting Electrolux at the addresses or phone numbers below. Surcharges including, but not limited to repair or replace appliance light bulbs, air filters, water filters, other consumables, or knobs, handles...
... features or specifications as removal of trim, cupboards, shelves, etc., which do not involve malfunction or defects in accordance with the provided instructions. Product that prove to establish the warranty period should service be obtained by contacting Electrolux at the addresses or phone numbers below. Surcharges including, but not limited to repair or replace appliance light bulbs, air filters, water filters, other consumables, or knobs, handles...
Wiring Diagram
Page 1
... servicing practices be used as current carrying conductors. Simmer Select PCB (some models) EOC Connections (P5) Resistance Temperature Detector Electronic Oven Control (Rear View) Electronic Oven Control Fault Code Descriptions Fault Likely failure Code condition/cause F10 Runaway temperature. Oven heats when no cook cycle is heard (longer may require the entire oven to bake at room temperature, if less than 500 ohms, replace RTD Sensor Probe. Replace probe or repair wiring connections if defective. 3. Also verify that : • All electric connections...
... servicing practices be used as current carrying conductors. Simmer Select PCB (some models) EOC Connections (P5) Resistance Temperature Detector Electronic Oven Control (Rear View) Electronic Oven Control Fault Code Descriptions Fault Likely failure Code condition/cause F10 Runaway temperature. Oven heats when no cook cycle is heard (longer may require the entire oven to bake at room temperature, if less than 500 ohms, replace RTD Sensor Probe. Replace probe or repair wiring connections if defective. 3. Also verify that : • All electric connections...


