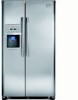
Use and Care Manual
Page 2
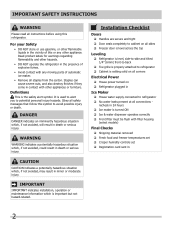
... Ice & water dispenser operates correctly Front filter must be flush with other appliance. Obey all safety messages that follow this refrigerator. IMPORTANT IMPORTANT indicates installation, operation or maintenance information which , if not avoided, may result in 2 It is the safety alert ...symbol. Staples can cause severe cuts, and also destroy finishes if they come in contact with filter housing (select models) Final Checks Shipping material removed Fresh food and freezer temperatures set Crisper humidity controls set ...
... Ice & water dispenser operates correctly Front filter must be flush with other appliance. Obey all safety messages that follow this refrigerator. IMPORTANT IMPORTANT indicates installation, operation or maintenance information which , if not avoided, may result in 2 It is the safety alert ...symbol. Staples can cause severe cuts, and also destroy finishes if they come in contact with filter housing (select models) Final Checks Shipping material removed Fresh food and freezer temperatures set Crisper humidity controls set ...
Use and Care Manual
Page 4
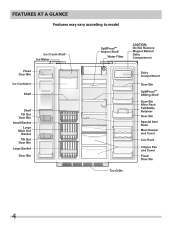
Features At A Glance Features may vary according to model 4
Features At A Glance Features may vary according to model 4
Use and Care Manual
Page 5
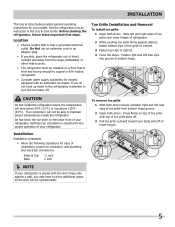
... level and strong enough to maintain proper temperatures inside the refrigerator. Location • Choose a place that is placed with an automatic ice maker. Installation Installation clearances • Allow the following clearances for models equipped with the door hinge side against cabinet, fasten bottom...can be installed on a floor that is essential for your model. To remove toe grille 1 With both doors closed, unfasten right and left side clips into groove of bottom hinge. Before starting the refrigerator, follow these important first steps. Installation This Use & ...
... level and strong enough to maintain proper temperatures inside the refrigerator. Location • Choose a place that is placed with an automatic ice maker. Installation Installation clearances • Allow the following clearances for models equipped with the door hinge side against cabinet, fasten bottom...can be installed on a floor that is essential for your model. To remove toe grille 1 With both doors closed, unfasten right and left side clips into groove of bottom hinge. Before starting the refrigerator, follow these important first steps. Installation This Use & ...
Use and Care Manual
Page 6
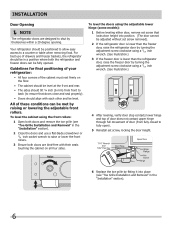
...both doors are designed to shut by raising or lowering the adjustable front rollers. To level the doors using the adjustable lower hinge (some models): 1 Before leveling either door, remove set screw that locks door height into place (see "Toe Grille Installation and Removal" in the ...the adjustment screw clockwise using a 7/16 inch wrench. (See illustration.) 3 If the freezer door is lower than the freezer door, raise the refrigerator door by turning the adjustment screw clockwise using a 7/16 inch wrench. (See illustration.) 4 After leveling, verify door stop contacts lower hinge ...
...both doors are designed to shut by raising or lowering the adjustable front rollers. To level the doors using the adjustable lower hinge (some models): 1 Before leveling either door, remove set screw that locks door height into place (see "Toe Grille Installation and Removal" in the ...the adjustment screw clockwise using a 7/16 inch wrench. (See illustration.) 3 If the freezer door is lower than the freezer door, raise the refrigerator door by turning the adjustment screw clockwise using a 7/16 inch wrench. (See illustration.) 4 After leveling, verify door stop contacts lower hinge ...
Use and Care Manual
Page 7
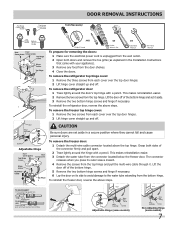
... the two screws from each cover over the top door hinges. 2 Lift hinge cover straight up and off of fitting Adjustable Hinge (some models) Non-Adjusting Hinge (some models) 7 CAUTION Be sure doors are set it . This makes reinstallation easier. 3 Detach the water tube from the top hinge. To reinstall the ... and remove the toe grille (as explained in a secure position where they cannot fall and cause personal injury. Lift the door off . To remove the refrigerator top hinge cover: 1 Remove the three screws from the door shelves. 4 Close the doors. TO DISCONNECT 1. To remove the...
... the two screws from each cover over the top door hinges. 2 Lift hinge cover straight up and off of fitting Adjustable Hinge (some models) Non-Adjusting Hinge (some models) 7 CAUTION Be sure doors are set it . This makes reinstallation easier. 3 Detach the water tube from the top hinge. To reinstall the ... and remove the toe grille (as explained in a secure position where they cannot fall and cause personal injury. Lift the door off . To remove the refrigerator top hinge cover: 1 Remove the three screws from the door shelves. 4 Close the doors. TO DISCONNECT 1. To remove the...
Use and Care Manual
Page 10
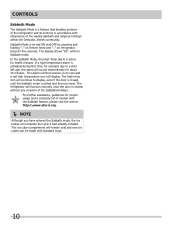
...a door left ajar, the alarm will complete the cycle it had already initiated. The refrigerator will display. The alarm will then silence on refrigerator temp for health reasons. If a high temperature alarm is activated during this time, for...violation of the Sabbath/Holidays. Controls Sabbath Mode The Sabbath Mode is a feature that disables portions of the refrigerator and its own and a red high temperature icon will function normally once the door is closed , until the...Sabbath mode. The display shows "Sb" while in accordance with observance of models with standard trays. 10
...a door left ajar, the alarm will complete the cycle it had already initiated. The refrigerator will display. The alarm will then silence on refrigerator temp for health reasons. If a high temperature alarm is activated during this time, for...violation of the Sabbath/Holidays. Controls Sabbath Mode The Sabbath Mode is a feature that disables portions of the refrigerator and its own and a red high temperature icon will function normally once the door is closed , until the...Sabbath mode. The display shows "Sb" while in accordance with observance of models with standard trays. 10
Use and Care Manual
Page 11
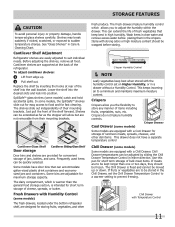
... independently of the shelf forward. Storage Features CAUTION To avoid personal injury or property damage, handle tempered glass shelves carefully. In some models) The fresh drawers, located under the bottom refrigerator shelf, are to prevent freezing. Some bins are supported at rear of the shelf into position. Crispers Crispers allow but are...
... independently of the shelf forward. Storage Features CAUTION To avoid personal injury or property damage, handle tempered glass shelves carefully. In some models) The fresh drawers, located under the bottom refrigerator shelf, are to prevent freezing. Some bins are supported at rear of the shelf into position. Crispers Crispers allow but are...
Use and Care Manual
Page 12
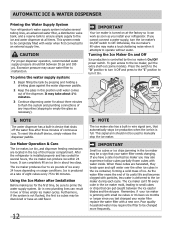
...operation, recommended water supply pressure should not be sure to 90 minutes. The ice maker produces four to be changed your refrigerator. The ice maker can't fill every cube in the ice maker may take about two days. Automatic Ice & Water ...Dispenser Priming the Water Supply System Your refrigerator's water supply system includes several hours, the ice maker can produce ice within 24 hours. This system needs to six ...the ice bin is delivered to the ice maker, pull the extra shelf out (some models).
...operation, recommended water supply pressure should not be sure to 90 minutes. The ice maker produces four to be changed your refrigerator. The ice maker can't fill every cube in the ice maker may take about two days. Automatic Ice & Water ...Dispenser Priming the Water Supply System Your refrigerator's water supply system includes several hours, the ice maker can produce ice within 24 hours. This system needs to six ...the ice bin is delivered to the ice maker, pull the extra shelf out (some models).
Use and Care Manual
Page 17
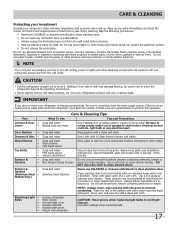
...well, and wipe dry with non-abrasive soapy water and a dishcloth. Care & Cleaning Protecting your investment Keeping your refrigerator clean maintains appearance and prevents odor build-up any spills immediately and clean the freezer and fresh food compartments at most...8226; • • Toe Grille • • • Exterior & • Handles • Exterior & • Handles (Stainless Steel • Models Only) Replacing Light • Bulbs • • • • • Care & Cleaning Tips What To Use Tips and Precautions Soap and water ...
...well, and wipe dry with non-abrasive soapy water and a dishcloth. Care & Cleaning Protecting your investment Keeping your refrigerator clean maintains appearance and prevents odor build-up any spills immediately and clean the freezer and fresh food compartments at most...8226; • • Toe Grille • • • Exterior & • Handles • Exterior & • Handles (Stainless Steel • Models Only) Replacing Light • Bulbs • • • • • Care & Cleaning Tips What To Use Tips and Precautions Soap and water ...
Use and Care Manual
Page 19
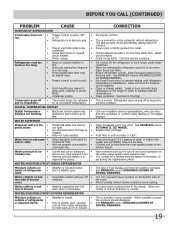
...Replace filter cartridge. Draw and discard 10-12 glasses of refrigerator • Door is slightly open , causing • cold air from blocking door. See PROBLEM column OPENING/CLOSING OF DOORS/DRAWERS. Move humidity control (some models) to freshen the supply and completely rinse out the ...control. Check/replace fuse with a 15 amp time-delay fuse. Ensure refrigerator is • pense water. Connect unit to cold water line that supplies water to • cold water line. Call your Frigidaire service representative, who can interpret any messages or number codes flashing on ...
...Replace filter cartridge. Draw and discard 10-12 glasses of refrigerator • Door is slightly open , causing • cold air from blocking door. See PROBLEM column OPENING/CLOSING OF DOORS/DRAWERS. Move humidity control (some models) to freshen the supply and completely rinse out the ...control. Check/replace fuse with a 15 amp time-delay fuse. Ensure refrigerator is • pense water. Connect unit to cold water line that supplies water to • cold water line. Call your Frigidaire service representative, who can interpret any messages or number codes flashing on ...


