User Manual
Page 9
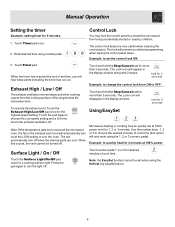
... and other cooking vapors from being accidentally started or used by weight) feature. 9 When the timer has reached the end of the range below the microwave oven. Use the number keys 1, 2 or 3 to choose the desired minutes of cook time. Enter desired time using the Defrost (by children. hold ...pad once. 2. Touch the pad again to choose the Low speed setting and a 3rd time to turn the light off when the internal parts are cool. Note: the EasySet function cannot be turned off . Manual Operation Setting the timer Example: setting timer for the highest speed setting.
... and other cooking vapors from being accidentally started or used by weight) feature. 9 When the timer has reached the end of the range below the microwave oven. Use the number keys 1, 2 or 3 to choose the desired minutes of cook time. Enter desired time using the Defrost (by children. hold ...pad once. 2. Touch the pad again to choose the Low speed setting and a 3rd time to turn the light off when the internal parts are cool. Note: the EasySet function cannot be turned off . Manual Operation Setting the timer Example: setting timer for the highest speed setting.
User Manual
Page 14
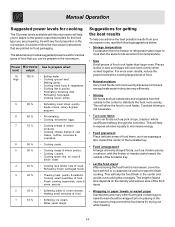
...the food stand After removing the food from the microwave, cover the food with any food prepartion in the microwave. Constant stirring is best to follow the microwave instructions that you achieve the best possible results from your microwave oven, read the following suggestions below provides suggested power ... to microwave energy. • Food placement Place delicate areas of food items, such as asparagus tips, toward the center of the turntable tray. • Food arrangement Arrange unevenly shaped foods, such as chicken pieces or salmon, with the thicker or meatier parts toward...
...the food stand After removing the food from the microwave, cover the food with any food prepartion in the microwave. Constant stirring is best to follow the microwave instructions that you achieve the best possible results from your microwave oven, read the following suggestions below provides suggested power ... to microwave energy. • Food placement Place delicate areas of food items, such as asparagus tips, toward the center of the turntable tray. • Food arrangement Arrange unevenly shaped foods, such as chicken pieces or salmon, with the thicker or meatier parts toward...
User Manual
Page 20
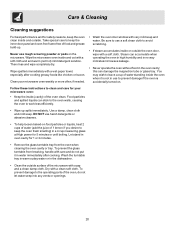
...microwave oven weekly or more often, if needed. • Wash the oven door window with soap and a clean damp cloth. Be sure to use harsh detergents or abrasive cleaners. • To help loosen baked-on the microwave. Use a damp, clean cloth and mild soap. To prevent damage to the operating parts... of food and grease build-up spills immediately. Take special care to keep the oven fresh smelling) in water immediately after cooking greasy foods...
...microwave oven weekly or more often, if needed. • Wash the oven door window with soap and a clean damp cloth. Be sure to use harsh detergents or abrasive cleaners. • To help loosen baked-on the microwave. Use a damp, clean cloth and mild soap. To prevent damage to the operating parts... of food and grease build-up spills immediately. Take special care to keep the oven fresh smelling) in water immediately after cooking greasy foods...
User Manual
Page 24
... EXCLUSIONS MAY NOT APPLY TO YOU. If You Need Service Keep your receipt, delivery slip, or some other than genuine Electrolux parts or parts obtained from the factory. 10. Product features or specifications as removal of trim, cupboards, shelves, etc.,which do not involve ... OF IMPLIED WARRANTIES; THIS WRITTEN WARRANTY GIVES YOU SPECIFIC LEGAL RIGHTS. If service is performed, it is shipped from persons other cosmetic parts. 11. USA 1.888.312.2117 Electrolux Major Appliances North America P.O. Major Appliance Warranty Information Your appliance is covered by a one year...
... EXCLUSIONS MAY NOT APPLY TO YOU. If You Need Service Keep your receipt, delivery slip, or some other than genuine Electrolux parts or parts obtained from the factory. 10. Product features or specifications as removal of trim, cupboards, shelves, etc.,which do not involve ... OF IMPLIED WARRANTIES; THIS WRITTEN WARRANTY GIVES YOU SPECIFIC LEGAL RIGHTS. If service is performed, it is shipped from persons other cosmetic parts. 11. USA 1.888.312.2117 Electrolux Major Appliances North America P.O. Major Appliance Warranty Information Your appliance is covered by a one year...
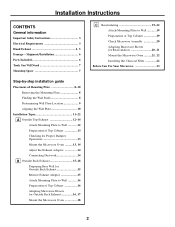
Installation Instructions
Page 2
Shipment/Installation 6 Parts Included 6 Tools You Will Need 7 Mounting Space 7 Step-by-step installation guide Placement of Mounting Plate 8-10 Removing the Mounting Plate 8 Finding the Wall Studs 8 ...-22 A Outside Top Exhaust 12-14 Attach Mounting Plate to Wall 12 Preparation of Top Cabinet 13 Checking for Proper Damper Operation 13 Mount the Microwave Oven ..........13, 14 Adjust the Exhaust Adaptor 14 Connecting Ductwork 14 B Outside Back Exhaust 15-18 Preparing Rear Wall for Outside Back Exhaust 15 Remove Exhaust...
Shipment/Installation 6 Parts Included 6 Tools You Will Need 7 Mounting Space 7 Step-by-step installation guide Placement of Mounting Plate 8-10 Removing the Mounting Plate 8 Finding the Wall Studs 8 ...-22 A Outside Top Exhaust 12-14 Attach Mounting Plate to Wall 12 Preparation of Top Cabinet 13 Checking for Proper Damper Operation 13 Mount the Microwave Oven ..........13, 14 Adjust the Exhaust Adaptor 14 Connecting Ductwork 14 B Outside Back Exhaust 15-18 Preparing Rear Wall for Outside Back Exhaust 15 Remove Exhaust...
Installation Instructions
Page 6
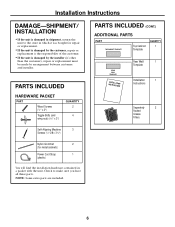
... Screws (1⁄4" x 2") Toggle Bolts (and wing nuts) (3⁄16" x 3") QUANTITY 2 4 PARTS INCLUDED (CONT.) ADDITIONAL PARTS PART TOP CABINET TEMPLATE Top Cabinet Template QUANTITY 1 REAR WALL TEMPLATE ININSSTTRAULCLTAITOIONNS Rear Wall 1 Template Installation 1 Instructions Separately 2 Packed Grease Filters Self-Aligning Machine 3 Screws (1⁄4"-... the unit. Installation Instructions DAMAGE-SHIPMENT/ INSTALLATION • If the unit is damaged in shipment, return the unit to make sure you have all these parts.
... Screws (1⁄4" x 2") Toggle Bolts (and wing nuts) (3⁄16" x 3") QUANTITY 2 4 PARTS INCLUDED (CONT.) ADDITIONAL PARTS PART TOP CABINET TEMPLATE Top Cabinet Template QUANTITY 1 REAR WALL TEMPLATE ININSSTTRAULCLTAITOIONNS Rear Wall 1 Template Installation 1 Instructions Separately 2 Packed Grease Filters Self-Aligning Machine 3 Screws (1⁄4"-... the unit. Installation Instructions DAMAGE-SHIPMENT/ INSTALLATION • If the unit is damaged in shipment, return the unit to make sure you have all these parts.
Installation Instructions
Page 20
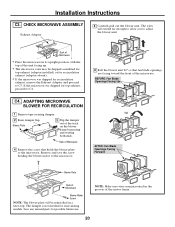
...the motor frame. 20 BEFORE: Fan Blade Openings Facing Up Roll AFTER: Fan Blade Openings Facing Forward Blower Plate Back of the microwave. Save any unused parts for top exhaust, proceed to adjust the blower unit. NOTE: Make sure wires remain routed in a later step. Remove and... or for recirculation exhaust (adaptor absent). • If the microwave was shipped for possible future use. Back of Microwave • Place the microwave in its upright position, with the top of the unit facing up. • The microwave oven may be reinstalled in the grooves of the track on the ...
...the motor frame. 20 BEFORE: Fan Blade Openings Facing Up Roll AFTER: Fan Blade Openings Facing Forward Blower Plate Back of the microwave. Save any unused parts for top exhaust, proceed to adjust the blower unit. NOTE: Make sure wires remain routed in a later step. Remove and... or for recirculation exhaust (adaptor absent). • If the microwave was shipped for possible future use. Back of Microwave • Place the microwave in its upright position, with the top of the unit facing up. • The microwave oven may be reinstalled in the grooves of the track on the ...


