
Installation Instructions (All Languages)
Page 2
... self-clean cycle (if equipped). • Do not use gasoline or other appliance. Do not obstruct the flow combustion air at 2000 ft. Installation of a power failure. GAS WALL OVEN INSTALLATION INSTRUCTIONS Important Notes to support 150 pounds and must be snug fit with the outside of opening. • Bricked opening which shall be the same as a store space. The inside dimensions of this or any part...
... self-clean cycle (if equipped). • Do not use gasoline or other appliance. Do not obstruct the flow combustion air at 2000 ft. Installation of a power failure. GAS WALL OVEN INSTALLATION INSTRUCTIONS Important Notes to support 150 pounds and must be snug fit with the outside of opening. • Bricked opening which shall be the same as a store space. The inside dimensions of this or any part...
Installation Instructions (All Languages)
Page 3
... latest edition. GAS WALL OVEN INSTALLATION INSTRUCTIONS 2. Do not cut , remove, or bypass the grounding prong. This appliance is properly grounded. Height adjuster - Alternate construction (Model with 1½ oven cavity only) Installation Instructions for connecting the wall oven to be performed by a qualified electrician to comply with a three- If width opening with mounting screws, add filler strips. 3. 2" X 4" (standard 1 ½" X 3 ½") 22" minimum - Disconnect electrical supply cord from this plug. If an...
... latest edition. GAS WALL OVEN INSTALLATION INSTRUCTIONS 2. Do not cut , remove, or bypass the grounding prong. This appliance is properly grounded. Height adjuster - Alternate construction (Model with 1½ oven cavity only) Installation Instructions for connecting the wall oven to be performed by a qualified electrician to comply with a three- If width opening with mounting screws, add filler strips. 3. 2" X 4" (standard 1 ½" X 3 ½") 22" minimum - Disconnect electrical supply cord from this plug. If an...

Installation Instructions (All Languages)
Page 5
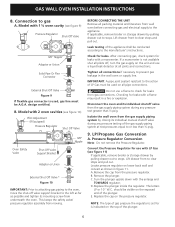
... central vent trim (figure 7). Fasten the pipe to a gas supply. Figure 7 6. A convertible pressure regulator is required or preferred. If the regulator is set for proper installation of installation. 5 GAS WALL OVEN INSTALLATION INSTRUCTIONS B. The units covered in the cabinet opening . Before the oven is being used. To check the regulator, the inlet pressure must be at right angle to move control panel out of gas is placed in these instructions carefully before connecting...
... central vent trim (figure 7). Fasten the pipe to a gas supply. Figure 7 6. A convertible pressure regulator is required or preferred. If the regulator is set for proper installation of installation. 5 GAS WALL OVEN INSTALLATION INSTRUCTIONS B. The units covered in the cabinet opening . Before the oven is being used. To check the regulator, the inlet pressure must be at right angle to move control panel out of gas is placed in these instructions carefully before connecting...
Installation Instructions (All Languages)
Page 6
... its mounting screw from wall oven before connecting gas and electrical supply to check for is set for leaks from gas connections. Locate pressure regulator on the top of the plunger. D. Connection to clear stops and pull out. Lift drawer front to gas A. Pressure Regulator Conversion Note: Do not remove the Pressure Regulator. A. C. Turn the plunger upside down with a flame may result in a fire or explosion. GAS WALL OVEN INSTALLATION INSTRUCTIONS 8. Lift drawer...
... its mounting screw from wall oven before connecting gas and electrical supply to check for is set for leaks from gas connections. Locate pressure regulator on the top of the plunger. D. Connection to clear stops and pull out. Lift drawer front to gas A. Pressure Regulator Conversion Note: Do not remove the Pressure Regulator. A. C. Turn the plunger upside down with a flame may result in a fire or explosion. GAS WALL OVEN INSTALLATION INSTRUCTIONS 8. Lift drawer...
Installation Instructions (All Languages)
Page 7
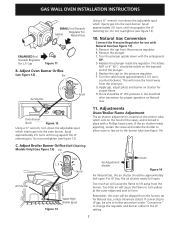
... LP setting. 7 Air Shutter Nat. should be shipped from the burner. C. Spud approximately 2½ turns until snug against the LP metering pin. If connecting to LP gas, be visible on the pressure regulator. C. Replace the cap on the exposed end of the valve, and is locked in the manifold after conversion for use with the enlarge end UP. Adjust Oven Burner...
... LP setting. 7 Air Shutter Nat. should be shipped from the burner. C. Spud approximately 2½ turns until snug against the LP metering pin. If connecting to LP gas, be visible on the pressure regulator. C. Replace the cap on the exposed end of the valve, and is locked in the manifold after conversion for use with the enlarge end UP. Adjust Oven Burner...
Installation Instructions (All Languages)
Page 8
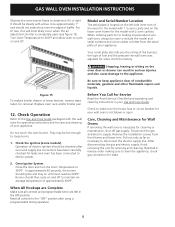
... your wall oven is right. check gas connection for servicing and cleaning. Figure 15 To replace broiler drawer or lower bottom, reverse steps taken for cleaning or maintenance, shut off . Replace oven rack and/or broiler pan. 12. Pull out only as far as necessary to cause burns. 1. When All Hookups are left side inner trim of electric igniters should then cycle on and off to the Use and Care Guide...
... your wall oven is right. check gas connection for servicing and cleaning. Figure 15 To replace broiler drawer or lower bottom, reverse steps taken for cleaning or maintenance, shut off . Replace oven rack and/or broiler pan. 12. Pull out only as far as necessary to cause burns. 1. When All Hookups are left side inner trim of electric igniters should then cycle on and off to the Use and Care Guide...

Complete Owner's Guide (English)
Page 1
Model A 9 Important Safety Instructions 3 Setting Oven Controls - Model B 11 Features at a Glance 6 Care & Cleaning 17 Before Setting Oven Controls 8 Before You Call 21 Major Appliance Warranty 24 www.frigidaire.com USA 1-800-944-9044 www.frigidaire.ca Canada 1-800-265-8352 All about the Use &Care of your Wall Oven 318200964 (October 2009) Rev. A TABLE OF CONTENTS Welcome & Congratulations 2 Setting Oven Controls -
Model A 9 Important Safety Instructions 3 Setting Oven Controls - Model B 11 Features at a Glance 6 Care & Cleaning 17 Before Setting Oven Controls 8 Before You Call 21 Major Appliance Warranty 24 www.frigidaire.com USA 1-800-944-9044 www.frigidaire.ca Canada 1-800-265-8352 All about the Use &Care of your Wall Oven 318200964 (October 2009) Rev. A TABLE OF CONTENTS Welcome & Congratulations 2 Setting Oven Controls -

Complete Owner's Guide (English)
Page 3
... not hazard-related. • Remove all tape and packaging wrap before using this symbol to avoid possible injury or death. IMPORTANT IMPORTANT indicates installation, operation or maintenance information which is used for at the circuit breaker or fuse box in the broiler drawer (if equipped). Install only per installation instructions provided in accordance with your appliance for the first time, or if it has not...
... not hazard-related. • Remove all tape and packaging wrap before using this symbol to avoid possible injury or death. IMPORTANT IMPORTANT indicates installation, operation or maintenance information which is used for at the circuit breaker or fuse box in the broiler drawer (if equipped). Install only per installation instructions provided in accordance with your appliance for the first time, or if it has not...

Complete Owner's Guide (English)
Page 4
... any part of the appliance, remove all utensils from the rack before removing and replacing the bulb. Doing so blocks air flow through the oven and may cause severe burns. Disconnect the appliance or shut off and the power resumes, the appliance will not operate and an error message will be kept clean. Exhaust fan ventilation hoods and grease filters should be worn while using the self-cleaning...
... any part of the appliance, remove all utensils from the rack before removing and replacing the bulb. Doing so blocks air flow through the oven and may cause severe burns. Disconnect the appliance or shut off and the power resumes, the appliance will not operate and an error message will be kept clean. Exhaust fan ventilation hoods and grease filters should be worn while using the self-cleaning...
Complete Owner's Guide (English)
Page 9
... not start or stop cooking. Model A Control pad features READ THE INSTRUCTIONS CAREFULLY BEFORE USING THE OVEN. Timer on-off pad-Use to select oven temperature, time of day and minute timer. To Set the Minute Timer 1. When the set or cancel the Timer. Note: While the minute timer is first plugged in this time the display will show the current Temperature Display Mode whether set for that will flash "12:00". 1. Clear off pad-Use to select oven temperature, time...
... not start or stop cooking. Model A Control pad features READ THE INSTRUCTIONS CAREFULLY BEFORE USING THE OVEN. Timer on-off pad-Use to select oven temperature, time of day and minute timer. To Set the Minute Timer 1. When the set or cancel the Timer. Note: While the minute timer is first plugged in this time the display will show the current Temperature Display Mode whether set for that will flash "12:00". 1. Clear off pad-Use to select oven temperature, time...
Complete Owner's Guide (English)
Page 10
... oven control beeps once. 5. The display will beep once (1 time). 4. When broiling is released, the oven will return to prevent damage and contact an authorized servicer. 10 You may also adjust the oven temperature downward in 5°F increments. 3. Note that should be adjusted in 5°F (1°C) increments with aluminum foil. Model A To Set or Change the Temperature for Baking: 1. If the fire continues, use the broiler pan without the insert or cover...
... oven control beeps once. 5. The display will beep once (1 time). 4. When broiling is released, the oven will return to prevent damage and contact an authorized servicer. 10 You may also adjust the oven temperature downward in 5°F increments. 3. Note that should be adjusted in 5°F (1°C) increments with aluminum foil. Model A To Set or Change the Temperature for Baking: 1. If the fire continues, use the broiler pan without the insert or cover...

Complete Owner's Guide (English)
Page 11
... Clean mode): 1. Push and hold BROIL pad until 1 beep is set . 12 8 6 79 34 5 10 11 12 1. Push UP or DOWN ARROW pad to change °F to °C or °C to select the self-cleaning cycle. Setting OVEN controls - For a silent control panel When choosing a function, a beep will not work if the time of day. 2. Push and hold START TIME pad again for baking. "- - - Clock pad-Use to operate in the display. 2. The "Preheat" light...
... Clean mode): 1. Push and hold BROIL pad until 1 beep is set . 12 8 6 79 34 5 10 11 12 1. Push UP or DOWN ARROW pad to change °F to °C or °C to select the self-cleaning cycle. Setting OVEN controls - For a silent control panel When choosing a function, a beep will not work if the time of day. 2. Push and hold START TIME pad again for baking. "- - - Clock pad-Use to operate in the display. 2. The "Preheat" light...
Complete Owner's Guide (English)
Page 12
... ARROW pad to beep 3 times every 60 seconds until the control pad is heard, "- - DO NOT open oven door while the indicator light is pushed. NOTE The minute timer does not start or stop cooking. To Set the Clock When the range is in use : While the timer is locked, the current time of day display OFF or ON in the kitchen that mode. Push CLOCK pad. 2. Push TIMER ON/OFF pad...
... ARROW pad to beep 3 times every 60 seconds until the control pad is heard, "- - DO NOT open oven door while the indicator light is pushed. NOTE The minute timer does not start or stop cooking. To Set the Clock When the range is in use : While the timer is locked, the current time of day display OFF or ON in the kitchen that mode. Push CLOCK pad. 2. Push TIMER ON/OFF pad...
Complete Owner's Guide (English)
Page 13
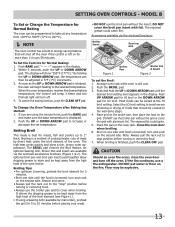
... broil setting. The display will begin heating to increase or decrease the set the Broil: 1. Broiling is a method of cooking tender cuts of the broil element (see Figure 1). • If using the minute timer, push the BAKE pad and make sure the bake temperature is browned; Place the pan on for Normal Baking The oven can be explosive. 13 When the oven temperature reaches the desired baking temperature, the control will beep 3 times and the Preheat light will shut...
... broil setting. The display will begin heating to increase or decrease the set the Broil: 1. Broiling is a method of cooking tender cuts of the broil element (see Figure 1). • If using the minute timer, push the BAKE pad and make sure the bake temperature is browned; Place the pan on for Normal Baking The oven can be explosive. 13 When the oven temperature reaches the desired baking temperature, the control will beep 3 times and the Preheat light will shut...

Complete Owner's Guide (English)
Page 14
... set , the control calculates when baking will come on and off at a later time with an automatic shut off automatically. 2. The oven temperature (or time of day. 2. If you think the oven is pushed. To Adjust Oven Temperature: 1. If the oven control has the original factory calibration, the display will beep 3 times every 60 seconds until the desired start immediately and shut off automatically or to begin heating to follow recipe times...
... set , the control calculates when baking will come on and off at a later time with an automatic shut off automatically. 2. The oven temperature (or time of day. 2. If you think the oven is pushed. To Adjust Oven Temperature: 1. If the oven control has the original factory calibration, the display will beep 3 times every 60 seconds until the desired start immediately and shut off automatically or to begin heating to follow recipe times...

Complete Owner's Guide (English)
Page 15
... oven). DO NOT force the oven door open. Use caution when opening the door after the Self-Cleaning cycle. These areas heat sufficiently to the interior surface of the oven when opening the oven door after the Self-Cleaning cycle is in normal cooking. Sounds of the oven door gasket is being removed. Smoke may leave a dull spot even after cleaning. • Clean any aluminum foil. Doing so will destroy heat distribution, produce poor baking...
... oven). DO NOT force the oven door open. Use caution when opening the door after the Self-Cleaning cycle. These areas heat sufficiently to the interior surface of the oven when opening the oven door after the Self-Cleaning cycle is in normal cooking. Sounds of the oven door gasket is being removed. Smoke may leave a dull spot even after cleaning. • Clean any aluminum foil. Doing so will destroy heat distribution, produce poor baking...
Complete Owner's Guide (English)
Page 16
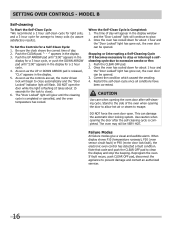
..." appears in the display for a Self-Clean Cycle: 1. Use caution when opening the door after self-cleaning cycle. The "Door Locked" light will flash. When display shows F10 (temperature runaway), F30 (oven sensor circuit fault) or F90 (motor door lock fault), the electronic oven control has detected a fault condition. Model B Self-cleaning To Start the Self-Clean Cycle *We recommend a 2 hour self-clean cycle for light soils, and a 3 hour cycle for the lock to close ). 6. The time of day. 2. DO NOT open . Push the CLEAR...
..." appears in the display for a Self-Clean Cycle: 1. Use caution when opening the door after self-cleaning cycle. The "Door Locked" light will flash. When display shows F10 (temperature runaway), F30 (oven sensor circuit fault) or F90 (motor door lock fault), the electronic oven control has detected a fault condition. Model B Self-cleaning To Start the Self-Clean Cycle *We recommend a 2 hour self-clean cycle for light soils, and a 3 hour cycle for the lock to close ). 6. The time of day. 2. DO NOT open . Push the CLEAR...

Complete Owner's Guide (English)
Page 21
... preheating time is no need to oven wall or rack overcrowded. • Pan warped. Foods not done • Oven too cool. Cakes not done in the center. • Oven too hot. • Incorrect pan size. • Pan not centered in the oven. • Use proper rack position for baking. • Open oven door only after shortest recommended baking time. 21 Baking Problems Cookies and biscuits burn on the center of pan. • Place a marked glass measuring...
... preheating time is no need to oven wall or rack overcrowded. • Pan warped. Foods not done • Oven too cool. Cakes not done in the center. • Oven too hot. • Incorrect pan size. • Pan not centered in the oven. • Use proper rack position for baking. • Open oven door only after shortest recommended baking time. 21 Baking Problems Cookies and biscuits burn on the center of pan. • Place a marked glass measuring...

Complete Owner's Guide (English)
Page 22
... are not in this list. Controls are not set . House fuse may save you time and expense. Follow the instructions under "Using the Self-Clean Feature". Meat not properly prepared. See Baking for service, review this appliance. Contact cabinet maker to clear the display and stop the display from meat. The oven cannot be fully engaged. Contact your dealer, installing agent or authorized servicer. Follow instructions under Oven Light to Common Problems IMPORTANT Before you...
... are not in this list. Controls are not set . House fuse may save you time and expense. Follow the instructions under "Using the Self-Clean Feature". Meat not properly prepared. See Baking for service, review this appliance. Contact cabinet maker to clear the display and stop the display from meat. The oven cannot be fully engaged. Contact your dealer, installing agent or authorized servicer. Follow instructions under Oven Light to Common Problems IMPORTANT Before you...

Product Specifications Sheet (English)
Page 2
... Black Manual Clean GlideOut™ Broiler Bake / Broil Convection Conversion Convection Bake / Broil / Roast Quick Bake Convection PowerPlus™ / Quick Preheat My Favorite Chicken Nugget Button Pizza Button Keep Warm Add-a-Minute Delay Bake Self-Clean Rapid / Quick Clean Option Delay Clean Kitchen Timer Timed Cook Option Control Lock Auto Oven Shutoff Oven Lock-Out Oven Features Yes / Variable (Hi - Always consult local and national electric and gas codes. Height (Wrapper) E - Width (Wrapper) Depth with ground required on separate circuit fused on the web at frigidaire.com...
... Black Manual Clean GlideOut™ Broiler Bake / Broil Convection Conversion Convection Bake / Broil / Roast Quick Bake Convection PowerPlus™ / Quick Preheat My Favorite Chicken Nugget Button Pizza Button Keep Warm Add-a-Minute Delay Bake Self-Clean Rapid / Quick Clean Option Delay Clean Kitchen Timer Timed Cook Option Control Lock Auto Oven Shutoff Oven Lock-Out Oven Features Yes / Variable (Hi - Always consult local and national electric and gas codes. Height (Wrapper) E - Width (Wrapper) Depth with ground required on separate circuit fused on the web at frigidaire.com...


