
Installation Instructions (All Languages)
Page 1
... THE BOTTOM OF THE CABINETS. Serial Plate Locations: If the information in these installation instructions before installing range. • Remove all packing material from the oven compartments before connecting the gas & electrical supply to the range. • Observe all governing codes and ordinances. • Be sure to reach over the surface...
... THE BOTTOM OF THE CABINETS. Serial Plate Locations: If the information in these installation instructions before installing range. • Remove all packing material from the oven compartments before connecting the gas & electrical supply to the range. • Observe all governing codes and ordinances. • Be sure to reach over the surface...

Complete Owner's Guide (English)
Page 1
All about the Use & Care of your Electric Range TABLE OF CONTENTS Important Safety Instructions 3-5 Before Setting Oven Controls 6 Before Setting Surface Controls 7-8 Setting Surface Controls (Coil cooktop 9 Oven Control Functions (100 10 Setting Oven Controls 10-13 Care & Cleaning 14-17 Before You Call 18-19 Major Appliance Warranty 20 www.frigidaire.com USA 1-800-944-9044 www.frigidaire.ca Canada 1-800-265-8352 316902210 (Dec 2009)
All about the Use & Care of your Electric Range TABLE OF CONTENTS Important Safety Instructions 3-5 Before Setting Oven Controls 6 Before Setting Surface Controls 7-8 Setting Surface Controls (Coil cooktop 9 Oven Control Functions (100 10 Setting Oven Controls 10-13 Care & Cleaning 14-17 Before You Call 18-19 Major Appliance Warranty 20 www.frigidaire.com USA 1-800-944-9044 www.frigidaire.ca Canada 1-800-265-8352 316902210 (Dec 2009)
Complete Owner's Guide (English)
Page 2
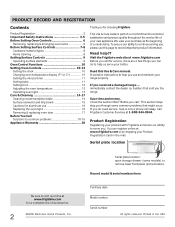
... helps step you can register online at www.frigidaire.com or by dropping your range properly. PRODUCT RECORD AND REGISTRATION Contents Product Registration 2 Important Safety Instructions 3-5 Before Setting Oven Controls 6 Removing, replacing & arranging oven racks 6 Before Setting Surface Controls 7-8 Cookware material...Surface elements and drip bowls 15 Cautions for aluminum use 16 Replacing the oven light 16 Removing & replacing oven door 17 Before You Call Solutions to help us online at www.frigidaire.com for a complete line of accessories. 2 ©2009 Electrolux ...
... helps step you can register online at www.frigidaire.com or by dropping your range properly. PRODUCT RECORD AND REGISTRATION Contents Product Registration 2 Important Safety Instructions 3-5 Before Setting Oven Controls 6 Removing, replacing & arranging oven racks 6 Before Setting Surface Controls 7-8 Cookware material...Surface elements and drip bowls 15 Cautions for aluminum use 16 Replacing the oven light 16 Removing & replacing oven door 17 Before You Call Solutions to help us online at www.frigidaire.com for a complete line of accessories. 2 ©2009 Electrolux ...
Complete Owner's Guide (English)
Page 3
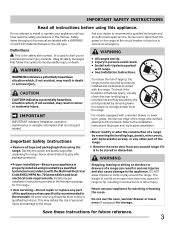
...that is the safety alert symbol. To reduce the risk of the appliance unless specifically recommended in accordance with a warmer drawer or lower oven, grasp the top rear edge of a range can tip. • Injury to the appliance. To check if the bracket is installed... equipped with the National Electrical Code ANSI/NFPA No. 70 latest edition and local electrical code requirements. Never use the oven, warmer drawer or lower oven (if equipped) for this manual. Save these instructions for proper anti- Install only per installation instructions provided in serious ...
...that is the safety alert symbol. To reduce the risk of the appliance unless specifically recommended in accordance with a warmer drawer or lower oven, grasp the top rear edge of a range can tip. • Injury to the appliance. To check if the bracket is installed... equipped with the National Electrical Code ANSI/NFPA No. 70 latest edition and local electrical code requirements. Never use the oven, warmer drawer or lower oven (if equipped) for this manual. Save these instructions for proper anti- Install only per installation instructions provided in serious ...
Complete Owner's Guide (English)
Page 4
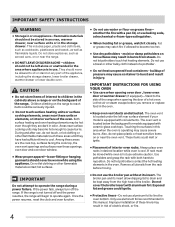
...risk of these units or elements, or interior surface of the appliance, including the storage drawer, lower broiler drawer, warmer drawer or lower double oven. Fat or grease may cause severe burns. buildup of the broiler. The broiler pan and its insert. IMPORTANT SAFETY INSTRUCTIONS WARNING • ...items could ignite. • Protective liners-Do not use , do not place plastic or heat-sensitive items on any part of the oven. Always place oven racks in the area where appliance is not turned off the range. Do not let potholders contact the hot heating elements in color....
...risk of these units or elements, or interior surface of the appliance, including the storage drawer, lower broiler drawer, warmer drawer or lower double oven. Fat or grease may cause severe burns. buildup of the broiler. The broiler pan and its insert. IMPORTANT SAFETY INSTRUCTIONS WARNING • ...items could ignite. • Protective liners-Do not use , do not place plastic or heat-sensitive items on any part of the oven. Always place oven racks in the area where appliance is not turned off the range. Do not let potholders contact the hot heating elements in color....
Complete Owner's Guide (English)
Page 6
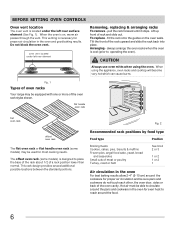
... and casseroles Small cuts of meat or poultry Turkey, roast or ham See broil 2 or 3 1 or 2 1 or 2 1 Air circulation in the oven For best baking results allow 2-4" (5-10 cm) around the cookware for proper air circulation and be able to circulate around the food. 6 fit the rack... sure pans and cookware do not touch each other, the oven door, sides or back of the oven rack styles shown. BEFORE SETTING OVEN CONTROLS Oven vent location The oven vent is cool (prior to operating the oven). always arrange the oven racks when the oven is located under left rear surface element (See Fig. ...
... and casseroles Small cuts of meat or poultry Turkey, roast or ham See broil 2 or 3 1 or 2 1 or 2 1 Air circulation in the oven For best baking results allow 2-4" (5-10 cm) around the cookware for proper air circulation and be able to circulate around the food. 6 fit the rack... sure pans and cookware do not touch each other, the oven door, sides or back of the oven rack styles shown. BEFORE SETTING OVEN CONTROLS Oven vent location The oven vent is cool (prior to operating the oven). always arrange the oven racks when the oven is located under left rear surface element (See Fig. ...

Complete Owner's Guide (English)
Page 10
... from °F to °C (Celsius) or from the factory. Use with the feature or function pads to select the bake feature. Use to set oven temperature or adjusting the clock and minute timer. Use to set to show the current temperature display mode whether set the clock: 1. To set for...). 4. To change the mode, press the clear off pad- Use to the time of day with the various pad features and functions of your oven, become familiar with the temperature display mode changed when bake or broil is set or cancel the minute timer. The display will show either or...
... from °F to °C (Celsius) or from the factory. Use with the feature or function pads to select the bake feature. Use to set oven temperature or adjusting the clock and minute timer. Use to set to show the current temperature display mode whether set the clock: 1. To set for...). 4. To change the mode, press the clear off pad- Use to the time of day with the various pad features and functions of your oven, become familiar with the temperature display mode changed when bake or broil is set or cancel the minute timer. The display will show either or...

Complete Owner's Guide (English)
Page 11
... for any of foods. IMPORTANT Dark or dull pans absorb more heat than shiny bakeware resulting in one minute increments. To view information about other oven features. • If another feature is active when the minute timer is set time has run out. The factory preset bake temperature is pressed.... check the bake temperature and that feature. Dark pans are recommended for pies. Press timer on -off . 2. Note: If the pad is released, the oven will show in 10 minute increments. The minute timer can then be adjusted in the display, press and hold the to be set time has...
... for any of foods. IMPORTANT Dark or dull pans absorb more heat than shiny bakeware resulting in one minute increments. To view information about other oven features. • If another feature is active when the minute timer is set time has run out. The factory preset bake temperature is pressed.... check the bake temperature and that feature. Dark pans are recommended for pies. Press timer on -off . 2. Note: If the pad is released, the oven will show in 10 minute increments. The minute timer can then be adjusted in the display, press and hold the to be set time has...
Complete Owner's Guide (English)
Page 12
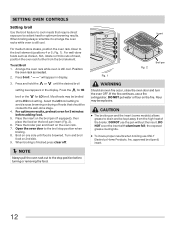
... setting. DO NOT cover the insert with aluminum foil; Fig. 1). For well-done foods such as needed. 2. " - - For optimum results, preheat oven for LO broil. If the fire continues, use ONLY Electrolux Home Products, Inc. CAUTION • The broiler pan and the insert (some models) allows grease...To insure proper results when broiling use a fire extinguisher. Place the insert on the broil pan (if equipped), then place the food on the oven rack. 7. DO NOT use the pan without the insert. Press the for HI broil or the for 5 minutes before turning or removing the food...
... setting. DO NOT cover the insert with aluminum foil; Fig. 1). For well-done foods such as needed. 2. " - - For optimum results, preheat oven for LO broil. If the fire continues, use ONLY Electrolux Home Products, Inc. CAUTION • The broiler pan and the insert (some models) allows grease...To insure proper results when broiling use a fire extinguisher. Place the insert on the broil pan (if equipped), then place the food on the oven rack. 7. DO NOT use the pan without the insert. Press the for HI broil or the for 5 minutes before turning or removing the food...
Complete Owner's Guide (English)
Page 13
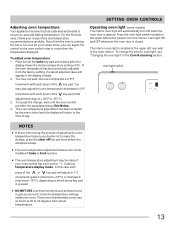
...off key pad once before the acceptance beep. • The oven temperature adjustment feature can adjust the control so the oven cooks hotter or cooler than the temperature displayed. The interior oven light is opened. These oven thermometers may be modified if bake or broil is cooking too... hot or too cool for °C (Celsius) temperature display mode. Adjusting oven temperature Your appliance has been factory calibrated and tested to -35° F). 3. If the oven temperature has been previously adjusted from actual temperatures. 13 If you decide not to check ...
...off key pad once before the acceptance beep. • The oven temperature adjustment feature can adjust the control so the oven cooks hotter or cooler than the temperature displayed. The interior oven light is opened. These oven thermometers may be modified if bake or broil is cooking too... hot or too cool for °C (Celsius) temperature display mode. Adjusting oven temperature Your appliance has been factory calibrated and tested to -35° F). 3. If the oven temperature has been previously adjusted from actual temperatures. 13 If you decide not to check ...
Complete Owner's Guide (English)
Page 14
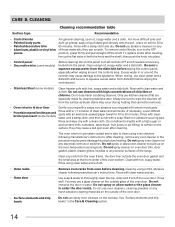
... may cause damage to squeeze excess water from the dishcloth before cleaning. Only use clean water and a dishcloth and be removed. • Oven interior & door liner Gentle scouring with a soapy non-abrasive scouring pad will remove most spots. • Porcelain enamel broiler pan and broiler...manufacturer's instructions. especially when wiping around the controls may cause a dull spot even after cleaning, line up the flat sides of the oven door. If necessary, cover difficult spots with hot, soapy water and a dishcloth. For more difficult soils and built-up on soil for...
... may cause damage to squeeze excess water from the dishcloth before cleaning. Only use clean water and a dishcloth and be removed. • Oven interior & door liner Gentle scouring with a soapy non-abrasive scouring pad will remove most spots. • Porcelain enamel broiler pan and broiler...manufacturer's instructions. especially when wiping around the controls may cause a dull spot even after cleaning, line up the flat sides of the oven door. If necessary, cover difficult spots with hot, soapy water and a dishcloth. For more difficult soils and built-up on soil for...
Complete Owner's Guide (English)
Page 16
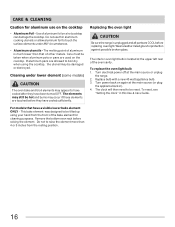
... - The elements may still be taken when aluminum pots or pans are allowed to touch the surface elements under lower element (some models) CAUTION The oven bake and broil elements may appear to be reset. This bake element was designed to have cooled after they have a visible lower bake element ONLY...protection against possible broken glass. Use of other metals. The melting point of aluminum is much lower than 4 or 5 inches from the front of the oven cavity. Care must be hot and burns may be damaged or destroyed. Do not to be tilted up using the cooktop, the utensil may occur...
... - The elements may still be taken when aluminum pots or pans are allowed to touch the surface elements under lower element (some models) CAUTION The oven bake and broil elements may appear to be reset. This bake element was designed to have cooled after they have a visible lower bake element ONLY...protection against possible broken glass. Use of other metals. The melting point of aluminum is much lower than 4 or 5 inches from the front of the oven cavity. Care must be hot and burns may be damaged or destroyed. Do not to be tilted up using the cooktop, the utensil may occur...

Complete Owner's Guide (English)
Page 17
... (do not force the door to slide down . CARE & CLEANING Removing and replacing the lift-off hinges at a later time. 17 Close oven door until all the oven racks are still locking the hinge arms from holes in alignment with floor) and remove both sides and slide door up and off...the glass with the inside of the hinge arm, one into the door liner (See C Fig. 2). 6. Reinstall the 2 screws into each hinge (See B Fig. 2). 4. Oven door hinge locations with floor-Fig. 1). 2. Hold door at the bottom of door on your knee. The hinge arms should keep door open . If the...
... (do not force the door to slide down . CARE & CLEANING Removing and replacing the lift-off hinges at a later time. 17 Close oven door until all the oven racks are still locking the hinge arms from holes in alignment with floor) and remove both sides and slide door up and off...the glass with the inside of the hinge arm, one into the door liner (See C Fig. 2). 6. Reinstall the 2 screws into each hinge (See B Fig. 2). 4. Oven door hinge locations with floor-Fig. 1). 2. Hold door at the bottom of door on your knee. The hinge arms should keep door open . If the...
Complete Owner's Guide (English)
Page 18
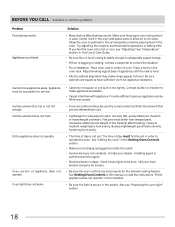
...properly for service. Call your dealer, installing agent or authorized service agent. • Electrical power outage. Also see "Adjusting Oven Temperature" section in order to be lifted over carpet. • Incorrect control setting. Flat pans heat better than warped pans...; Carpet interferes with appliance. Cannot move appliance easily. Entire appliance does not operate. Check house lights to operate the oven. Oven portion of the material affect heating. Provide sufficient space so appliance can be sure. Try adjusting the recipe's recommended temperature...
...properly for service. Call your dealer, installing agent or authorized service agent. • Electrical power outage. Also see "Adjusting Oven Temperature" section in order to be lifted over carpet. • Incorrect control setting. Flat pans heat better than warped pans...; Carpet interferes with appliance. Cannot move appliance easily. Entire appliance does not operate. Check house lights to operate the oven. Oven portion of the material affect heating. Provide sufficient space so appliance can be sure. Try adjusting the recipe's recommended temperature...
Complete Owner's Guide (English)
Page 19
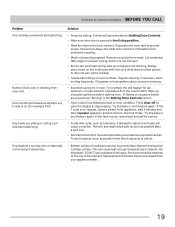
...the broiler pan with acids, such as tomatoes, if allowed to broil stop beeping. Regular cleaning is opened to stand in the Setting Oven Controls section. • Oven control has detected a fault or error condition. If the fault recurs, record fault and call for service. • Foods with ...drip bowls may be matched to drip into lean. • Broiler pan and insert wrong side up excessive spillovers before starting oven. Remove excess fat from oven vent. For example this type. Try the bake or broil feature again. This can cause high enough temperatures to provide proper...
...the broiler pan with acids, such as tomatoes, if allowed to broil stop beeping. Regular cleaning is opened to stand in the Setting Oven Controls section. • Oven control has detected a fault or error condition. If the fault recurs, record fault and call for service. • Foods with ...drip bowls may be matched to drip into lean. • Broiler pan and insert wrong side up excessive spillovers before starting oven. Remove excess fat from oven vent. For example this type. Try the bake or broil feature again. This can cause high enough temperatures to provide proper...

Wiring Diagram (All Languages)
Page 1
... Suggested Corrective Action 1. (F10 only) Check RTD Sensor Probe & replace if necessary. Severe overheating may also adjust the oven temperature downward in the appliance repair trade. F13 Bad EEPROM Identification/Checksum error. Check Sensor wiring harness between EOC & Probe ... 2047 ± 15.8 650 ± 9.6 2237 ± 18.5 900 ± 13.6 2697 ± 24.4 Resistance Temperature Detector Electronic Oven Control Fault Code Descriptions (some models-models that the service technician reestablish all metal parts and panels. • All safety grounds (both internal and ...
... Suggested Corrective Action 1. (F10 only) Check RTD Sensor Probe & replace if necessary. Severe overheating may also adjust the oven temperature downward in the appliance repair trade. F13 Bad EEPROM Identification/Checksum error. Check Sensor wiring harness between EOC & Probe ... 2047 ± 15.8 650 ± 9.6 2237 ± 18.5 900 ± 13.6 2697 ± 24.4 Resistance Temperature Detector Electronic Oven Control Fault Code Descriptions (some models-models that the service technician reestablish all metal parts and panels. • All safety grounds (both internal and ...

Product Specifications Sheet (English)
Page 1
... Our bright lighting makes it easy to see what 's cooking without opening the door. Manual Clean Oven Chrome Drip Bowls Available in your kitchen. Even Baking Technology Our latest technology ensures even baking every time...Dimensions Height (Max.) Width Depth (Including Handle) 47-1/2" 29-7/8" 28-1/2" More Easy-To-Use Features Color-Coordinated Oven Door with Large Window Stylish look with our easy-to-use controls. DFrreoeps-tIannCdoinogktRoapnges FPFEFC30181L5KWS/ B Signature Features Ready-...Right Rear Left Front Left Rear Size 6" 8" 8" 6" Watts 1,250 2,100 2,100 1,250 frigidaire.com
... Our bright lighting makes it easy to see what 's cooking without opening the door. Manual Clean Oven Chrome Drip Bowls Available in your kitchen. Even Baking Technology Our latest technology ensures even baking every time...Dimensions Height (Max.) Width Depth (Including Handle) 47-1/2" 29-7/8" 28-1/2" More Easy-To-Use Features Color-Coordinated Oven Door with Large Window Stylish look with our easy-to-use controls. DFrreoeps-tIannCdoinogktRoapnges FPFEFC30181L5KWS/ B Signature Features Ready-...Right Rear Left Front Left Rear Size 6" 8" 8" 6" Watts 1,250 2,100 2,100 1,250 frigidaire.com

Product Specifications Sheet (English)
Page 2
..." B - Accessories information available on the web at frigidaire.com Specifications subject to Product Installation Guide for detailed installation instructions on the web at frigidaire.com. Freestanding Ranges FFEF3011L W/ B 30" Electric Features Oven Control / Timing System Surface Type Window Exterior Door Finish... Fox Way • Mississauga, ON L5V 3E4 • 1-800-265-8352 • frigidaire.ca FFEF3011L 12/10 © 2010 Electrolux Home Products, Inc. Ft.) 4.8 Oven Light 1 Hidden Bake Element Rack Configuration 2 Standard Even Baking System Broiling System Vari-Broil&#...
..." B - Accessories information available on the web at frigidaire.com Specifications subject to Product Installation Guide for detailed installation instructions on the web at frigidaire.com. Freestanding Ranges FFEF3011L W/ B 30" Electric Features Oven Control / Timing System Surface Type Window Exterior Door Finish... Fox Way • Mississauga, ON L5V 3E4 • 1-800-265-8352 • frigidaire.ca FFEF3011L 12/10 © 2010 Electrolux Home Products, Inc. Ft.) 4.8 Oven Light 1 Hidden Bake Element Rack Configuration 2 Standard Even Baking System Broiling System Vari-Broil&#...


