

Installation Instructions (All Languages)
Page 2
...Copper Electrical Wiring & Metal Conduit (for the bracket. Level range by removing lower panel or storage drawer. Use a spirit level to the floor. For models with upturned ends. 2 ANTI-TIP BRACKET INSTALLATION INSTRUCTIONS - Failure to secure the bracket in Step 4c. Fig. 5 Fig. 6 If range is ... or metal. When using the Template - (Bracket may be properly installed and grounded by means of the range (See Fig. 4). Models with a wrench. NOTE: Some models may be located. See Range Connection Opening Size Chart (Figs. 9 & 10) for cord kit ampere rating information.
...Copper Electrical Wiring & Metal Conduit (for the bracket. Level range by removing lower panel or storage drawer. Use a spirit level to the floor. For models with upturned ends. 2 ANTI-TIP BRACKET INSTALLATION INSTRUCTIONS - Failure to secure the bracket in Step 4c. Fig. 5 Fig. 6 If range is ... or metal. When using the Template - (Bracket may be properly installed and grounded by means of the range (See Fig. 4). Models with a wrench. NOTE: Some models may be located. See Range Connection Opening Size Chart (Figs. 9 & 10) for cord kit ampere rating information.

Installation Instructions (All Languages)
Page 3
... 9). hole or 1-1/8" dia. See Fig. 10 for 4-Wire or 4b. Rear Access Cover Fig. 11 4A. Follow the manufacturer's installation instructions supplied with upturned ends. MODELS REQUIRING POWER SUPPLY CORD KIT. for cord kit ampere rating information.
... 9). hole or 1-1/8" dia. See Fig. 10 for 4-Wire or 4b. Rear Access Cover Fig. 11 4A. Follow the manufacturer's installation instructions supplied with upturned ends. MODELS REQUIRING POWER SUPPLY CORD KIT. for cord kit ampere rating information.

Complete Owner s Guide
Page 2
... 6 Before Setting Surface Controls 7 Cookware material types 7 Home Canning 7 Setting Surface Controls 8 Operating surface elements 8 Setting Clock & Minute Timer (some models); Save time and money. Call Frigidaire Customer Services at www.frigidaire.com for aluminum use and maintain your better. If you do to help you use 12 Replacing the oven light 13...
... 6 Before Setting Surface Controls 7 Cookware material types 7 Home Canning 7 Setting Surface Controls 8 Operating surface elements 8 Setting Clock & Minute Timer (some models); Save time and money. Call Frigidaire Customer Services at www.frigidaire.com for aluminum use and maintain your better. If you do to help you use 12 Replacing the oven light 13...
Complete Owner s Guide
Page 4
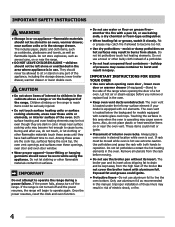
..., oven door and oven door window. • Wear proper apparel-loose-fitting or hanging garments should not be left rear surface element if your model is not turned off the range. Fat or grease may become too hot. • Use dry potholders - Remove all utensils from steam. Exposed... result in burns from the rack before you remove or replace food in the oven. The oven vent is located below the backguard for models equipped with aluminum foil. Use potholders and grasp the rack with coil elements. The broiler pan and its insert. Improper installation of the ...
..., oven door and oven door window. • Wear proper apparel-loose-fitting or hanging garments should not be left rear surface element if your model is not turned off the range. Fat or grease may become too hot. • Use dry potholders - Remove all utensils from steam. Exposed... result in burns from the rack before you remove or replace food in the oven. The oven vent is located below the backguard for models equipped with aluminum foil. Use potholders and grasp the rack with coil elements. The broiler pan and its insert. Improper installation of the ...
Complete Owner s Guide
Page 5
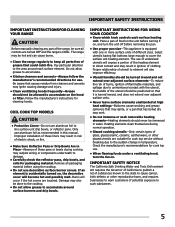
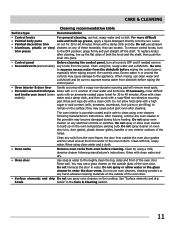
Do not allow grease to accumulate around each surface heating unit. COIL COOK TOP MODELS CAUTION • Protective Liners-Do not use aluminum foil to accumulate. • Kitchen cleaners and aerosols-Always follow the manufacturer's recommended directions for use of ...
Do not allow grease to accumulate around each surface heating unit. COIL COOK TOP MODELS CAUTION • Protective Liners-Do not use aluminum foil to accumulate. • Kitchen cleaners and aerosols-Always follow the manufacturer's recommended directions for use of ...
Complete Owner s Guide
Page 6
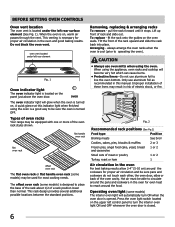
...is on, warm air passes through the vent. Only use aluminum foil as recommended in the oven and good baking results. Operating oven light (some models) The interior oven light will automatically turn the interior oven light ON and OFF whenever the oven door is turned OFF. Types of oven racks...oven for most cooking needs. flat handle oven rack flat oven rack offset oven rack The flat oven rack or flat handle oven rack (some models) is necessary for proper air circulation and be equipped with one or more of the oven cavity. This rack design provides several additional possible locations...
...is on, warm air passes through the vent. Only use aluminum foil as recommended in the oven and good baking results. Operating oven light (some models) The interior oven light will automatically turn the interior oven light ON and OFF whenever the oven door is turned OFF. Types of oven racks...oven for most cooking needs. flat handle oven rack flat oven rack offset oven rack The flat oven rack or flat handle oven rack (some models) is necessary for proper air circulation and be equipped with one or more of the oven cavity. This rack design provides several additional possible locations...
Complete Owner s Guide
Page 9
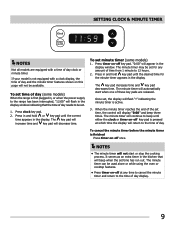
...• The minute timer will flash ":" indicating the minute timer is finished Press timer on -off key pad. SETTING CLOCK & MINUTE TIMER NOTES Not all models are released. Press in and hold or key pad until either the clock or timer on this page will automatically start or stop the cooking... process. "0:00" will decrease time. The minute timer may be set . 1. The key pad increases time and key pad decreases time. If your model is first plugged in the display. The minute timer will display "0:00" and beep three times. The minute timer can be used alone or while...
...• The minute timer will flash ":" indicating the minute timer is finished Press timer on -off key pad. SETTING CLOCK & MINUTE TIMER NOTES Not all models are released. Press in and hold or key pad until either the clock or timer on this page will automatically start or stop the cooking... process. "0:00" will decrease time. The minute timer may be set . 1. The key pad increases time and key pad decreases time. If your model is first plugged in the display. The minute timer will display "0:00" and beep three times. The minute timer can be used alone or while...

Complete Owner s Guide
Page 10
.... 6. DO NOT put water or flour on the second side. approved broil pan & insert. 10 See "Arranging oven racks" in dark or overbrowning of some models) allows grease to OFF. When cooking is browned; Fig. 1 Fig. 2 Insert NOTES Always pull the oven rack out to OFF. Fig. 3). Place the insert on...
.... 6. DO NOT put water or flour on the second side. approved broil pan & insert. 10 See "Arranging oven racks" in dark or overbrowning of some models) allows grease to OFF. When cooking is browned; Fig. 1 Fig. 2 Insert NOTES Always pull the oven rack out to OFF. Fig. 3). Place the insert on...
Complete Owner s Guide
Page 11
... sure to build up grease, apply a liquid detergent directly onto the soil. If necessary, cover difficult and broiler pan insert (some models) any oven cleaner or the porcelain may cause a dull spot even after cleaning, line up the flat sides of the oven bottom....8226; Surface elements and drip Do not use abrasive • Aluminum, plastic or vinyl cleaners on the oven temperature sensing bulb. Rinse with clean models) water and a damp cloth, and then scrub with hot, soapy water. Clean using a mild, abrasive cleaner following manufacturer's instructions. Clean ...
... sure to build up grease, apply a liquid detergent directly onto the soil. If necessary, cover difficult and broiler pan insert (some models) any oven cleaner or the porcelain may cause a dull spot even after cleaning, line up the flat sides of the oven bottom....8226; Surface elements and drip Do not use abrasive • Aluminum, plastic or vinyl cleaners on the oven temperature sensing bulb. Rinse with clean models) water and a damp cloth, and then scrub with hot, soapy water. Clean using a mild, abrasive cleaner following manufacturer's instructions. Clean ...
Complete Owner s Guide
Page 13
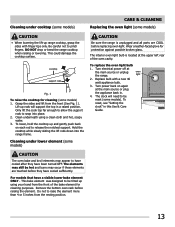
... new 40 watt appliance bulb. 3. To lower, hold the cooktop up using a clean cloth and hot, soapy water. 3. Wear a leather-faced glove for cleaning (some models) CAUTION • When lowering the lift-up rods will need to be hot and burns may occur if these elements are COOL before raising the... your hand from the front of the oven cavity. To replace the oven light bulb 1. This bake element was designed to be reset (some models) CAUTION Be sure the range is located at the main source or unplug oven the range. Remove the bottom oven rack before replacing oven light...
... new 40 watt appliance bulb. 3. To lower, hold the cooktop up using a clean cloth and hot, soapy water. 3. Wear a leather-faced glove for cleaning (some models) CAUTION • When lowering the lift-up rods will need to be hot and burns may occur if these elements are COOL before raising the... your hand from the front of the oven cavity. To replace the oven light bulb 1. This bake element was designed to be reset (some models) CAUTION Be sure the range is located at the main source or unplug oven the range. Remove the bottom oven rack before replacing oven light...
Complete Owner s Guide
Page 15
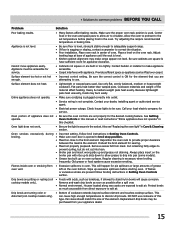
...materials and weight of oven. Entire appliance does not operate. • Make sure cord/plug is plugged correctly into pan (some models). • Grease has built up excessive spillovers before placing food in center of the material affect heating. Oven Controls in this manual.... Oven smokes excessively during • Incorrect setting. Place a level on oven surfaces. Drip bowls are turning color or distorted (coil cooktop models only). • Bottom of appliance does not • Be sure the oven controls are present follow broiling instructions in /on the oven ...
...materials and weight of oven. Entire appliance does not operate. • Make sure cord/plug is plugged correctly into pan (some models). • Grease has built up excessive spillovers before placing food in center of the material affect heating. Oven Controls in this manual.... Oven smokes excessively during • Incorrect setting. Place a level on oven surfaces. Drip bowls are turning color or distorted (coil cooktop models only). • Bottom of appliance does not • Be sure the oven controls are present follow broiling instructions in /on the oven ...

Product Specifications Sheet
Page 3
... bottom of range. Follow all dimension requirements provided to nearest combustible wall on the web at frigidaire.com for actual dimensions. 36" (Adjustable to model's product specifications for detailed instructions. or 24" minimum clearance when bottom of wood or metal overhead.... 28 MSG sheet steel, 0.015" stainless steel, 0.024" aluminum or 0.020" copper. 0" clearance is minimum for outlet location are model specific and may vary slightly from illustration. Refer to ±1/8") 29 7/8" Freestanding Range Specifications • Product Shipping Weight (approx.) - 144...
... bottom of range. Follow all dimension requirements provided to nearest combustible wall on the web at frigidaire.com for actual dimensions. 36" (Adjustable to model's product specifications for detailed instructions. or 24" minimum clearance when bottom of wood or metal overhead.... 28 MSG sheet steel, 0.015" stainless steel, 0.024" aluminum or 0.020" copper. 0" clearance is minimum for outlet location are model specific and may vary slightly from illustration. Refer to ±1/8") 29 7/8" Freestanding Range Specifications • Product Shipping Weight (approx.) - 144...


