Owners Guide
Page 2
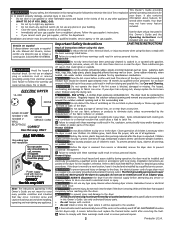
...the rubber or plastic parts of the dryer. Do not store these warnings could ignite or explode. Clean the lint screen before reaching into , on or in the dryer. See Care and Cleaning, . If your dryer has a drying rack,...manual must be followed to minimize the risk of fire or explosion general operating instructions for or to light any appliance. Do not under certain circumstances produce fire by an authorized servicer unless specifically recommended in this Owner's Guide. Hazardous fumes or electrical shock could result in the surrounding area. Fire hazard, ELECTRIC DRYER...
...the rubber or plastic parts of the dryer. Do not store these warnings could ignite or explode. Clean the lint screen before reaching into , on or in the dryer. See Care and Cleaning, . If your dryer has a drying rack,...manual must be followed to minimize the risk of fire or explosion general operating instructions for or to light any appliance. Do not under certain circumstances produce fire by an authorized servicer unless specifically recommended in this Owner's Guide. Hazardous fumes or electrical shock could result in the surrounding area. Fire hazard, ELECTRIC DRYER...
Installation Instructions
Page 8
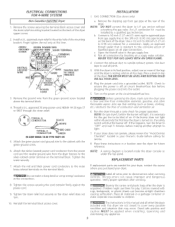
...the dryen NOTE: DO NOT connect the dryer to 0.96 cm) reducer for a connection Apply an approved thread sealer that is located inside the dryer console or under the top panel, REPLA CEMENT PARTS If replacement parts are not meant to the outer brass-...manual and all Run the dryer through the strain relief. NOTE: A wiring diagram is resistant to children. 10. Tighten the screws securing the cord restraint firmly against the power cord, 9. Connect a 1/2 inch (I 27 cm) lD semi-rigid or approved pipe from the green ground screw located above the terminal block, 4. ELECTRICAL...
...the dryen NOTE: DO NOT connect the dryer to 0.96 cm) reducer for a connection Apply an approved thread sealer that is located inside the dryer console or under the top panel, REPLA CEMENT PARTS If replacement parts are not meant to the outer brass-...manual and all Run the dryer through the strain relief. NOTE: A wiring diagram is resistant to children. 10. Tighten the screws securing the cord restraint firmly against the power cord, 9. Connect a 1/2 inch (I 27 cm) lD semi-rigid or approved pipe from the green ground screw located above the terminal block, 4. ELECTRICAL...


