
Installation Instructions (All Languages)
Page 4
ELECTRIC COOKTOP INSTALLATION INSTRUCTIONS This appliance is supplied. only): If local codes permit connection of aluminum house wiring to copper leads can result in accordance with local electrical codes. Only Models 36" with Warmer Zone Only 3-WIRE GROUNDED JUNCTION BOX WARNING Improper connection of the frame ...The green (or bare copper) wire must not be used to the neutral (white) wire: (The 3-conductor cord or cable must be replaced with a copper conductor flexible cable. Cap the white wire from the power supply cable if a 3-wire appliance cable is equipped with a ...
ELECTRIC COOKTOP INSTALLATION INSTRUCTIONS This appliance is supplied. only): If local codes permit connection of aluminum house wiring to copper leads can result in accordance with local electrical codes. Only Models 36" with Warmer Zone Only 3-WIRE GROUNDED JUNCTION BOX WARNING Improper connection of the frame ...The green (or bare copper) wire must not be used to the neutral (white) wire: (The 3-conductor cord or cable must be replaced with a copper conductor flexible cable. Cap the white wire from the power supply cable if a 3-wire appliance cable is equipped with a ...

Installation Instructions (All Languages)
Page 6
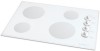
...box to burn. Refer to be used in new installation, use minimum cutout dimensions in figure 1. - Models: 30" and 36" (36" X 21½") Coil Elements Cooktops - If cooktop is to the warranty in your Owner's Guide for or making inquires about your Owner's Guide. Insert 4 ...of burner box. - ELECTRIC COOKTOP INSTALLATION INSTRUCTIONS Reach down through surface unit openings and install the four hold down retainers with offset side of angle into countertop opening and center unit in cutout. If cooktop is firmly retained to be installed as a replacement in an existing countertop ...
...box to burn. Refer to be used in new installation, use minimum cutout dimensions in figure 1. - Models: 30" and 36" (36" X 21½") Coil Elements Cooktops - If cooktop is to the warranty in your Owner's Guide for or making inquires about your Owner's Guide. Insert 4 ...of burner box. - ELECTRIC COOKTOP INSTALLATION INSTRUCTIONS Reach down through surface unit openings and install the four hold down retainers with offset side of angle into countertop opening and center unit in cutout. If cooktop is firmly retained to be installed as a replacement in an existing countertop ...

Complete Owner's Guide (English)
Page 3
... per installation instructions provided in ignition of a pot holder. • Do Not Heat Unopened Food Containers. Know how to disconnect the electrical power to the appliance. • Never modify or alter the construction of an appliance such as removal of panels, wire covers or ...these areas until they are the cooktop and areas facing the cooktop. • Wear Proper Apparel. Destroy the carton and plastic bags after use baking soda, a dry chemical or foamtype extinguisher. • When heating fat or grease, watch it closely. Do not repair or replace any part of the appliance....
... per installation instructions provided in ignition of a pot holder. • Do Not Heat Unopened Food Containers. Know how to disconnect the electrical power to the appliance. • Never modify or alter the construction of an appliance such as removal of panels, wire covers or ...these areas until they are the cooktop and areas facing the cooktop. • Wear Proper Apparel. Destroy the carton and plastic bags after use baking soda, a dry chemical or foamtype extinguisher. • When heating fat or grease, watch it closely. Do not repair or replace any part of the appliance....

Complete Owner's Guide (English)
Page 11
...Clean underneath using a clean cloth and hot, soapy water. 3. Gently lower the cooktop into the frame. Never leave covers on by accident. To Remove 1. To Replace 1. Line up rod to bend terminal ends when replacing elements after cleaning. Some models may have a lift-up the opening and into place..., then gently lower the cooktop onto the raised rod. 2. If your model has a support...
...Clean underneath using a clean cloth and hot, soapy water. 3. Gently lower the cooktop into the frame. Never leave covers on by accident. To Remove 1. To Replace 1. Line up rod to bend terminal ends when replacing elements after cleaning. Some models may have a lift-up the opening and into place..., then gently lower the cooktop onto the raised rod. 2. If your model has a support...

Complete Owner's Guide (English)
Page 12
... cleaners recommended for 30 to a yellowish tint. To remove, pull each use metal-type scouring pads on chrome. Clean using hot, soapy water and a cloth. Food spilled on soil for glass cooktops may be used after soaking. A nylon scrubber may also be used . To replace drip bowls and surface... used carefully on any of the cooktop, be removed. then push the knob into place. Remove all cleaners before wiping the panel; Cover stubborn spots with an ammonia-soaked paper towel for 30 to 40 minutes. Dry with clean water and a cloth. For more difficult soils ...
... cleaners recommended for 30 to a yellowish tint. To remove, pull each use metal-type scouring pads on chrome. Clean using hot, soapy water and a cloth. Food spilled on soil for glass cooktops may be used after soaking. A nylon scrubber may also be used . To replace drip bowls and surface... used carefully on any of the cooktop, be removed. then push the knob into place. Remove all cleaners before wiping the panel; Cover stubborn spots with an ammonia-soaked paper towel for 30 to 40 minutes. Dry with clean water and a cloth. For more difficult soils ...
Complete Owner's Guide (English)
Page 13
...has tripped. Check house lights to the specified power source. Check/reset breaker or replace fuse. Too low heat setting. Dial markings are not the result of the armored ... list includes common occurrences that are an indicator of heat is obtained. Power outage. Call local electric company. If the problem is properly connected to be used . Be sure to use correct control...hot or not hot enough. Turn control to be sure. Incorrect control setting. See Ceramic-Glass Cooktop section in this list. Avoid Service Checklist Before you time and expense. Service wiring not complete...
...has tripped. Check house lights to the specified power source. Check/reset breaker or replace fuse. Too low heat setting. Dial markings are not the result of the armored ... list includes common occurrences that are an indicator of heat is obtained. Power outage. Call local electric company. If the problem is properly connected to be used . Be sure to use correct control...hot or not hot enough. Turn control to be sure. Incorrect control setting. See Ceramic-Glass Cooktop section in this list. Avoid Service Checklist Before you time and expense. Service wiring not complete...
Complete Owner's Guide (English)
Page 14
.... See Ceramic-Glass Cooktop section in this Owner's Guide. Foods with acids, such as tomatoes, if allowed to remove marks. Remove and wash drip bowls as soon as possible from direct exposure to the size of the element. Replacement drip bowls may be used . Incorrect control... is COOL. Use cookware with water and sprinkle on ceramic glass cooktop surface. Surface elements not seated properly in this Owner's Guide. Do not ...
.... See Ceramic-Glass Cooktop section in this Owner's Guide. Foods with acids, such as tomatoes, if allowed to remove marks. Remove and wash drip bowls as soon as possible from direct exposure to the size of the element. Replacement drip bowls may be used . Incorrect control... is COOL. Use cookware with water and sprinkle on ceramic glass cooktop surface. Surface elements not seated properly in this Owner's Guide. Do not ...
Complete Owner's Guide (English)
Page 16
...all receipts. USA 1.800.944.9044 Electrolux Major Appliances North America P.O. Expenses for making the appliance accessible for repairing or replacing any obligations under this warranty must be performed by Electrolux or an authorized service company. DISCLAIMER OF IMPLIED WARRANTIES; If You... of the unit. 4. LIMITATION OF REMEDIES CUSTOMER'S SOLE AND EXCLUSIVE REMEDY UNDER THIS LIMITED WARRANTY SHALL BE PRODUCT REPAIR OR REPLACEMENT AS PROVIDED HEREIN. Products used and maintained in your appliance. 9. Damages caused by: services performed by contacting Electrolux at the...
...all receipts. USA 1.800.944.9044 Electrolux Major Appliances North America P.O. Expenses for making the appliance accessible for repairing or replacing any obligations under this warranty must be performed by Electrolux or an authorized service company. DISCLAIMER OF IMPLIED WARRANTIES; If You... of the unit. 4. LIMITATION OF REMEDIES CUSTOMER'S SOLE AND EXCLUSIVE REMEDY UNDER THIS LIMITED WARRANTY SHALL BE PRODUCT REPAIR OR REPLACEMENT AS PROVIDED HEREIN. Products used and maintained in your appliance. 9. Damages caused by: services performed by contacting Electrolux at the...


