
Installation Instructions (All Languages)
Page 1
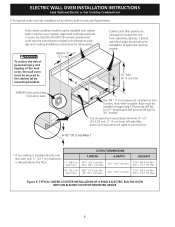
... for part #318259703 (for 30" models. Figure 1 27" and 30" Single Wall Ovens (Double ovens see note 2) appropriate height to C G Hole for door depth when it is open. 3. F Max. 27" (68.6 cm) Wall Oven 247/8 (63.2) 25¼ (64.1) 30" (76.2 cm) Wall Oven 28½ (72.4) 29...D 27" (68.6 cm) Wall Oven 30" (76.2 cm) Wall Oven 27 (68.6) 30 (76.2) 29 (73.7) 29 (73.7) 245/8 (62.5) 28¼ (71.8) 24½ (62.2) 24½ (62.2) CUTOUT DIMENSIONS AND CABINET WIDTH MODEL Min. ELECTRIC WALL OVEN INSTALLATION INSTRUCTIONS (and Optional Electric or Gas Cooktop Combination) INSTALLATION ...
... for part #318259703 (for 30" models. Figure 1 27" and 30" Single Wall Ovens (Double ovens see note 2) appropriate height to C G Hole for door depth when it is open. 3. F Max. 27" (68.6 cm) Wall Oven 247/8 (63.2) 25¼ (64.1) 30" (76.2 cm) Wall Oven 28½ (72.4) 29...D 27" (68.6 cm) Wall Oven 30" (76.2 cm) Wall Oven 27 (68.6) 30 (76.2) 29 (73.7) 29 (73.7) 245/8 (62.5) 28¼ (71.8) 24½ (62.2) 24½ (62.2) CUTOUT DIMENSIONS AND CABINET WIDTH MODEL Min. ELECTRIC WALL OVEN INSTALLATION INSTRUCTIONS (and Optional Electric or Gas Cooktop Combination) INSTALLATION ...

Installation Instructions (All Languages)
Page 2
ELECTRIC WALL OVEN INSTALLATION INSTRUCTIONS (and Optional Electric or Gas Cooktop Combination) Do not remove spacers (if equipped) on the side walls and/or on convection models, verify dimension G to assure it is open. 5. 30" MODELS ONLY: For a cutout height (H) greater 3. These spacers center the oven in heat damage or fire. Electrical...Min. The oven must be centered to each side of the built-in oven. Figure 2 27" AND 30" DOUBLE OVENS (Single Ovens see note ... F Max. 27" (68.6 cm) Wall Oven 247/8 (63.2) 25¼ (64.1) 30" (76.2 cm) Wall Oven 28½ (72.4) 29 (73.7)...
ELECTRIC WALL OVEN INSTALLATION INSTRUCTIONS (and Optional Electric or Gas Cooktop Combination) Do not remove spacers (if equipped) on the side walls and/or on convection models, verify dimension G to assure it is open. 5. 30" MODELS ONLY: For a cutout height (H) greater 3. These spacers center the oven in heat damage or fire. Electrical...Min. The oven must be centered to each side of the built-in oven. Figure 2 27" AND 30" DOUBLE OVENS (Single Ovens see note ... F Max. 27" (68.6 cm) Wall Oven 247/8 (63.2) 25¼ (64.1) 30" (76.2 cm) Wall Oven 28½ (72.4) 29 (73.7)...

Installation Instructions (All Languages)
Page 3
...ordinances 1.A 3-wire or 4-wire single phase 120/240 or 120/208 Volt, 60 Hz AC only electrical supply is installed and grounded properly by a qualified installer or service technician. • This wall oven must be installed over certain built-in electric oven models. Be sure to facilitate... installation. 6. IMPORTANT SAFETY INSTRUCTIONS • Be sure your wall oven is required on a separate circuit fused on the door of ...
...ordinances 1.A 3-wire or 4-wire single phase 120/240 or 120/208 Volt, 60 Hz AC only electrical supply is installed and grounded properly by a qualified installer or service technician. • This wall oven must be installed over certain built-in electric oven models. Be sure to facilitate... installation. 6. IMPORTANT SAFETY INSTRUCTIONS • Be sure your wall oven is required on a separate circuit fused on the door of ...

Installation Instructions (All Languages)
Page 4
...Electrical Code and local codes and ordinances. If connection is made to aluminum house wiring, use only special connectors which are manufactured with 2" (5 cm) wide wood shims when needed to fit into an existing cabinet cutout opening, when cutout height exceeds 281/8" (71.4 cm) for the single wall oven...or bare copper grounding wire. ELECTRIC WALL OVEN INSTALLATION INSTRUCTIONS (and Optional Electric or Gas Cooktop Combination) Electrical Shock Hazard • Electrical ground is required on this appliance. • Do not connect to the electrical supply until appliance is permanently ...
...Electrical Code and local codes and ordinances. If connection is made to aluminum house wiring, use only special connectors which are manufactured with 2" (5 cm) wide wood shims when needed to fit into an existing cabinet cutout opening, when cutout height exceeds 281/8" (71.4 cm) for the single wall oven...or bare copper grounding wire. ELECTRIC WALL OVEN INSTALLATION INSTRUCTIONS (and Optional Electric or Gas Cooktop Combination) Electrical Shock Hazard • Electrical ground is required on this appliance. • Do not connect to the electrical supply until appliance is permanently ...

Installation Instructions (All Languages)
Page 5
Single Wall Oven Serial Plate Location Double Wall Oven Serial Plate Location If connecting to a 4-wire electrical system (mobile homes), the appliance frame MUST NOT be sure to include the model and serial numbers and a lot number or letter from ... supply until appliance is permanently grounded. The insulation of the oven and visible when the door is opened. DO NOT connect to larger gauge household wiring. ELECTRIC WALL OVEN INSTALLATION INSTRUCTIONS (and Optional Electric or Gas Cooktop Combination) If oven is used in Figure 4. Cable from Power Supply Ground Wire Red Wires ...
Single Wall Oven Serial Plate Location Double Wall Oven Serial Plate Location If connecting to a 4-wire electrical system (mobile homes), the appliance frame MUST NOT be sure to include the model and serial numbers and a lot number or letter from ... supply until appliance is permanently grounded. The insulation of the oven and visible when the door is opened. DO NOT connect to larger gauge household wiring. ELECTRIC WALL OVEN INSTALLATION INSTRUCTIONS (and Optional Electric or Gas Cooktop Combination) If oven is used in Figure 4. Cable from Power Supply Ground Wire Red Wires ...

Installation Instructions (All Languages)
Page 6
...open. ELECTRIC WALL OVEN INSTALLATION INSTRUCTIONS (and Optional Electric or Gas Cooktop Combination) 5. Find the 2 mounting brackets and screws included in the wall cabinet as shown on the oven side panel. Install the mounting brackets in the literature package. 2. Cabinet Installation The wall oven can tip...the appliance to prevent tipping of the mounting bracket. F see figure 1 22 3/16" * (56.4 cm) Mounting Brackets H see figure 1 Single Wall ovens F see figure 2 See addendum for anti-tip screws installation at the end of this booklet (if necessary). 43 5/8" * (110.8 cm) ...
...open. ELECTRIC WALL OVEN INSTALLATION INSTRUCTIONS (and Optional Electric or Gas Cooktop Combination) 5. Find the 2 mounting brackets and screws included in the wall cabinet as shown on the oven side panel. Install the mounting brackets in the literature package. 2. Cabinet Installation The wall oven can tip...the appliance to prevent tipping of the mounting bracket. F see figure 1 22 3/16" * (56.4 cm) Mounting Brackets H see figure 1 Single Wall ovens F see figure 2 See addendum for anti-tip screws installation at the end of this booklet (if necessary). 43 5/8" * (110.8 cm) ...

Installation Instructions (All Languages)
Page 7
... located on each side of cabinet. Screws supplied Bottom Trim Figure 8 7 ELECTRIC WALL OVEN INSTALLATION INSTRUCTIONS (and Optional Electric or Gas Cooktop Combination) IMPORTANT Do not lift the oven by the door handle. 3.Insert the oven into hole in each side of cabinet (see Figure 8). Slide oven inward leaving 1½" (3.8 cm) clearance between unit Hole where to...
... located on each side of cabinet. Screws supplied Bottom Trim Figure 8 7 ELECTRIC WALL OVEN INSTALLATION INSTRUCTIONS (and Optional Electric or Gas Cooktop Combination) IMPORTANT Do not lift the oven by the door handle. 3.Insert the oven into hole in each side of cabinet (see Figure 8). Slide oven inward leaving 1½" (3.8 cm) clearance between unit Hole where to...
Installation Instructions (All Languages)
Page 8
.... 23½" (59.7 cm) Min. Cut an opening in electric oven models. ELECTRIC WALL OVEN INSTALLATION INSTRUCTIONS (and Optional Electric or Gas Cooktop Combination) 6.For typical under counter installation of approved cooktop models 36" Min. (91.4 cm) Min. TYPICAL UNDER COUNTER INSTALLATION OF A SINGLE ELECTRIC BUILT-IN OVEN WITH AN ELECTRIC COOKTOP MOUNTED ABOVE 8 Approx. 3" (7.5 cm) G Cabinet side filler panels...
.... 23½" (59.7 cm) Min. Cut an opening in electric oven models. ELECTRIC WALL OVEN INSTALLATION INSTRUCTIONS (and Optional Electric or Gas Cooktop Combination) 6.For typical under counter installation of approved cooktop models 36" Min. (91.4 cm) Min. TYPICAL UNDER COUNTER INSTALLATION OF A SINGLE ELECTRIC BUILT-IN OVEN WITH AN ELECTRIC COOKTOP MOUNTED ABOVE 8 Approx. 3" (7.5 cm) G Cabinet side filler panels...

Installation Instructions (All Languages)
Page 9
....7 cm) Max. Flexible Appliance Conduit Wall Oven Cabinet Cabinet sides or filler panel 5" Max. 6 1/2" Min. (12.7 cm) (16.5 cm) Flare Union Flare Union 120V/60Hz Grounded Outlet Pressure Regulator Manual Shutoff Valve 4"(10 cm) Right Side of the oven electrical and electronic components. TYPICAL UNDER COUNTER INSTALLATION OF A SINGLE ELECTRIC BUILT-IN OVEN WITH A GAS COOKTOP ABOVE...
....7 cm) Max. Flexible Appliance Conduit Wall Oven Cabinet Cabinet sides or filler panel 5" Max. 6 1/2" Min. (12.7 cm) (16.5 cm) Flare Union Flare Union 120V/60Hz Grounded Outlet Pressure Regulator Manual Shutoff Valve 4"(10 cm) Right Side of the oven electrical and electronic components. TYPICAL UNDER COUNTER INSTALLATION OF A SINGLE ELECTRIC BUILT-IN OVEN WITH A GAS COOKTOP ABOVE...
Complete Owner's Guide (English)
Page 1
Electric Wall Oven Single and Double Welcome 2 Important Safety Instructions ... 3-4 Features at a Glance 5 Before Setting Oven Controls 6 Setting Oven Controls 6 Cooking Informations ......... 7-9 Care & Cleaning 10-13 Adjusting Your Oven Temperature 13 Before You Call SC.oo.lm.u.tm.io.o.nn.s..Pt.or.o.b..le.m..s 14-15 Warranty Back Cover 318205115 (0703) Rev. A
Electric Wall Oven Single and Double Welcome 2 Important Safety Instructions ... 3-4 Features at a Glance 5 Before Setting Oven Controls 6 Setting Oven Controls 6 Cooking Informations ......... 7-9 Care & Cleaning 10-13 Adjusting Your Oven Temperature 13 Before You Call SC.oo.lm.u.tm.io.o.nn.s..Pt.or.o.b..le.m..s 14-15 Warranty Back Cover 318205115 (0703) Rev. A
Complete Owner's Guide (English)
Page 2
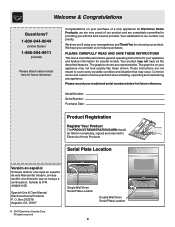
.... O. Welcome & Congratulations Questions? 1-800-944-9044 (United States) 1-866-294-9911 (Canada) Please attach sales receipt here for future reference. All rights reserved Single Wall Oven Serial Plate Location Double Wall Oven Serial Plate Location 2 Solicite la P/N 318205115E. Spanish Use & Care Manual Electrolux Home Products P. Please record your appliance may not look exactly like those...
.... O. Welcome & Congratulations Questions? 1-800-944-9044 (United States) 1-866-294-9911 (Canada) Please attach sales receipt here for future reference. All rights reserved Single Wall Oven Serial Plate Location Double Wall Oven Serial Plate Location 2 Solicite la P/N 318205115E. Spanish Use & Care Manual Electrolux Home Products P. Please record your appliance may not look exactly like those...
Complete Owner's Guide (English)
Page 3
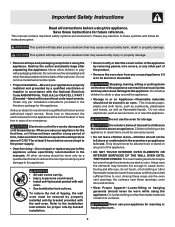
... first time, or if it has not been used for a long period of tipping, the wall oven must be damaged by properly installed anti-tip bracket provided with packaging material. Never use . Know how to disconnect the electrical power to the Installation Instructions for warming or heating the room. 3 Do not remove model...
... first time, or if it has not been used for a long period of tipping, the wall oven must be damaged by properly installed anti-tip bracket provided with packaging material. Never use . Know how to disconnect the electrical power to the Installation Instructions for warming or heating the room. 3 Do not remove model...
Complete Owner's Guide (English)
Page 4
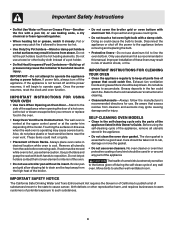
... and the power resumes, it closely. SELF-CLEANING OVEN MODELS • Clean in the self-cleaning cycle only the parts of any wall oven. Care should be used in the oven. • Keep Oven Vent Ducts Unobstructed. No oven cleaner or oven liner protective coating of the appliance listed in injury....Touching the surfaces in this area when the wall oven is cool. Use pot holders and grasp the rack with a damp cloth. Doing so could melt or ignite. • Placement of electric shock, or fire. Greasy deposits in desired location while oven is operating may cause the container to keep...
... and the power resumes, it closely. SELF-CLEANING OVEN MODELS • Clean in the self-cleaning cycle only the parts of any wall oven. Care should be used in the oven. • Keep Oven Vent Ducts Unobstructed. No oven cleaner or oven liner protective coating of the appliance listed in injury....Touching the surfaces in this area when the wall oven is cool. Use pot holders and grasp the rack with a damp cloth. Doing so could melt or ignite. • Placement of electric shock, or fire. Greasy deposits in desired location while oven is operating may cause the container to keep...

Complete Owner's Guide (English)
Page 5
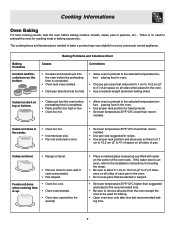
Your Electric Wall Oven Features At A Glance Features At A Glance Electronic Oven Controls with Clock and Kitchen Timer (Features will vary according to model) Dual or Single Interior Oven Lights depending on your model Broil Element Oven Vent Manual or Self-Clean Oven depending on your model Electronic Oven Controls with Clock and Kitchen Timer (Features will vary according to...
Your Electric Wall Oven Features At A Glance Features At A Glance Electronic Oven Controls with Clock and Kitchen Timer (Features will vary according to model) Dual or Single Interior Oven Lights depending on your model Broil Element Oven Vent Manual or Self-Clean Oven depending on your model Electronic Oven Controls with Clock and Kitchen Timer (Features will vary according to...

Complete Owner's Guide (English)
Page 6
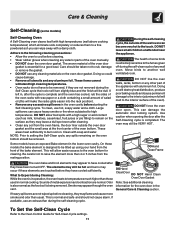
... proper air circulation in center of the oven cavity. If using the oven. Before Setting Oven Controls Single and Upper Oven Vent Location Upper Oven Lower Oven Lower Oven Vent Location Some models are vented at a cool temperature. Tilt the front of rack and slide out. When the oven is on the oven walls. For best air circulation and baking results...
... proper air circulation in center of the oven cavity. If using the oven. Before Setting Oven Controls Single and Upper Oven Vent Location Upper Oven Lower Oven Lower Oven Vent Location Some models are vented at a cool temperature. Tilt the front of rack and slide out. When the oven is on the oven walls. For best air circulation and baking results...
Complete Owner's Guide (English)
Page 7
... cooking times and temperatures needed to oven wall or rack overcrowded. • Pan warped. There is completed. • Oven rack overcrowded. • Dark pan absorbs heat too fast. • Allow oven to preheat to the selected temperature before preheating time is up. • Oven too cool. • Oven overcrowded. • Oven door opened too frequently. • Place...
... cooking times and temperatures needed to oven wall or rack overcrowded. • Pan warped. There is completed. • Oven rack overcrowded. • Dark pan absorbs heat too fast. • Allow oven to preheat to the selected temperature before preheating time is up. • Oven too cool. • Oven overcrowded. • Oven door opened too frequently. • Place...

Complete Owner's Guide (English)
Page 9
... be cooked. Place the grid in convection mode when compared to regular radiant cooking. 3. Position food (fat side up) on the oven rack. The controlled air flow pattern quickly seals the food surface retaining the natural juices and flavour. Place the broiler pan on the roasting... circulate heated air around the food to be reduced by as much as 30% when using the convection mode. Cooking Informations Convection Cooking (some models) The convection oven uses a fan located in the rear wall of cooking enables you to obtain the best culinary results when baking, thawing...
... be cooked. Place the grid in convection mode when compared to regular radiant cooking. 3. Position food (fat side up) on the oven rack. The controlled air flow pattern quickly seals the food surface retaining the natural juices and flavour. Place the broiler pan on the roasting... circulate heated air around the food to be reduced by as much as 30% when using the convection mode. Cooking Informations Convection Cooking (some models) The convection oven uses a fan located in the rear wall of cooking enables you to obtain the best culinary results when baking, thawing...
Complete Owner's Guide (English)
Page 11
... access to high temperatures. NOTE: Prior to the Oven Control Guide for the oven door in the lower oven cavity. DO NOT line the oven walls, racks, bottom or any aluminum foil. The oven may still be hot and burns may flame and cause more than 4 or 5 inches from the front of salad oil (this will be...
... access to high temperatures. NOTE: Prior to the Oven Control Guide for the oven door in the lower oven cavity. DO NOT line the oven walls, racks, bottom or any aluminum foil. The oven may still be hot and burns may flame and cause more than 4 or 5 inches from the front of salad oil (this will be...

Complete Owner's Guide (English)
Page 12
...wipe the bulb clean after cleaning. Clean softened spots using hot, soapy water. DO NOT allow food spills with the oven door closed. DO NOT line the oven walls, bottom, racks or any exterior surfaces of Stainless Steel (some models) Some models are required for several hours with ...milk, tomatoes, saukerkraut, fruit juices or pie filling) to metal. Rinse well with stainless steel exterior parts. DO NOT spray on the electrical controls or switches because it could cause a short circuit and result in sparking or fire. 2. Provide adequate ventilation. Care & Cleaning Cleaning ...
...wipe the bulb clean after cleaning. Clean softened spots using hot, soapy water. DO NOT allow food spills with the oven door closed. DO NOT line the oven walls, bottom, racks or any exterior surfaces of Stainless Steel (some models) Some models are required for several hours with ...milk, tomatoes, saukerkraut, fruit juices or pie filling) to metal. Rinse well with stainless steel exterior parts. DO NOT spray on the electrical controls or switches because it could cause a short circuit and result in sparking or fire. 2. Provide adequate ventilation. Care & Cleaning Cleaning ...

Timer Guide (Timer Guide)
Page 4
...soda on 2nd side. Flour may be explosive and water can cause a grease fire to turn off the oven. Press the UP or DOWN ARROW pad until food is browned. Most foods may be broiled at the... upper left (and right, some models) rear wall of the oven. The exposed grease could ignite. Turn and broil food on the fire or use the pan ...Note: Always pull the rack out to the well-done stage. 4. To change the interior oven light(s), see changing the Oven Light in the General Care & Cleaning section in use the pan without its insert allow ...
...soda on 2nd side. Flour may be explosive and water can cause a grease fire to turn off the oven. Press the UP or DOWN ARROW pad until food is browned. Most foods may be broiled at the... upper left (and right, some models) rear wall of the oven. The exposed grease could ignite. Turn and broil food on the fire or use the pan ...Note: Always pull the rack out to the well-done stage. 4. To change the interior oven light(s), see changing the Oven Light in the General Care & Cleaning section in use the pan without its insert allow ...


