
User Manual
Page 2
... product or unauthorized modifications, repairs, or alterations to this EPSON printer. EPSON is registered trademark, and EPSON Exceed Your Vision is subject to other than those marks. No part of Seiko Epson Corporation. Epson disclaims any means, electronic, mechanical, photocopying, recording, or... otherwise, without notice. © 2012 Epson America, Inc. 3/12 CPD-36618 Copyrights and Trademarks 2 This ...
... product or unauthorized modifications, repairs, or alterations to this EPSON printer. EPSON is registered trademark, and EPSON Exceed Your Vision is subject to other than those marks. No part of Seiko Epson Corporation. Epson disclaims any means, electronic, mechanical, photocopying, recording, or... otherwise, without notice. © 2012 Epson America, Inc. 3/12 CPD-36618 Copyrights and Trademarks 2 This ...
User Manual
Page 3
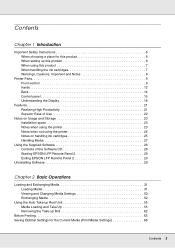
... When setting up this product 6 When using this product 7 When handling the ink cartridges 7 Warnings, Cautions, Important and Notes 8 Printer Parts 9 Front section 9 Inside 12 Back 14 Control panel 15 Understanding the Display 18 Features 21 Realizing High Productivity 21 Superior Ease of Use 22...on handling ink cartridges 25 Handling Media 27 Using the Supplied Software 28 Contents of the Software CD 28 Starting EPSON LFP Remote Panel 2 29 Exiting EPSON LFP Remote Panel 2 29 Uninstalling Software 29 Chapter 2 Basic Operations Loading and Exchanging Media 31 Loading Media ...
... When setting up this product 6 When using this product 7 When handling the ink cartridges 7 Warnings, Cautions, Important and Notes 8 Printer Parts 9 Front section 9 Inside 12 Back 14 Control panel 15 Understanding the Display 18 Features 21 Realizing High Productivity 21 Superior Ease of Use 22...on handling ink cartridges 25 Handling Media 27 Using the Supplied Software 28 Contents of the Software CD 28 Starting EPSON LFP Remote Panel 2 29 Exiting EPSON LFP Remote Panel 2 29 Uninstalling Software 29 Chapter 2 Basic Operations Loading and Exchanging Media 31 Loading Media ...
User Manual
Page 4
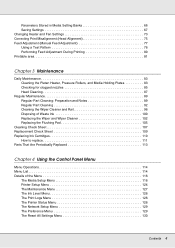
..., Pressure Rollers, and Media Holding Plates 83 Checking for clogged nozzles 85 Head Cleaning 87 Regular Maintenance 89 Regular Part Cleaning: Preparation and Notes 89 Regular Part Cleaning 92 Cleaning the Wiper Cleaner and Rail 98 Disposing of Waste Ink 100 Replacing the Wiper and Wiper Cleaner ...102 Replacing the Flushing Pad 105 Cleaning Check Sheet 107 Replacement Check Sheet 109 Replacing Ink Cartridges 110 How to replace 111 Parts That Are Periodically Replaced 113 Chapter 4 Using the Control Panel Menu Menu Operations 114 Menu List 114 Details of the Menu 118 ...
..., Pressure Rollers, and Media Holding Plates 83 Checking for clogged nozzles 85 Head Cleaning 87 Regular Maintenance 89 Regular Part Cleaning: Preparation and Notes 89 Regular Part Cleaning 92 Cleaning the Wiper Cleaner and Rail 98 Disposing of Waste Ink 100 Replacing the Wiper and Wiper Cleaner ...102 Replacing the Flushing Pad 105 Cleaning Check Sheet 107 Replacement Check Sheet 109 Replacing Ink Cartridges 110 How to replace 111 Parts That Are Periodically Replaced 113 Chapter 4 Using the Control Panel Menu Menu Operations 114 Menu List 114 Details of the Menu 118 ...

User Manual
Page 9
... print head. Introduction 9 See"Media Loading and Take Up" on page 71. 3 Roll core holder Place the used to rapidly dry ink after printing. Printer Parts Front section 1 Maintenance cover (left and one on these holders. See "Cleaning Around the Print Head" on page 94. 2 After heater The heater can be...
... print head. Introduction 9 See"Media Loading and Take Up" on page 71. 3 Roll core holder Place the used to rapidly dry ink after printing. Printer Parts Front section 1 Maintenance cover (left and one on these holders. See "Cleaning Around the Print Head" on page 94. 2 After heater The heater can be...

User Manual
Page 12
..., Pressure Rollers, and Media Holding Plates" on the cut media. 4 Pressure rollers These rollers press down this unit once a week. Regularly clean or exchange these parts as described in the chapters listed in the reference sections below. 1 Print head The print head prints by moving left side of the media from... the area around this groove to cut edge of the printer before printing. Make sure the print head is at either side of the following parts may reduce print quality. Inside Dirt on any of the media before cleaning.
..., Pressure Rollers, and Media Holding Plates" on the cut media. 4 Pressure rollers These rollers press down this unit once a week. Regularly clean or exchange these parts as described in the chapters listed in the reference sections below. 1 Print head The print head prints by moving left side of the media from... the area around this groove to cut edge of the printer before printing. Make sure the print head is at either side of the following parts may reduce print quality. Inside Dirt on any of the media before cleaning.

User Manual
Page 13
..." on page 102. 9 Flushing pad Ink is discharged onto this unit be cleaned once a week. See "Regular Part Cleaning" on page 92 See "Replacing the Wiper and Wiper Cleaner" on page 105. See "Regular Part Cleaning" on usage). Replace about once every six months (or more often, depending on page 92. 8 Wiper...
..." on page 102. 9 Flushing pad Ink is discharged onto this unit be cleaned once a week. See "Regular Part Cleaning" on page 92 See "Replacing the Wiper and Wiper Cleaner" on page 105. See "Regular Part Cleaning" on usage). Replace about once every six months (or more often, depending on page 92. 8 Wiper...

User Manual
Page 36
Raise the media loading lever. Basic Operations 36 Rotate the handle until part A in the illustration below is hidden, do not turn the handle any further. Failure to observe this precaution could damage the roll holder. 9. Important: Once part A is fully inserted. 8.
Raise the media loading lever. Basic Operations 36 Rotate the handle until part A in the illustration below is hidden, do not turn the handle any further. Failure to observe this precaution could damage the roll holder. 9. Important: Once part A is fully inserted. 8.

User Manual
Page 45
Failure to step 6 and fully press the right unit into the roll core. 9. Rotate the handle until it can no longer be turned, return to observe this precaution could damage the roll holder. If part A is not hidden even after turning the handle until part A in the illustration below is hidden, do not turn the handle any further. Basic Operations 45 Important: Once part A is fully inserted. Raise the media loading lever. 8.
Failure to step 6 and fully press the right unit into the roll core. 9. Rotate the handle until it can no longer be turned, return to observe this precaution could damage the roll holder. If part A is not hidden even after turning the handle until part A in the illustration below is hidden, do not turn the handle any further. Basic Operations 45 Important: Once part A is fully inserted. Raise the media loading lever. 8.

User Manual
Page 57
Insert the roll core onto the right holder. 5. Slide the holder in until part A in the illustration below is inserted too far. The take-up reel unit may not function as expected if the holder is fully inserted. Basic Operations 57 Insert the left holder into the roll core. Important: Stop when part A is no longer visible. 4.
Insert the roll core onto the right holder. 5. Slide the holder in until part A in the illustration below is inserted too far. The take-up reel unit may not function as expected if the holder is fully inserted. Basic Operations 57 Insert the left holder into the roll core. Important: Stop when part A is no longer visible. 4.

User Manual
Page 66
... ❏ Tension Measurement Basic Operations 66 Parameters Stored in a media setting bank, it can be recalled to instantly optimize multiple parameters. Perform head cleaning if parts of 30 media setting banks. Saving Optimal Settings for the Current Media (Print Media Settings) A variety of media settings can be optimized for clogged nozzles...
... ❏ Tension Measurement Basic Operations 66 Parameters Stored in a media setting bank, it can be recalled to instantly optimize multiple parameters. Perform head cleaning if parts of 30 media setting banks. Saving Optimal Settings for the Current Media (Print Media Settings) A variety of media settings can be optimized for clogged nozzles...

User Manual
Page 87
...on page 124. ❏ Cleaning Cycle Maintenance 87 If the pattern still contains faint or missing segments after head cleaning, perform regular part cleaning. Auto Maintenance Options The printer features handy auto maintenance options for performing regular head cleaning at selected intervals of 1 to 24 ... "Printer Setup Menu" on page 87. 5. The menus close when printing is resumed. Select Execute (Light) first. See "Regular Part Cleaning" on page 92. Example of clogged nozzles Perform head cleaning if any segments are faint or missing even after head cleaning has been...
...on page 124. ❏ Cleaning Cycle Maintenance 87 If the pattern still contains faint or missing segments after head cleaning, perform regular part cleaning. Auto Maintenance Options The printer features handy auto maintenance options for performing regular head cleaning at selected intervals of 1 to 24 ... "Printer Setup Menu" on page 87. 5. The menus close when printing is resumed. Select Execute (Light) first. See "Regular Part Cleaning" on page 92. Example of clogged nozzles Perform head cleaning if any segments are faint or missing even after head cleaning has been...

User Manual
Page 89
... maintenance. Print the check sheet to determine whether the problem has been resolved. Regular Part Cleaning: Preparation and Notes What You'll Need Ready the following items before beginning regular part cleaning. ❏ Protective eyeware (not included) Protects your eyes from ink and ink...See "Cleaning Check Sheet" on page 107 and "Replacement Check Sheet" on page 85. Regular Maintenance The printer requires regular part cleaning and part replacement to confirm whether the problem has been resolved. See "Options and Consumable Products" on the frequency with printer) Contains...
... maintenance. Print the check sheet to determine whether the problem has been resolved. Regular Part Cleaning: Preparation and Notes What You'll Need Ready the following items before beginning regular part cleaning. ❏ Protective eyeware (not included) Protects your eyes from ink and ink...See "Cleaning Check Sheet" on page 107 and "Replacement Check Sheet" on page 85. Regular Maintenance The printer requires regular part cleaning and part replacement to confirm whether the problem has been resolved. See "Options and Consumable Products" on the frequency with printer) Contains...

User Manual
Page 90
... the printer can be removed with water or alcohol. ❏ Touch a metallic object before proceeding. ❏ Complete the task within 10 minutes to discharge any parts that produce lint will sound after 10 minutes. ❏ Never touch the belts, circuit boards, or any static electricity. Ink congeals when mixed with cleaning...
... the printer can be removed with water or alcohol. ❏ Touch a metallic object before proceeding. ❏ Complete the task within 10 minutes to discharge any parts that produce lint will sound after 10 minutes. ❏ Never touch the belts, circuit boards, or any static electricity. Ink congeals when mixed with cleaning...

User Manual
Page 92
...wiper, caps, and wiper rail as used only to clean the area around the wiper, caps, and print head. Using ink cleaner on other parts of the printer could damage the product. ❏ Used ink cleaner is classified as industrial waste and should also be disposed of direct sunlight. ... cleaner should be used ink. ❏ Store ink cleaner at room temperature out of in the same way as suggested below. ❏ We recommend that part cleaning be performed at least once a week. ❏ Cleaning should be performed if colors in the following order: (1) Print head (2) Wiper (3) Caps (4) ...
...wiper, caps, and wiper rail as used only to clean the area around the wiper, caps, and print head. Using ink cleaner on other parts of the printer could damage the product. ❏ Used ink cleaner is classified as industrial waste and should also be disposed of direct sunlight. ... cleaner should be used ink. ❏ Store ink cleaner at room temperature out of in the same way as suggested below. ❏ We recommend that part cleaning be performed at least once a week. ❏ Cleaning should be performed if colors in the following order: (1) Print head (2) Wiper (3) Caps (4) ...

User Manual
Page 93
Moving the print head manually could cause malfunction. 1. Use the d/u buttons to the part cleaning position. 4. The Maintenance menu will be displayed. 2. Press the Z button to move the print head to select Head Maintenance and press the Z button. 3. Moving the Print Head This section describes how to follow the steps below when positioning the print head. Maintenance 93 Important: Be sure to position the print head for part cleaning. Open the maintenance covers at each end. Confirm that the printer is on and press #.
Moving the print head manually could cause malfunction. 1. Use the d/u buttons to the part cleaning position. 4. The Maintenance menu will be displayed. 2. Press the Z button to move the print head to select Head Maintenance and press the Z button. 3. Moving the Print Head This section describes how to follow the steps below when positioning the print head. Maintenance 93 Important: Be sure to position the print head for part cleaning. Open the maintenance covers at each end. Confirm that the printer is on and press #.

User Manual
Page 95
.... If there is ink on the attachment points, remove the wiper for cleaning. Failure to observe this precaution could damage the print head. ❏ The parts shown below and proceed to Step 7. Cleaning Wiper and Caps 1. Be careful not to observe this area with a cleaning stick. Proceed to touch the nozzle...
.... If there is ink on the attachment points, remove the wiper for cleaning. Failure to observe this precaution could damage the print head. ❏ The parts shown below and proceed to Step 7. Cleaning Wiper and Caps 1. Be careful not to observe this area with a cleaning stick. Proceed to touch the nozzle...

User Manual
Page 98
Clean the area around the print head, the wiper and the caps as described above, and then press the Z button to move the wiper to observe this precaution could result in the control panel. After cleaning, close maintenance covers and press OK. 2. Maintenance 98 Remove the wiper cleaner. Cleaning the Wiper Cleaner and Rail Important: Failure to regularly clean the wiper rail could deform the affected parts. Failure to the rear. Clean wiper rail. Confirm that the following message is displayed in product malfunction. 1. Important: Do not touch the insides of the caps.
Clean the area around the print head, the wiper and the caps as described above, and then press the Z button to move the wiper to observe this precaution could result in the control panel. After cleaning, close maintenance covers and press OK. 2. Maintenance 98 Remove the wiper cleaner. Cleaning the Wiper Cleaner and Rail Important: Failure to regularly clean the wiper rail could deform the affected parts. Failure to the rear. Clean wiper rail. Confirm that the following message is displayed in product malfunction. 1. Important: Do not touch the insides of the caps.

User Manual
Page 102
... with ink 1. Important: ❏ Be sure to confirm that a fresh waste ink bottle is not inserted in the mouth of the wiper cleaner (the absorbent parts) start to select Head Maintenance and press the Z button. Replacing the Wiper and Wiper Cleaner Replace the wiper and wiper cleaner as directed below: ❏...
... with ink 1. Important: ❏ Be sure to confirm that a fresh waste ink bottle is not inserted in the mouth of the wiper cleaner (the absorbent parts) start to select Head Maintenance and press the Z button. Replacing the Wiper and Wiper Cleaner Replace the wiper and wiper cleaner as directed below: ❏...

User Manual
Page 110
... 1 Flushing pad / / / / / ❏ We recommend that this / / / / / component be replaced once every six months. / / / / / ❏ Replace when the front of the / / / / / wiper cleaner (the absorbent parts) start to replace cleaning cartridges for print head washing.
... 1 Flushing pad / / / / / ❏ We recommend that this / / / / / component be replaced once every six months. / / / / / ❏ Replace when the front of the / / / / / wiper cleaner (the absorbent parts) start to replace cleaning cartridges for print head washing.

User Manual
Page 113
... Replaced The following parts require periodic replacement. When replacing the print head, you will also need to replace the print head on the quality of use. The printer can be used while this message is displayed. See "The Printer Status Menu" on replacing components. Contact your dealer or EPSON Support for replacement...
... Replaced The following parts require periodic replacement. When replacing the print head, you will also need to replace the print head on the quality of use. The printer can be used while this message is displayed. See "The Printer Status Menu" on replacing components. Contact your dealer or EPSON Support for replacement...

