Use and Care Guide
Page 34
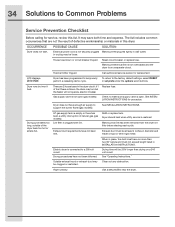
...breaker or replace fuse. There are not the result of defective workmanship or materials in the dryer circuit. Lint filter is not open . Electric dryer is open (gas models). Use a dehumidifier near the dryer. 34 Solutions to a 208 volt circuit. The list includes common occurrences that are 2 house... have enough air supply to make sure supply valve is connected to Common Problems Service Prevention Checklist Before calling for service, review this dryer. LP gas supply tank is not securely plugged Make sure the plug fits tightly in diameter and made of the 2 ...
...breaker or replace fuse. There are not the result of defective workmanship or materials in the dryer circuit. Lint filter is not open . Electric dryer is open (gas models). Use a dehumidifier near the dryer. 34 Solutions to a 208 volt circuit. The list includes common occurrences that are 2 house... have enough air supply to make sure supply valve is connected to Common Problems Service Prevention Checklist Before calling for service, review this dryer. LP gas supply tank is not securely plugged Make sure the plug fits tightly in diameter and made of the 2 ...
Installation Instructions
Page 17
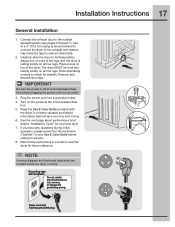
...outlet. 3. Read the Use & Care Guide provided with 3-prong grounded plug Place these instructions in your new dryer. 7. Power cord with the dryer. Carefully slide the dryer to the exhaust vent system. Rock alternating corners to the outside exhaust system (see pages 5 through 7). ...Remove and discard door tape. Grounding type wall receptacle Do not, under any questions during initial operation, please review the "Avoid Service Checklist" in a location near the dryer for future reference. Installation Instructions 17 General installation 1. If you time and money. 6. See the next ...
...outlet. 3. Read the Use & Care Guide provided with 3-prong grounded plug Place these instructions in your new dryer. 7. Power cord with the dryer. Carefully slide the dryer to the exhaust vent system. Rock alternating corners to the outside exhaust system (see pages 5 through 7). ...Remove and discard door tape. Grounding type wall receptacle Do not, under any questions during initial operation, please review the "Avoid Service Checklist" in a location near the dryer for future reference. Installation Instructions 17 General installation 1. If you time and money. 6. See the next ...
Installation Instructions
Page 18
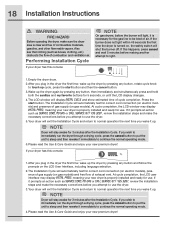
... the LCD User Interface, including language selection. 2.The Installation Cycle will automatically test for 3 minutes after the Installation Cycle. NOTE Dryer will stay awake for correct cord connection (on electric models), presence of gas supply (on gas models) and free flow of air. If your new... NO GAS or call service 877 435 3287, review the installation steps and make the necessary corrections before making another attempt to light. 1.Empty the dryer drum. 2.After you plug in the dryer the first time: wake up the dryer by pressing any button, rotate cycle knob to normal...
... the LCD User Interface, including language selection. 2.The Installation Cycle will automatically test for 3 minutes after the Installation Cycle. NOTE Dryer will stay awake for correct cord connection (on electric models), presence of gas supply (on gas models) and free flow of air. If your new... NO GAS or call service 877 435 3287, review the installation steps and make the necessary corrections before making another attempt to light. 1.Empty the dryer drum. 2.After you plug in the dryer the first time: wake up the dryer by pressing any button, rotate cycle knob to normal...