Product Specifications Sheet (English)
Page 1
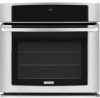
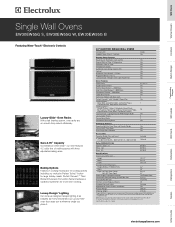
... 18-1/32" Overall Exterior Dimensions - and Electrolux electric cooktop models EW30CC55G, EW36CC55G, EW30EC55G and EW36EC55G. NOTE: Always consult local and / or national electric codes. Wall Ovens Warmer Drawers Cooktops Built-In Ranges Freestanding Ranges Microwaves Single Wall Ovens EW30EW55G S, EW30EW55G W, EW30EW55G B Featuring Wave-Touch™ Electronic Controls Luxury-Glide™ Oven Racks With a ball bearing system, oven racks are so smooth they extend...
... 18-1/32" Overall Exterior Dimensions - and Electrolux electric cooktop models EW30CC55G, EW36CC55G, EW30EC55G and EW36EC55G. NOTE: Always consult local and / or national electric codes. Wall Ovens Warmer Drawers Cooktops Built-In Ranges Freestanding Ranges Microwaves Single Wall Ovens EW30EW55G S, EW30EW55G W, EW30EW55G B Featuring Wave-Touch™ Electronic Controls Luxury-Glide™ Oven Racks With a ball bearing system, oven racks are so smooth they extend...
Complete Owner's Guide (English)
Page 3
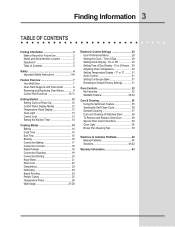
...30 Adjusting Oven Temperature 30 Setting Temperature Display - °F or °C ......... 31 Audio Control 31 Setting Continuous Bake 31 Resetting to Common Problems 40 Baking Problems 40 Solutions 41-42 Warranty Information 43 Time of Stainless Steel 38 To Remove and Replace Oven...Number Location 2 Questions 2 Table of Contents 3 Safety 4 Important Safety Instructions 4-6 Feature Overview 7 Your Wall Oven 7 Oven Rack Supports and Oven Vents 8 Removing and Replacing Oven Racks 9 Control Pad Functions 10-11 Getting Started 12 Setting Clock at Power Up 12 Control Panel ...
...30 Adjusting Oven Temperature 30 Setting Temperature Display - °F or °C ......... 31 Audio Control 31 Setting Continuous Bake 31 Resetting to Common Problems 40 Baking Problems 40 Solutions 41-42 Warranty Information 43 Time of Stainless Steel 38 To Remove and Replace Oven...Number Location 2 Questions 2 Table of Contents 3 Safety 4 Important Safety Instructions 4-6 Feature Overview 7 Your Wall Oven 7 Oven Rack Supports and Oven Vents 8 Removing and Replacing Oven Racks 9 Control Pad Functions 10-11 Getting Started 12 Setting Clock at Power Up 12 Control Panel ...

Complete Owner's Guide (English)
Page 37
...is COOL. Care should be removed. Wipe with clean water and a cloth. Rinse with hot, soapy water and a dishcloth. Stainless Steel, Chrome Decorative Trim, Oven Racks, Oven Racks Support Clean with a 1:1 solution of clear water and ammonia. Be sure to rinse the cleaners as described above. If ... more difficult soils and builtup grease, apply a liquid detergent directly onto the soil. DO NOT use abrasive cleaners on soil for 30 to 40 minutes. These can scratch. REGULAR CLEANINGS WILL REDUCE THE NUMBER OF MAJOR CLEANINGS LATER Surfaces Glass, Painted and Plastic Body...
...is COOL. Care should be removed. Wipe with clean water and a cloth. Rinse with hot, soapy water and a dishcloth. Stainless Steel, Chrome Decorative Trim, Oven Racks, Oven Racks Support Clean with a 1:1 solution of clear water and ammonia. Be sure to rinse the cleaners as described above. If ... more difficult soils and builtup grease, apply a liquid detergent directly onto the soil. DO NOT use abrasive cleaners on soil for 30 to 40 minutes. These can scratch. REGULAR CLEANINGS WILL REDUCE THE NUMBER OF MAJOR CLEANINGS LATER Surfaces Glass, Painted and Plastic Body...

Complete Owner's Guide (English)
Page 38
... at the beginning of the General Care & Cleaning section in normal position Lock engaged for maintaining the appearance of the Oven Door Lock in this Use & Care Manual. Removal of stainless parts. Do not hit the glass with pots, pans, or any other object. 3. Proceed in place. 2. Make...lock to the fully opened position. 2. Open the door to pull it up. 3. 38 Care & Cleaning CARE AND CLEANING OF STAINLESS STEEL Special care and cleaning are required for door removal HINGE SLOT - TO REMOVE AND REPLACE OVEN DOOR 1. Grasp the door by the sides, pull the bottom of range.
... at the beginning of the General Care & Cleaning section in normal position Lock engaged for maintaining the appearance of the Oven Door Lock in this Use & Care Manual. Removal of stainless parts. Do not hit the glass with pots, pans, or any other object. 3. Proceed in place. 2. Make...lock to the fully opened position. 2. Open the door to pull it up. 3. 38 Care & Cleaning CARE AND CLEANING OF STAINLESS STEEL Special care and cleaning are required for door removal HINGE SLOT - TO REMOVE AND REPLACE OVEN DOOR 1. Grasp the door by the sides, pull the bottom of range.
